
• Skip to primary navigation
  • Skip to main content
  • Skip to primary sidebar
  • Summer Recipes
  • Get your Saucebook
  • Recipe Index
  • Dr. Who?
  • Contact

Butter Over Bae logo

menu icon
go to homepage
  • Summer Recipes
  • Get your Saucebook
  • Recipe Index
  • Dr. Who?
  • Contact
    • Facebook
    • Instagram
    • Pinterest
    • TikTok
    • Twitter
  • search icon
    Homepage link
    • Summer Recipes
    • Get your Saucebook
    • Recipe Index
    • Dr. Who?
    • Contact
    • Facebook
    • Instagram
    • Pinterest
    • TikTok
    • Twitter
  • ×
    Home

    Blog

    Easy Homemade Sweet n’ Sour Chicken

    June 5, 2021

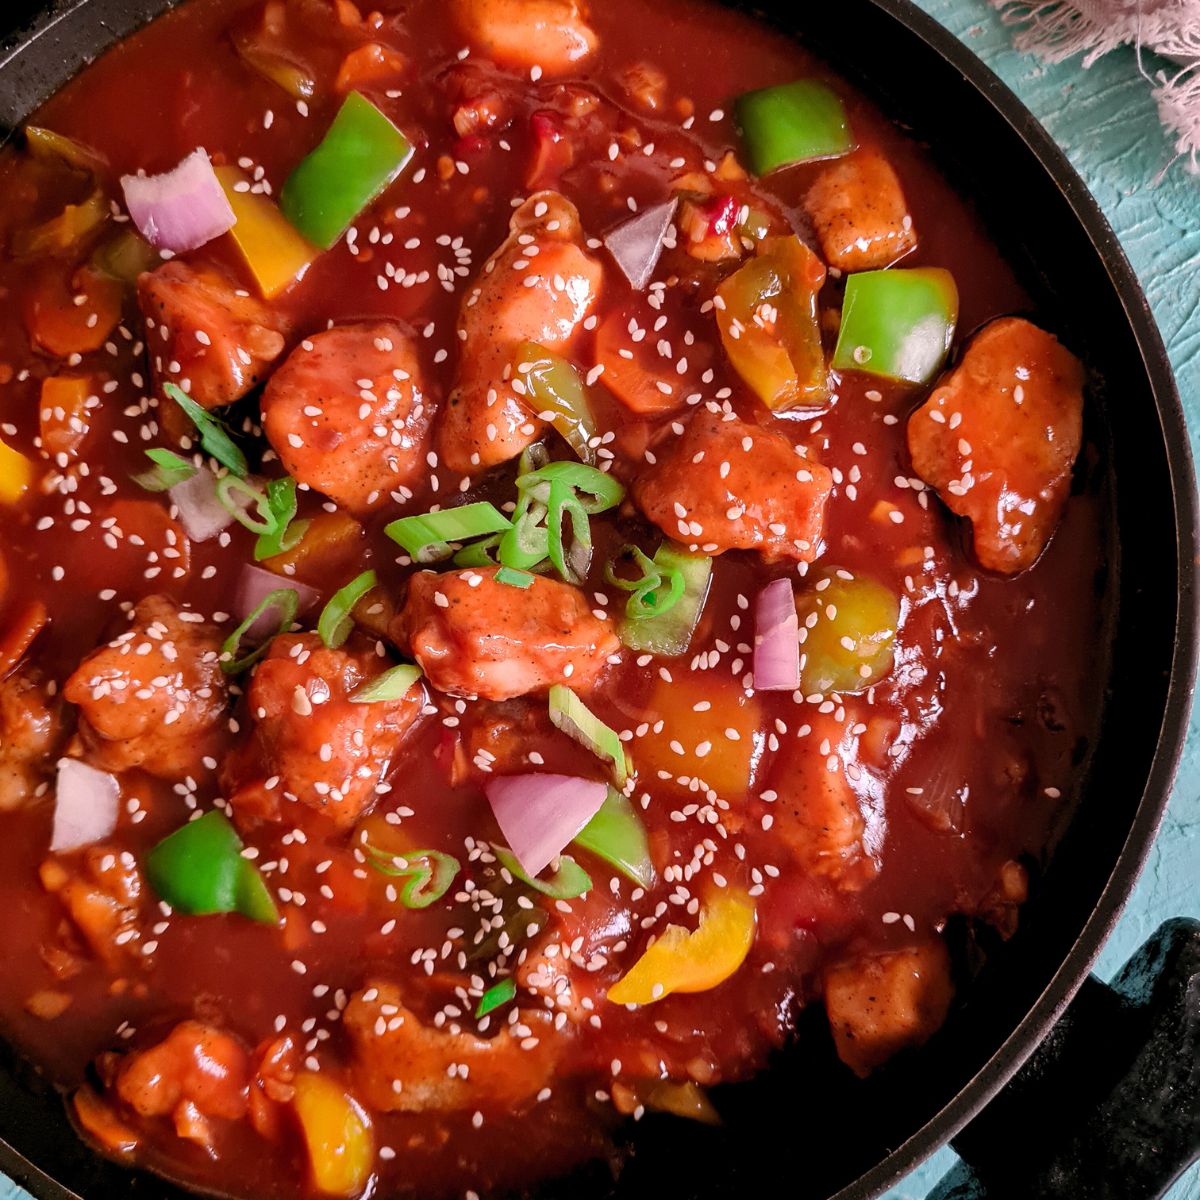
    Sweet and sour chicken ready in pot.

    This delicious, saucy, homemade Sweet and Sour chicken is easy, better-than-takeout, with no food coloring, and is made from simple pantry ingredients!

    Sweet and sour chicken ready in pot.

    Cooking fake-outs at home is literally the best thing I’ve done for my health, and my family’s, of course. This way, I can control my ingredients, use quality products, and eat delicious food without the guilt! Being able to whip up authentic P.F. Chang’s Dynamite Shrimp or Nando’s Peri Peri Chicken Livers at home has been a game-changer!

    [feast_advanced_jump_to]

    Saucy Sweet and Sour Chicken

    Sweet ‘n Sour chicken is a classic restaurant-style Asian main. The chicken is lightly coated and tossed into a classic sweet and tangy sauce along with some veggies to balance the flavors.

    This homemade version has the best of both worlds! We get the same great restaurant test minus all the unhealthy factors. We are skipping the MSG (Chinese Salt), artificial food coloring, and fresh chicken! Plus, you can always control the method of cooking, oil source, and sauce brands!

    Ingredients

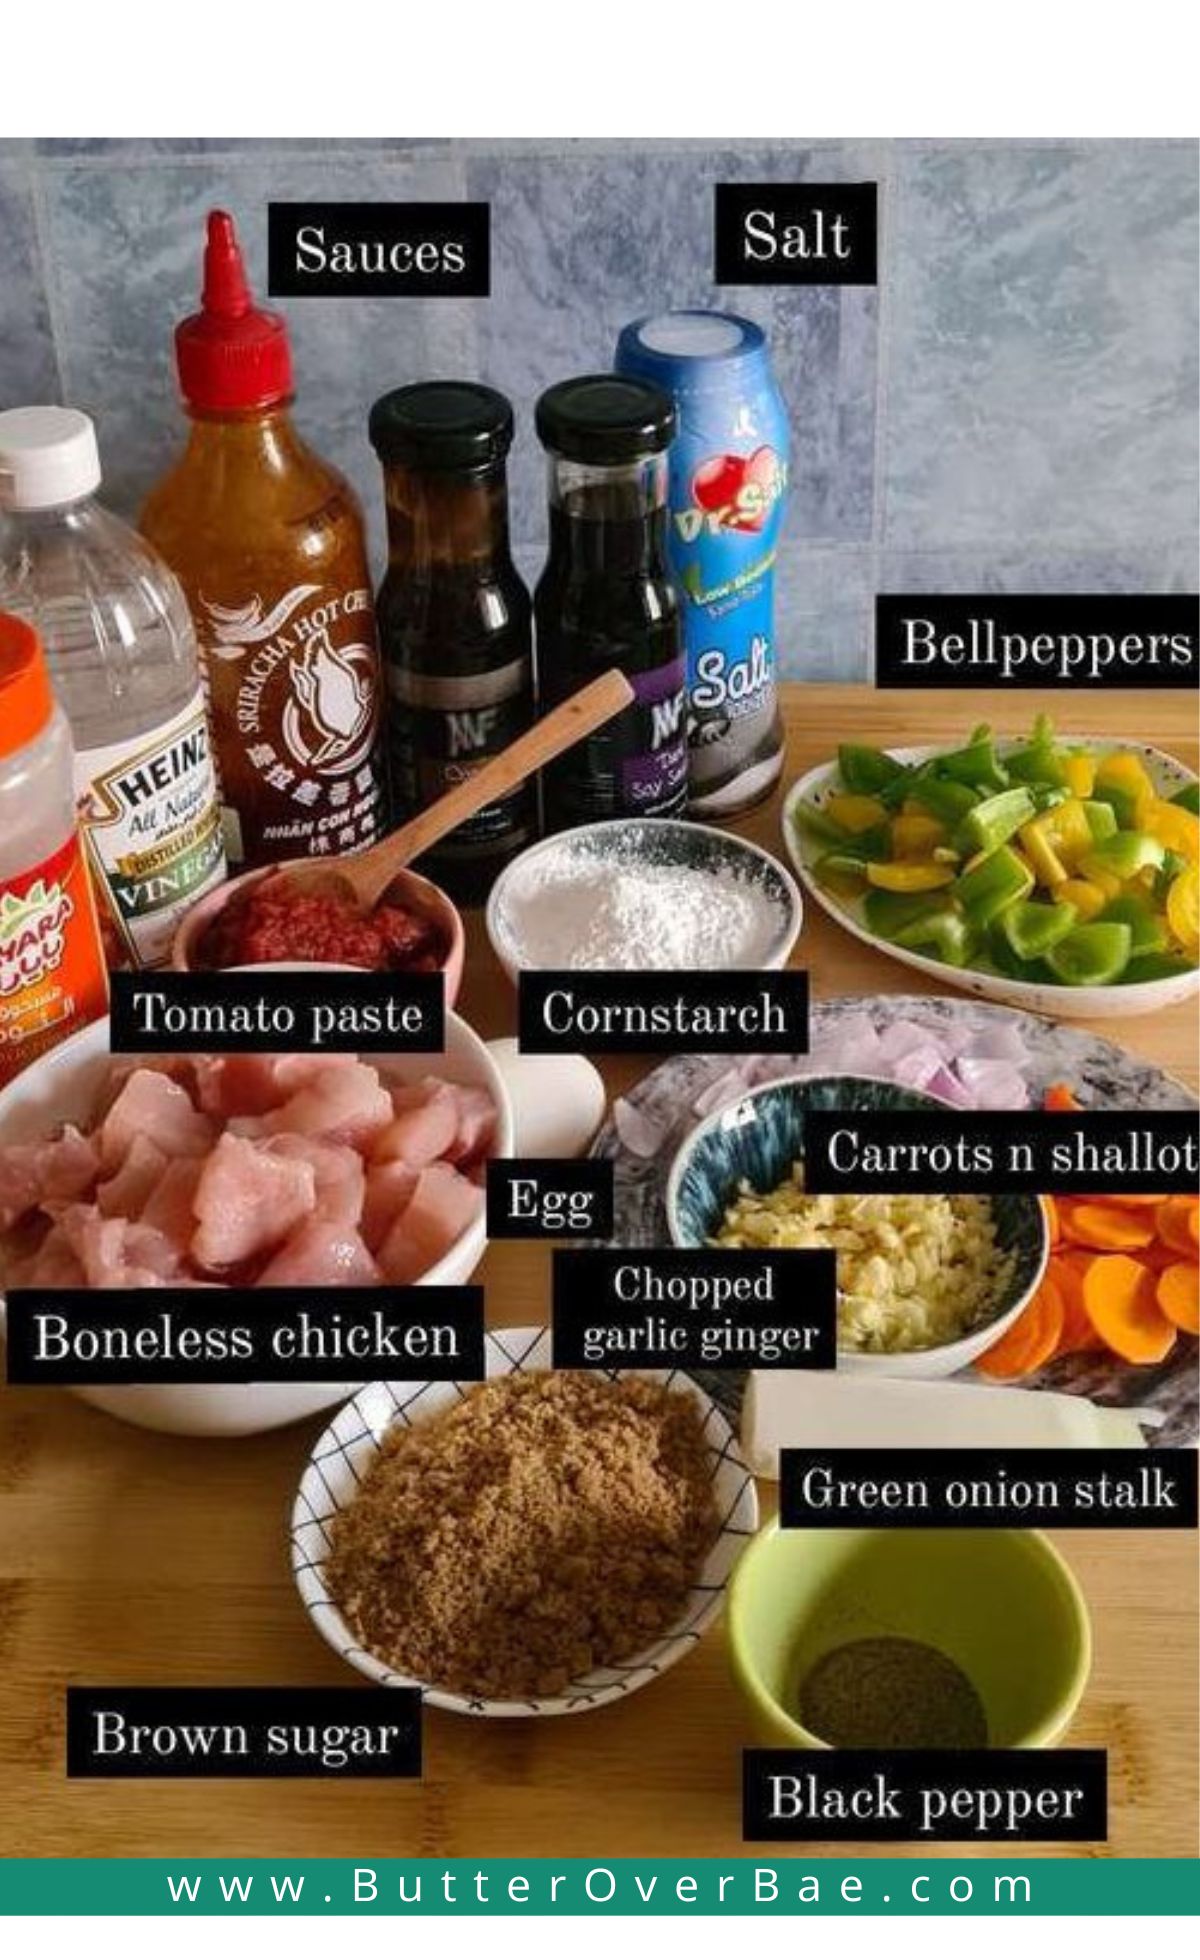
    Here’s what you’ll need to make the perfect Saucy Sweet n Sour chicken:

    recipe ingredients labelled and shown separately.
    • Veggies – Bell Peppers and onions are non-negotiable, guys! sorry! And yellow bell pepper is even better! You can ADD pineapples and delete carrots if you want, but the onions and bell peppers balance the flavors, so no way are you skipping that, ok?
    • Boneless Chicken – This is a saucy recipe, so you can use breast pieces or thigh pieces, no preference.
    • Sauces – Oyster sauce, Soy sauce, and Sriracha Sauce. Opt for your favorite brands.
    • Dark Brown sugar – Brown sugar brings out a slight bitterness along with sweetness in the recipe. Don’t you dare use white sugar for this recipe! Use honey instead if you need to.
    • Cornstarch – You will need this to coat the chicken and to thicken the sauce. I’ve experimented with all kinds of coatings for this recipe, and the cornstarch and egg coating works the best. It’s light and holds well whether baked or fried.
    • Egg – You will need this for coating the chicken.
    • Garlic and Ginger – Lifelong flavor enhancers, need I say more? You can also use galangal instead of ginger.
    • Seasoning – Your usual salt and black pepper
    • Garnish – I use the usual scallions (green onions) and sesame seeds to garnish this recipe. But I also use the bulb or the white portion of the green onion in the gravy.

    Substitutions

    • Eggs – Some of you have mentioned time and again on my IG, that you avoid eggs due to dietary restrictions. If you can’t add eggs, skip it altogether. Eggs add a slight binding element to the batter, but you can do without them if you need to.
    • Tomato Paste – You can totally use regular ketchup instead of tomato paste in this recipe
    • Sauces – You can use hot sauce (half quantity) instead of Sriracha and a dash of BBQ sauce instead of Oyster sauce.

    See the recipe card for full information on ingredients and quantities

    Instructions

    Here’s a simple rundown of all the steps you’ll come across while cooking, so that there are no surprises!

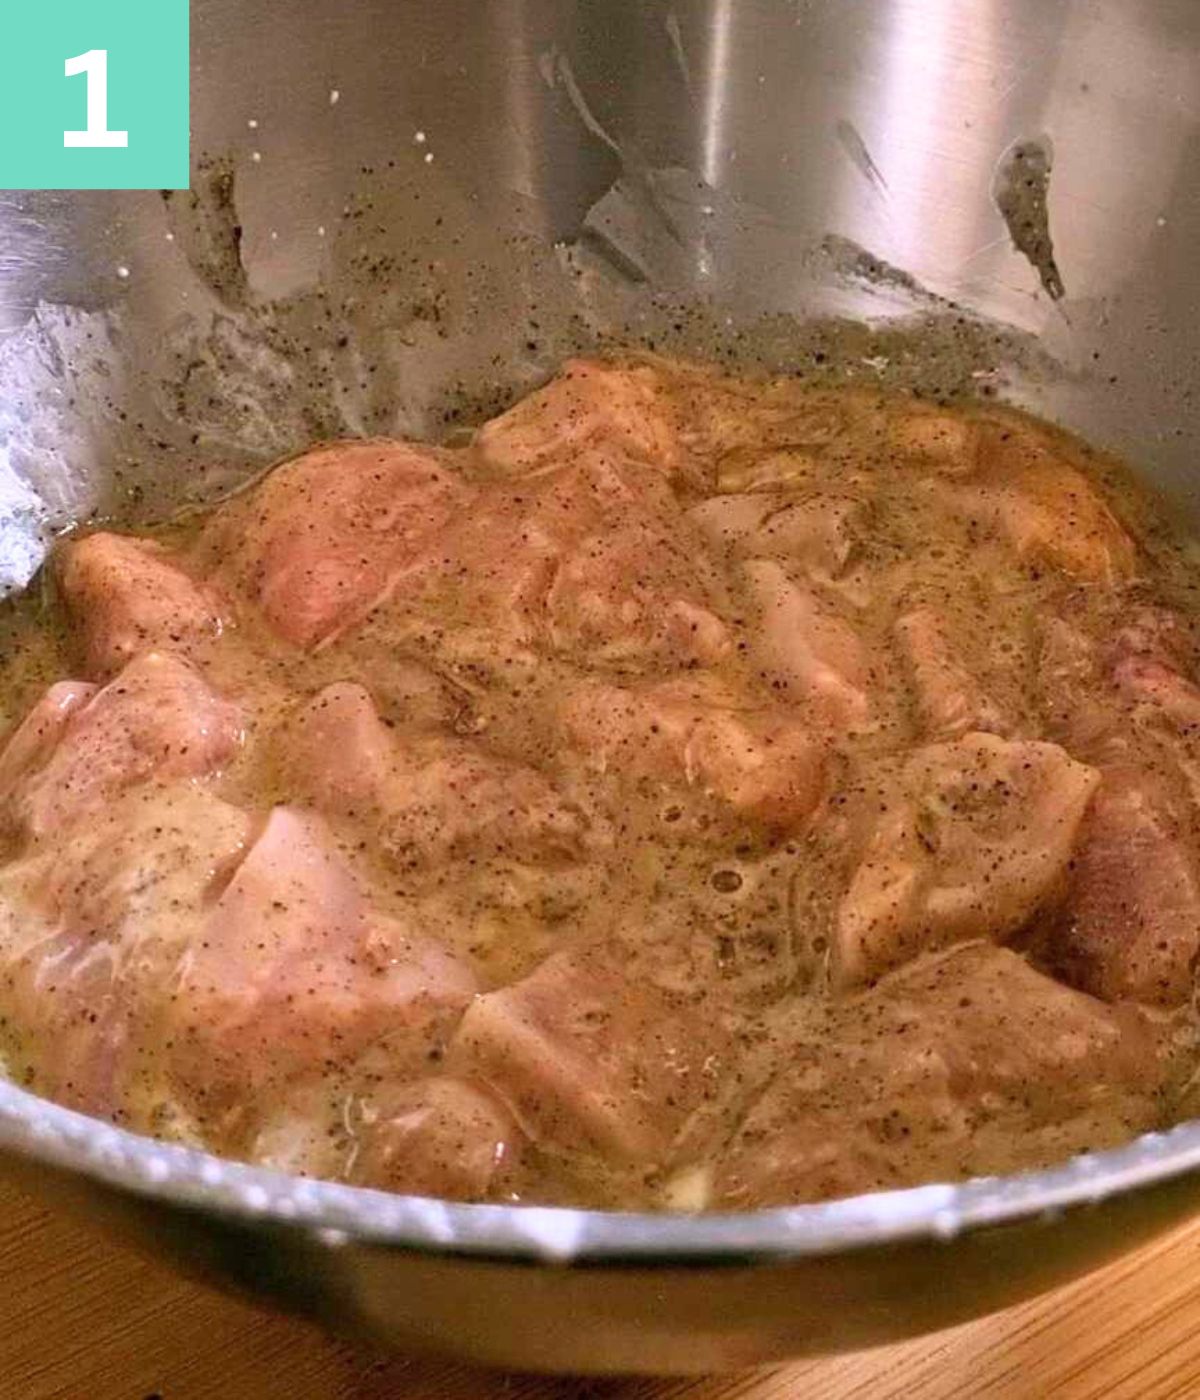
    marinate chicken in spices.

    Step 1: Marinate boneless chicken cubes in egg, spices, vinegar, and cornflour for 10 mins.

    frying chicken pieces in oil.

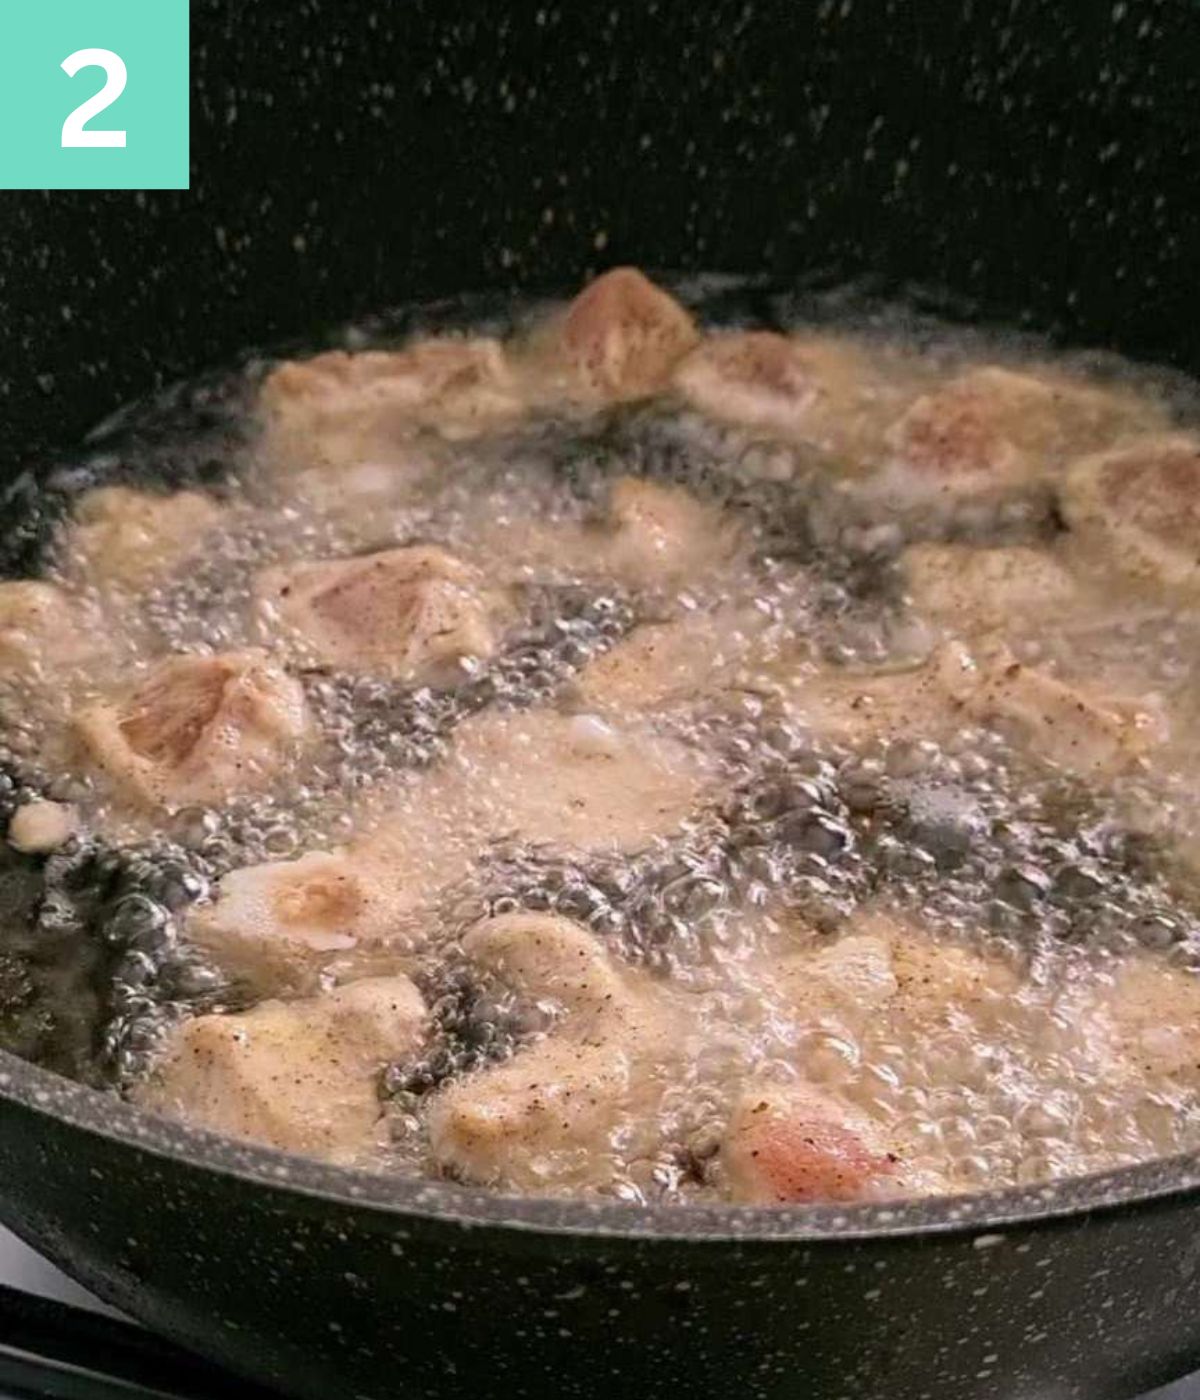
    Step 2: Deep fry in oil until golden brown.

    removing the fried chicken from oil.

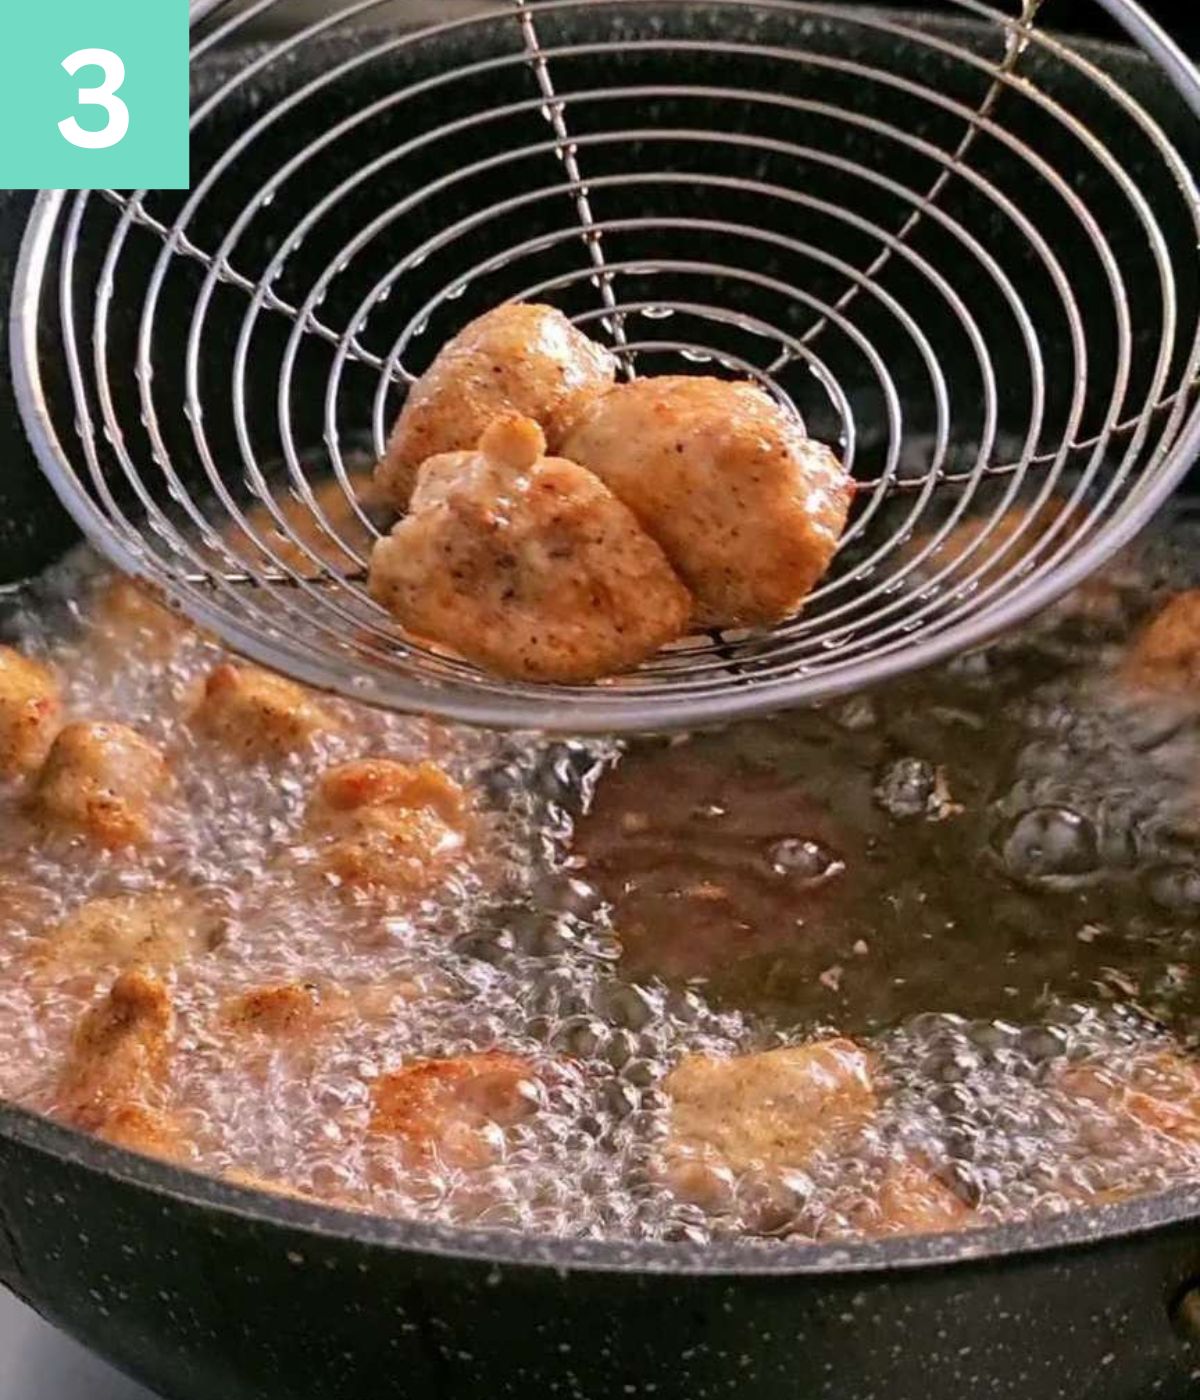
    Step 3: Remove the fried chicken from the oil.

    laying down all the fried chicken on a pan.

    Step 4: Set the fried chicken chunks aside.

    a sauce mixture in a bowl.

    Step 5: Mix all the sauces in the recipe with cornflour and set aside.

    minced garlic and onions in oil in a pot.

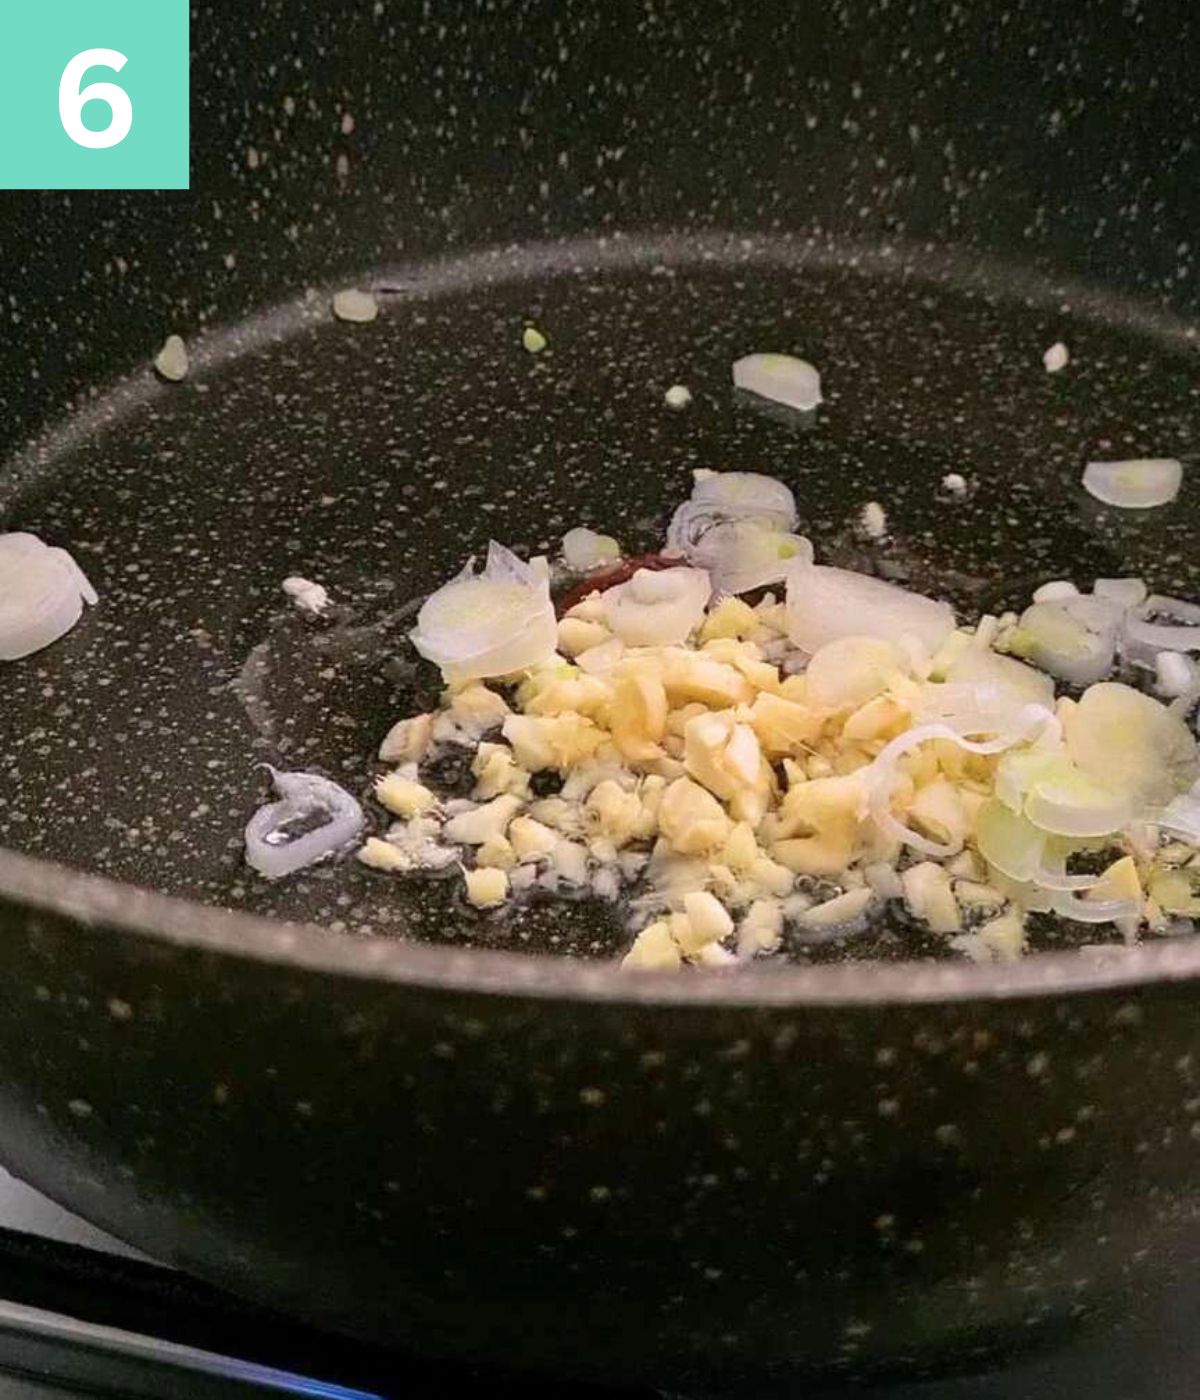
    Step 6: Sauté garlic, ginger, and the white bulb of green onions in oil.

    tomato paste and seasoning added to the pot and mixed.

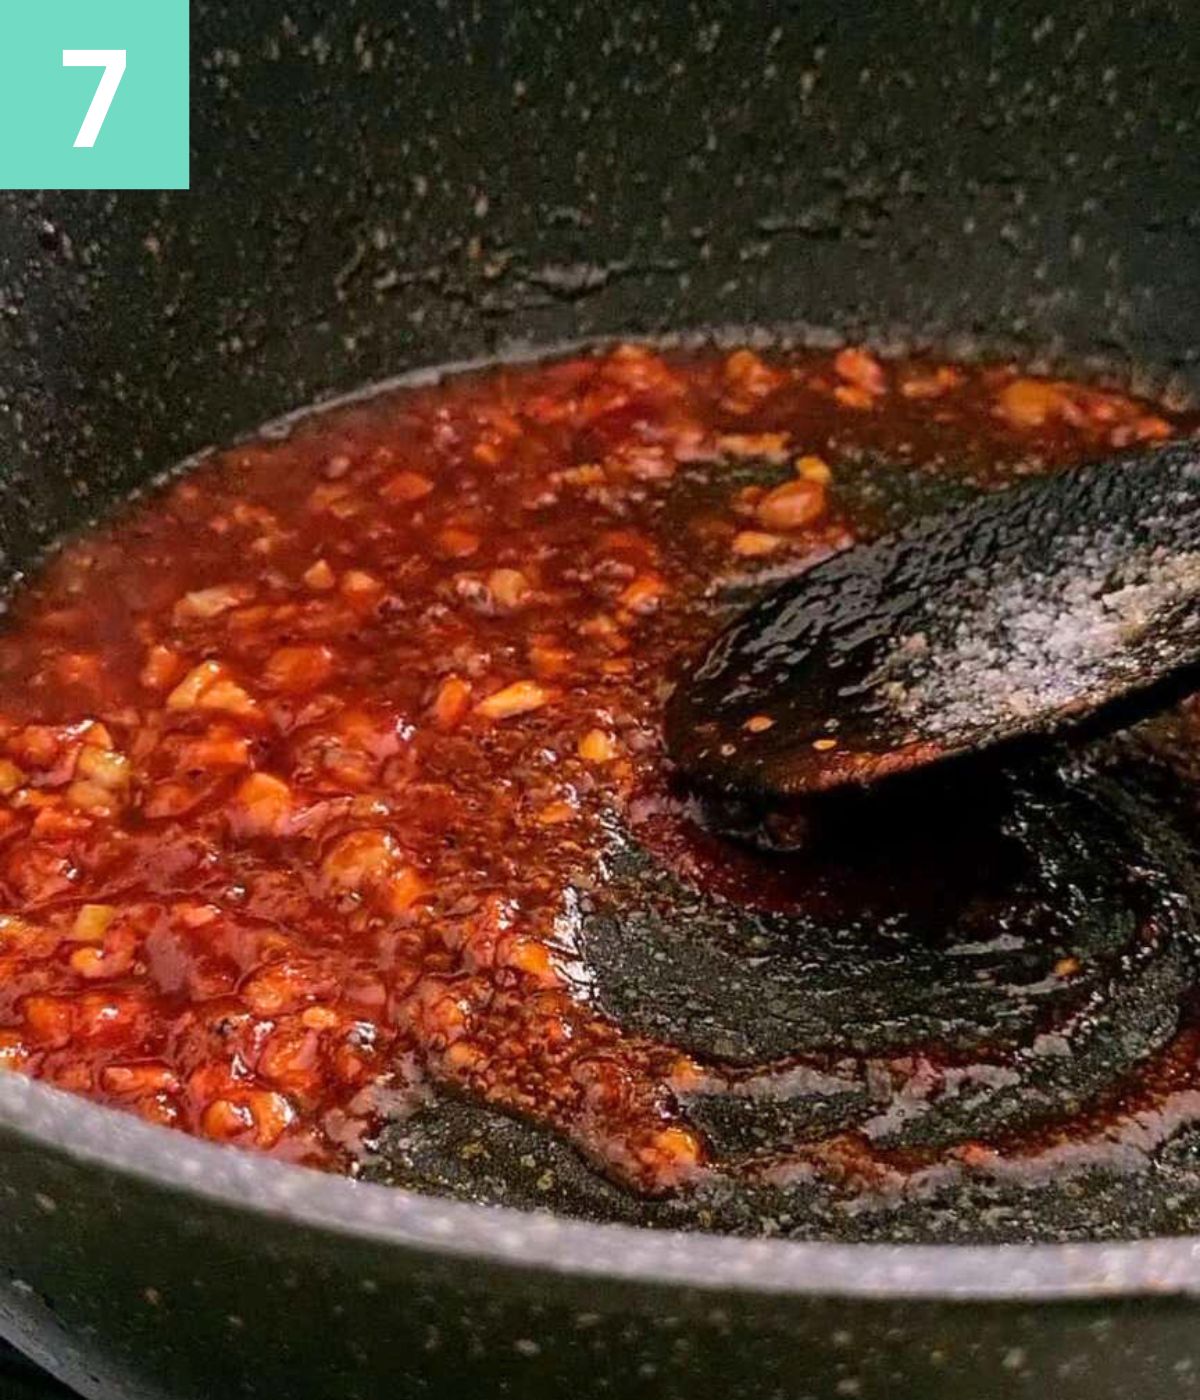
    Step 7: After it turns golden, add tomato paste with a splash of water and some sugar.

    sauces, diced vegetables and water added to the pot.

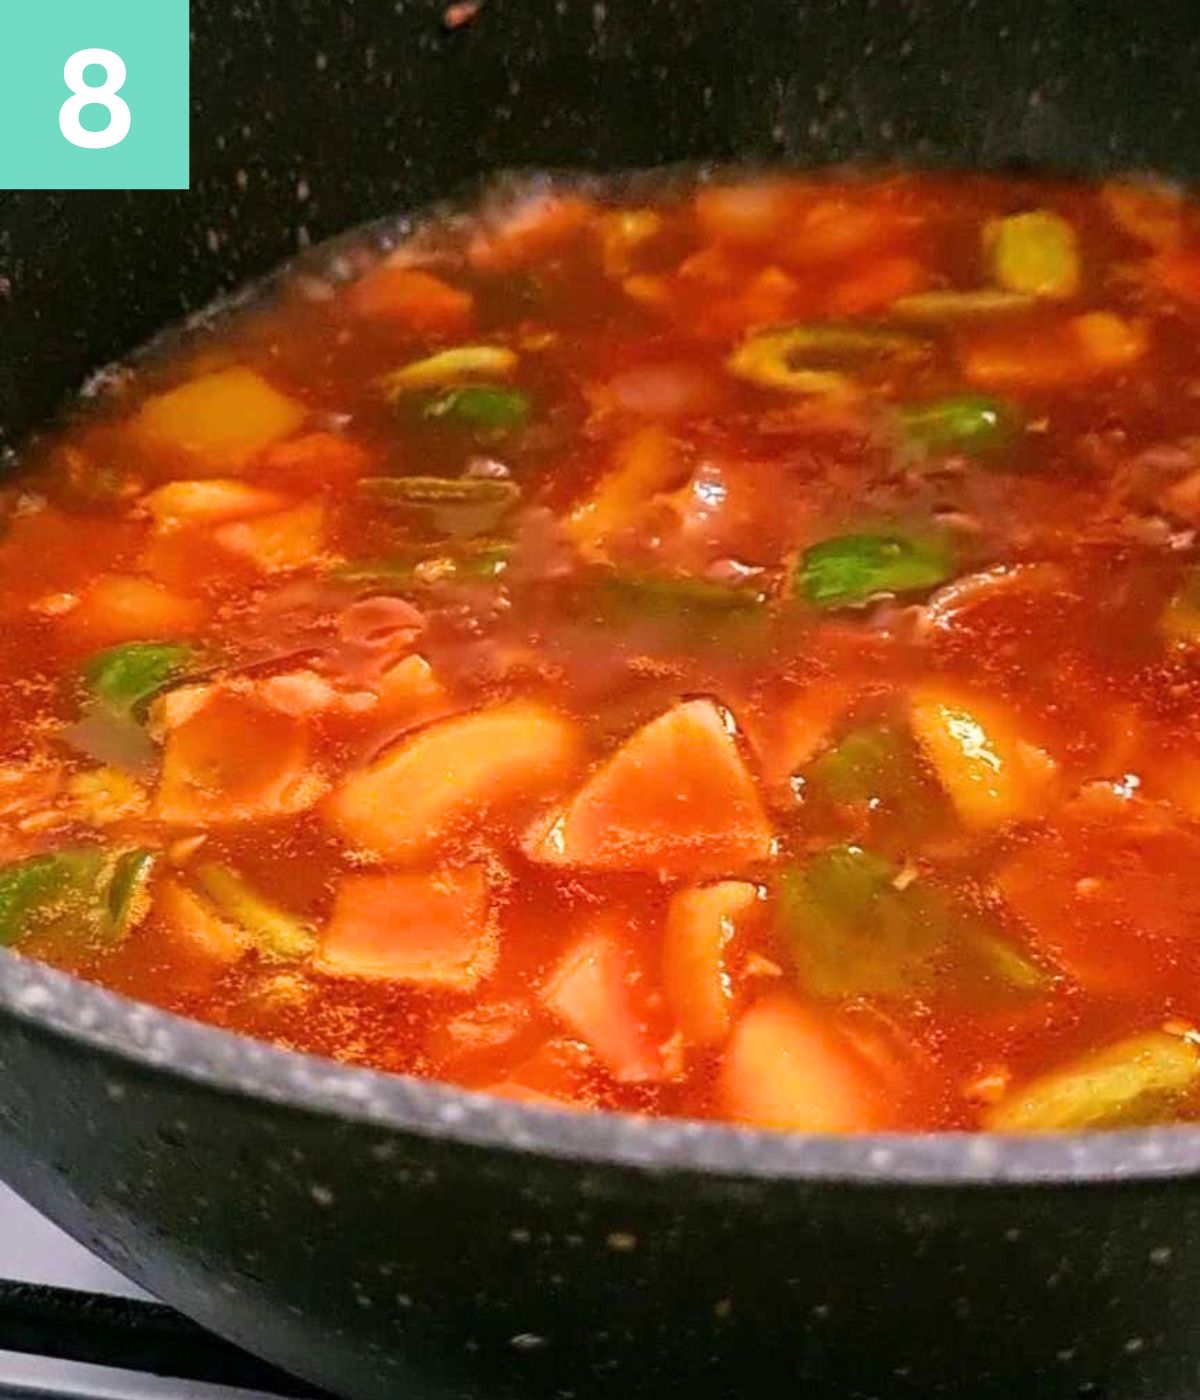
    Step 8: Add water and vegetables to your tomato garlic base. Allow it to boil and then drop in the cornflour sauce mix.

    NOTE: Tomato paste sputters when added to oil; Add about 1/4 cup of water before adding the paste to avoid excessive sputtering.

    fried chicken added to the pot.

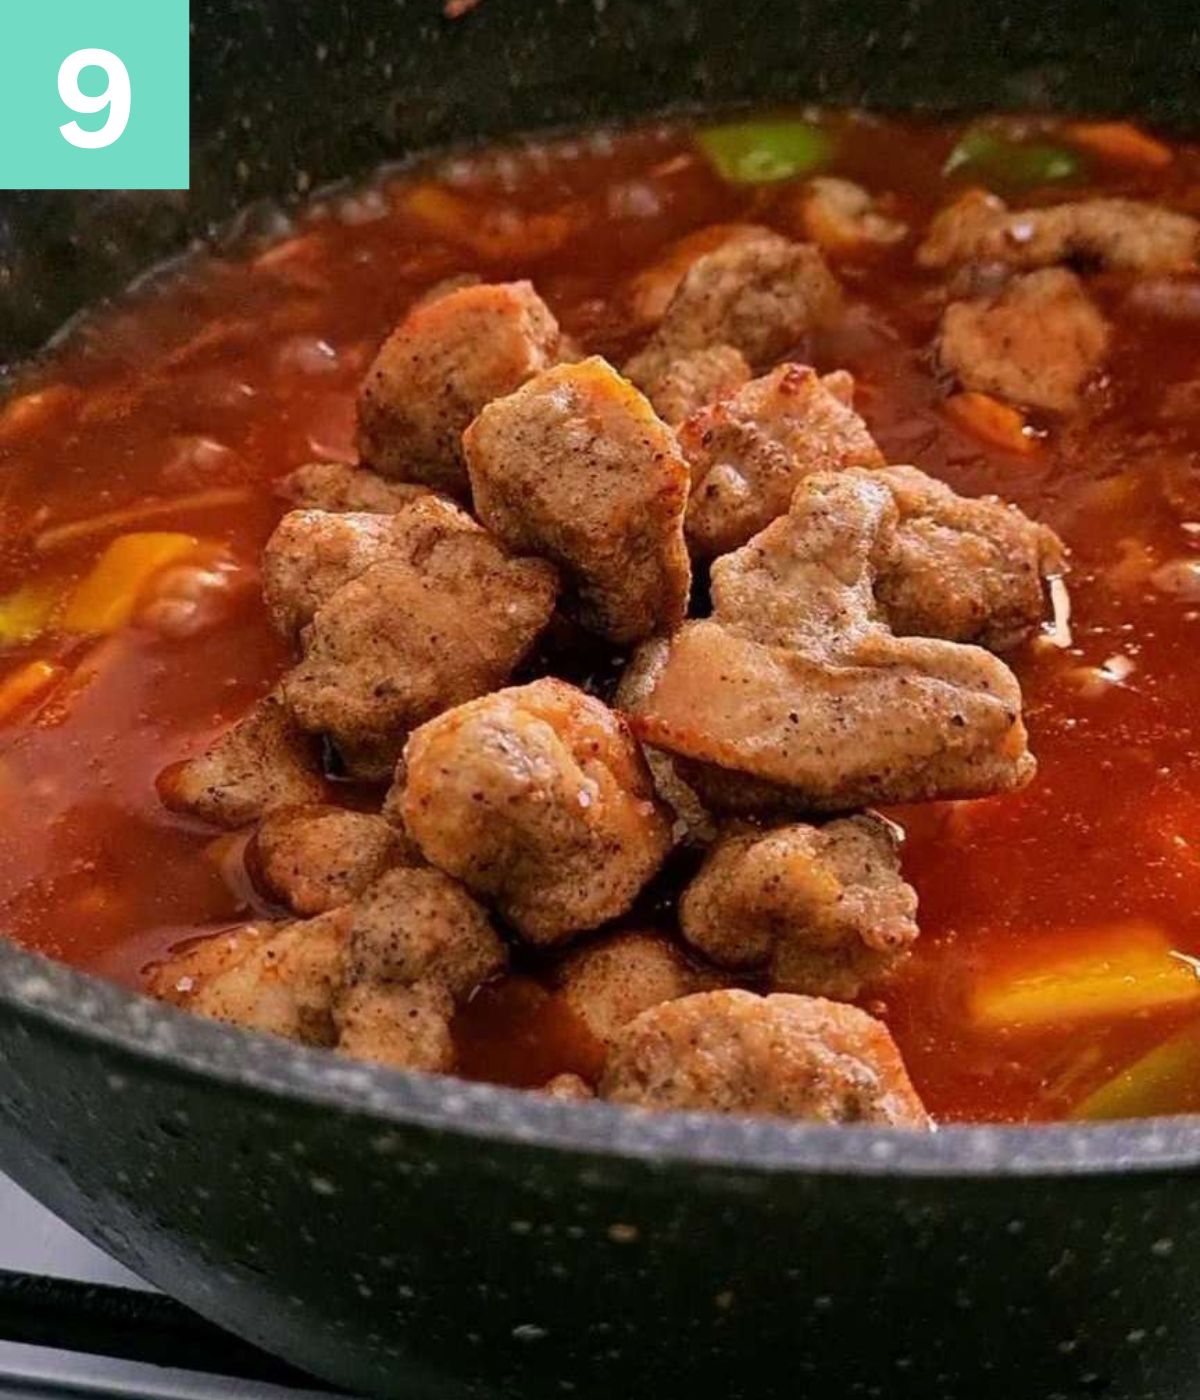
    Step 9: Add the fried chicken to the gravy. Cook for 2 minutes.

    sweet and sour chicken ready in the pot.

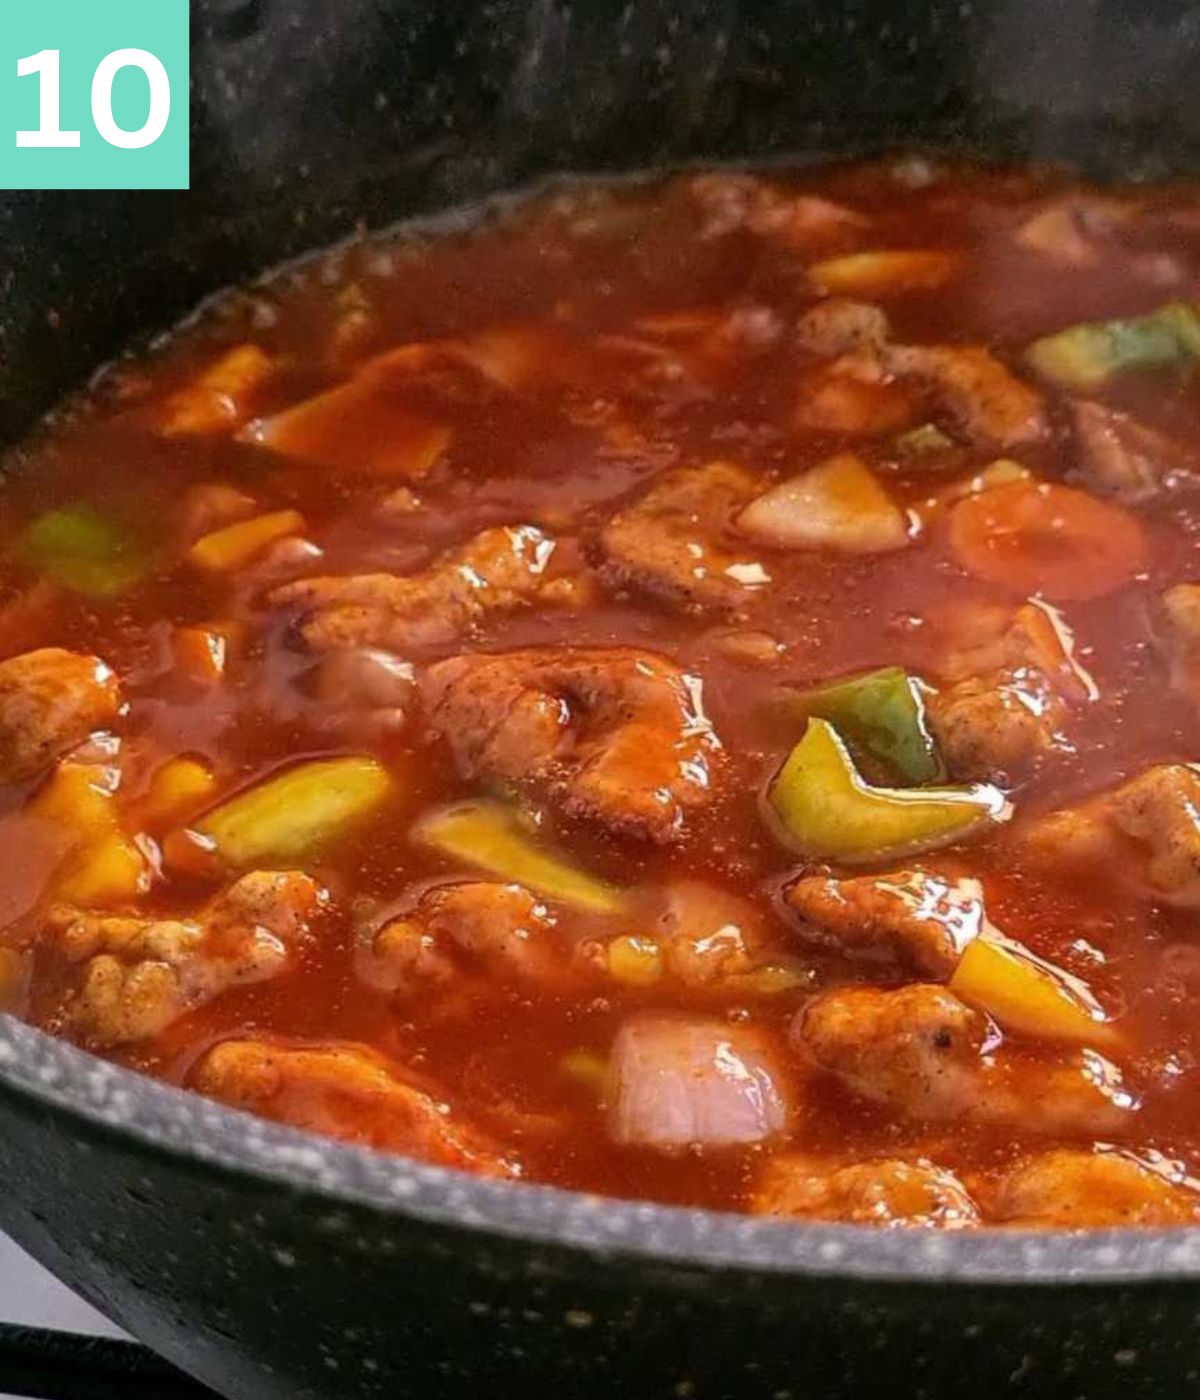
    Step 10: Give your corn flour time to thicken up (around 3 minutes). Adjust the sauce thickness by adding more water if needed.

    Serve your sweet and sour chicken hot, garnished with sesame seeds and green onions. Pair it with fried rice or plain rice, or just plain garlic noodles!

    sweet and sour chicken served with rice.

    Expert Tips

    • Keep everything chopped and prepared before starting to work on the sauce. Things happen very quickly once you start prepping the sauce, so it’s best that you have everything ready by your side.
    • You can use Chicken broth or Stock instead of water for more depth of flavor and nutrition.
    • While frying, make sure your wok or pan is wide enough to allow the chicken pieces to fry separately.
    • Use good-quality tomato paste!
    • For dinners or parties, you can prepare the chicken a day in advance and prepare the sauce on the day of the event.

    Tips to make this recipe lighter or healthier

    • Use low-sodium Soy sauce instead of regular soy sauce.
    • Use fresh organic tomato paste.
    • Bake the chicken instead of frying.
    • Use tapioca flour instead of cornflour.
    • You can also use Pink salt instead of regular table salt.
    • Use fresh organic chicken for the recipe.
    • Use homemade Chicken Yakhni or Broth instead of water for nutrition.

    Frequently Asked Questions

    Can I make this recipe Vegetarian?

    Totally! You can use tofu or cauliflower florets instead of chicken.

    Can I make this recipe with beef or fish?

    Of course! Sweet ‘n Sour Fish would turn out amazing! You can follow the same instructions for fish. In case of beef, if you are using flank meat, then you can use the same steps. If you are using a tougher cut of the meat, boil it for 20 minutes in salt, black pepper, and garlic. Then proceed with the recipe as is.

    Can I reheat it in the microwave?

    Yes! Most cornflour-based gravies tend to clump when they are kept in the fridge. But this recipe has enough water content to prevent that from happening. So yes, go ahead and heat it in the microwave.

    How long can the sweet and sour chicken last in the fridge?

    Since this recipe has fresh vegetables, I wouldn’t keep it for very long in the fridge. Consume within 2 to 3 days.

    More Pan-Asian Recipes

    I love recreating recipes. Here are some restaurant-style Asian remakes:

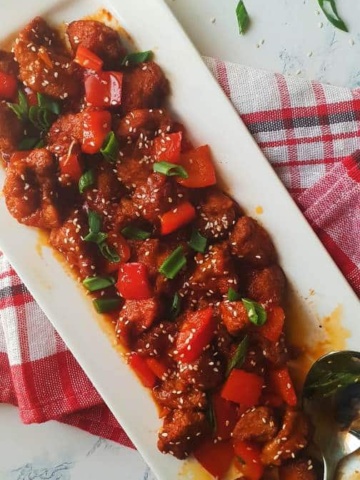
    • Asian-style Saucy & Spicy Chicken Meatballs Recipe 
      Asian-style Saucy & Spicy chicken meatballs recipe 
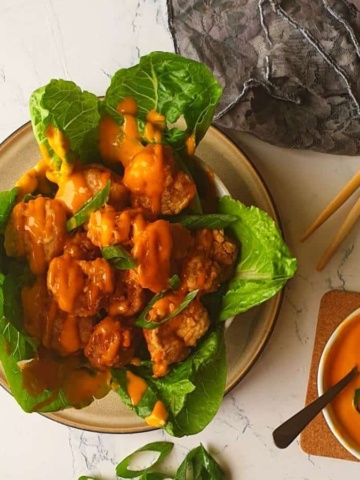
    • BEST AND EASY DRAGON CHICKEN RECIPE
      Dragon Chicken Recipe
    • Dynamite Shrimps Recipe
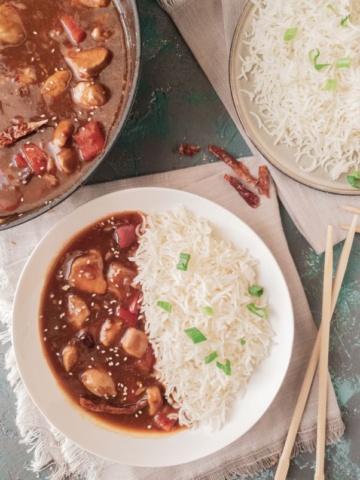
    • a plate containing half white rice and other half chicken sichuan curry. Chopsticks on the side and partial view of more rice and gravy
      Saucy Schezwan Chicken (Szechuan Chicken)

    Do you have any questions? I’m happy to help! And of course, If you try this recipe, I’d loveeeee to see it or simply hear about it! Hit me up in the comment section below and I’ll get back to asap! Happy Cooking!

    a piece of sweet and sour chicken held with chopsticks, with a plate or rice and sweet and sour chicken in the background

    Sweet And Sour Chicken

    A saucy Indo-chinese chicken main, made with crispy coated chicken stirred into a thick sweet and sour gravy.
    4.89 from 9 votes
    Print Pin
    Course: Main Course
    Cuisine: Chinese/Indo Chinese
    Prep Time: 15 minutes minutes
    Cook Time: 15 minutes minutes
    Total Time: 30 minutes minutes
    Servings: 6 servings
    Calories: 176kcal
    Author: Wajiha

    Ingredients

    Chicken Marinade

    • 400 gm boneless chicken breast cut up in 1/2 inch cubes
    • 3 tbsp cornstarch
    • 1 pinch of baking soda see notes
    • 1 large egg
    • 1 tsp garlic powder
    • 1 tsp salt
    • 2 tsp black pepper powder
    • 3 tbsp vinegar
    • Oil as needed or frying or to grease for baking

    Sweet ‘n Sour Gravy

    • 3 cloves of garlic finely chopped
    • 1 White end of green onion sliced
    • 1/2 inch piece of ginger finely chopped
    • 3 tbsp Soy sauce
    • 2 tbsp Oyster Sauce
    • 1 tsp salt
    • 4 tbsp brown sugar
    • 3 tbsp Sriracha Sauce
    • 1/3 cup tomato paste
    • 5 tbsp Vinegar
    • 2 cups water
    • 2 tbsp cornstarch see notes
    • 1 cup bell peppers cut in 1/2 inch squares
    • 1/2 cup shallots cut in 1/2 inch squares
    • 1/2 a carrot thinly sliced
    • 2 tbsp vegetable oil
    • sesame seeds for garnish
    • chopped green onion for garnish

    Instructions

    • In a bowl, add all the ingredients for the chicken marinade. Mix everything together and coat the chicken well. Set aside for 10 mins
    • Cook the chicken by frying or baking. To fry, add the chicken in hot vegetable oil and fry until golden brown. Remove from oil and set aside. Make sure to have a large enough frying pan so that the chicken pieces don’t stick together. To bake, preheat the oven to 220°C (430 F). Grease a large baking tray and place your chicken pieces on to the tray, making sure the pieces don’t touch. Spray with an oil spray and bake for 20 mins, flipping the chicken pieces after 10 mins. Set the baked/fried chicken aside
    • In a bowl, mix vinegar, soy sauce, oyster sauce, sriracha sauce and cornstarch. Set aside.
    • In a wok or a large deep pan, add oil, chopped garlic and ginger and sliced white end of the green onion. Saute at medium flame until the ginger garlic turns light golden brown.
    • Add a splash of water, tomato paste, brown sugar and salt. Stir for 2 mins to allow tomato paste to cook for a bit. Add more water if the paste splatters a lot.
    • Drop in all your vegetables and saute for another minute.
    • Add 2 cups of water and allow the the water to come to a boil.
    • After the water boil, add the cornstarch sauce mix and the fried/baked chicken.
    • Cook for another 2 to 3 minutes or until gravy thickens.
    • Turn off flame and sprinkle sesame seeds and green onions for garnish
    • Serve with fried rice.

    Notes

    • You can use regular tomato ketchup instead of tomato paste
    • You can also add more cornstarch if you feel you need a thicker gravy.
    • You can prepare the chicken a day in advance and keep in the refrigerator and just bring it out on the day of assembly. Just give it 2 3 extra minutes to cook so that it heats up.
    • You can use any veggies that you like. Fruits like pineapple or apples both go very well in this recipe.

    Nutrition

    Serving: 1servingCalories: 176kcalCarbohydrates: 20gProtein: 18gFat: 2gSaturated Fat: 0.5gPolyunsaturated Fat: 1gMonounsaturated Fat: 1gTrans Fat: 0.01gCholesterol: 44mgSodium: 1834mgPotassium: 521mgFiber: 2gSugar: 11gVitamin A: 1035IUVitamin C: 41mgCalcium: 29mgIron: 1mg
    Can’t wait to see your remakes! Tag meon IG with your pictures @butteroverbae

    Street style Bun Kebab

    February 23, 2021

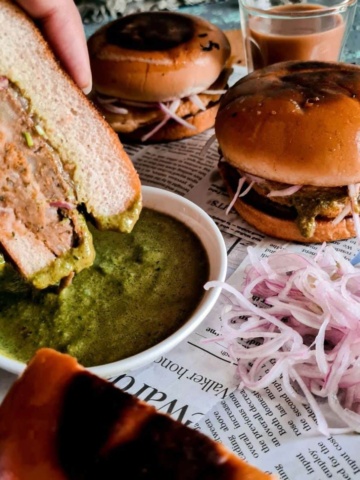
    a half bun kebab being dipped into the green chutney with sliced onions on side, and 2 full bunkebabs in the background

    The best kinda street food, are Bun Kababs, and this vegetarian Pakistani burger screammmssss delicious! (AND SPICY )

    2 bun kebabs, with sliced onion and green chutney on the side, and a tea cup in the background

    What are bun kababs

    “Bun Kebab” literally translates to well, Bun and Kebabs. It’s a fried kebab in a bun, slathered with chutney and other delicious stuff hanging out of it. The kabab can either be vegetarian, like this one or made with meat or eggs. It’s one of THE most popular street style food in Pakistan and is somewhat slightly close to the popular Indian snack “vada pav”.

    If you are a fan of Pakistani restaurant-style food, you will love my classic Kheer (rice pudding) and Karachi Tikka samosa recipe.

    Ingredients

    Don’t be alarmed if the ingredient list seems a tad bit long or a little foreign to you. There are only a few ingredients that you may not have in your pantry, and I will mention substitutes for them too.

    • Green tamarind Chutney – The chutney for this recipe is a cross between a sweet tamarind chutney and a spicy mint green chutney. You will need tamarind pulp, Yogurt, Green Chilies (serrano), garlic, Salt, cumin powder, black pepper powder, coriander leaves, Mint leaves
    • Split Chickpea (chana dal) and potato patties – This recipe uses a vegetarian patty. You can use a different chickpea to potato ratio if you prefer. Its boiled with ginger, garlic, button red chilies, cumin and carom seeds and of course, salt. And then potatoes, some coriander and onions are added. The extra tartness of the patties comes through mango powder (aamchoor) and chaat masala.
    • Eggs – The highlight of this recipe is the beaten egg coating that is THE hallmark of the street style bun kababs.
    • Cooking Oil and/or Butter – Any cooking oil of your choice to fry the egg coated kababs. You will also need butter or oil while toasting the buns, but this is optional.
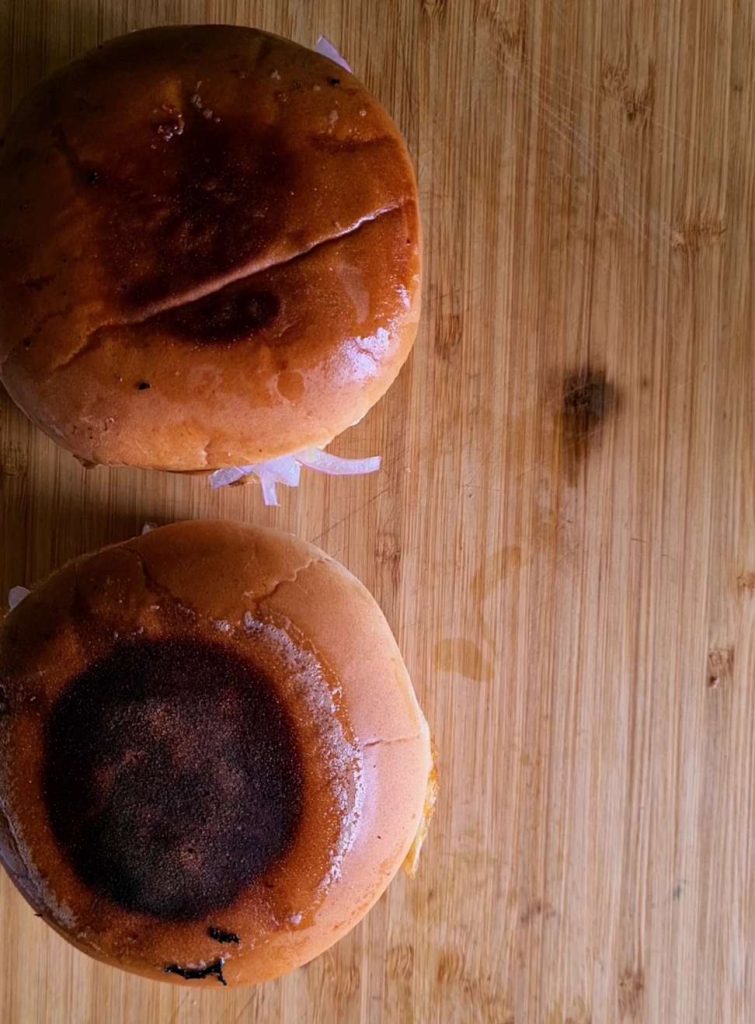
    • Buns – The best buns for a good bun kabab are the round buns with no sesame seeds.
    • Veggies – Most common vegetables in a bun kabab are onions, cucumbers, and tomatoes. This is mostly a flexible topping and be as creative or as simple as you want to.
    • Other condiments – Some versions use ketchup, mayo, a simple omelette or coleslaw in their bun kababs. Again, this is totally optional and upto your preference.

    Substitutions

    • Mango powder – You can use tamarind pulp instead (more details in recipe card)
    • Chaat masala – Just skip chaat masala altogether and use 1/2 tsp of crushed red chili flakes
    • Round seedless buns – Use dinner rolls instead.
    • Eggs – I’d definitely not recommend skipping it. But IF for dietary restrictions, you cannot have eggs, use all purpose flour to coat the patties. You need something to coat the patties because they are delicate.
    • Whole red chilies – Use Crushed red chilies
    • Coriander leaves aka Cilantro – If you are not a cilantro fan, use parsley

    Instructions

    Making the Daal and potato Patties

    Everything starts a day earlier, when you soak split chickpeas (dal) overnight or for 12 hours. Soaking dals are always important to get rid of any antinutrients. Just change the water once or twice.

    NOTE: If you live in a hot humid climate, keep the soaked dal in fridge overnight rather than on the counter.

    Drain all the water and transfer dal into a pressure cooker or a normal pot. Add all the boiling masala in the pot. Add 5 cups of water or as much needed for a pressure cooker.

    whole spices and split chickpeas submerged in water
    a tender smashed split chickpea on a spatula

    The dal needs to cook long enough so that each grain can be broken up by hand. It should be that tender. IF there is still water left in the pot, dry it out at high flame. Don’t drain this water away, because it holds a lot of flavor and salt. You can also add your potatoes in the dal itself to boil it. I already had pre-boiled potatoes which is why I didn’t need to add it to my dal pot.

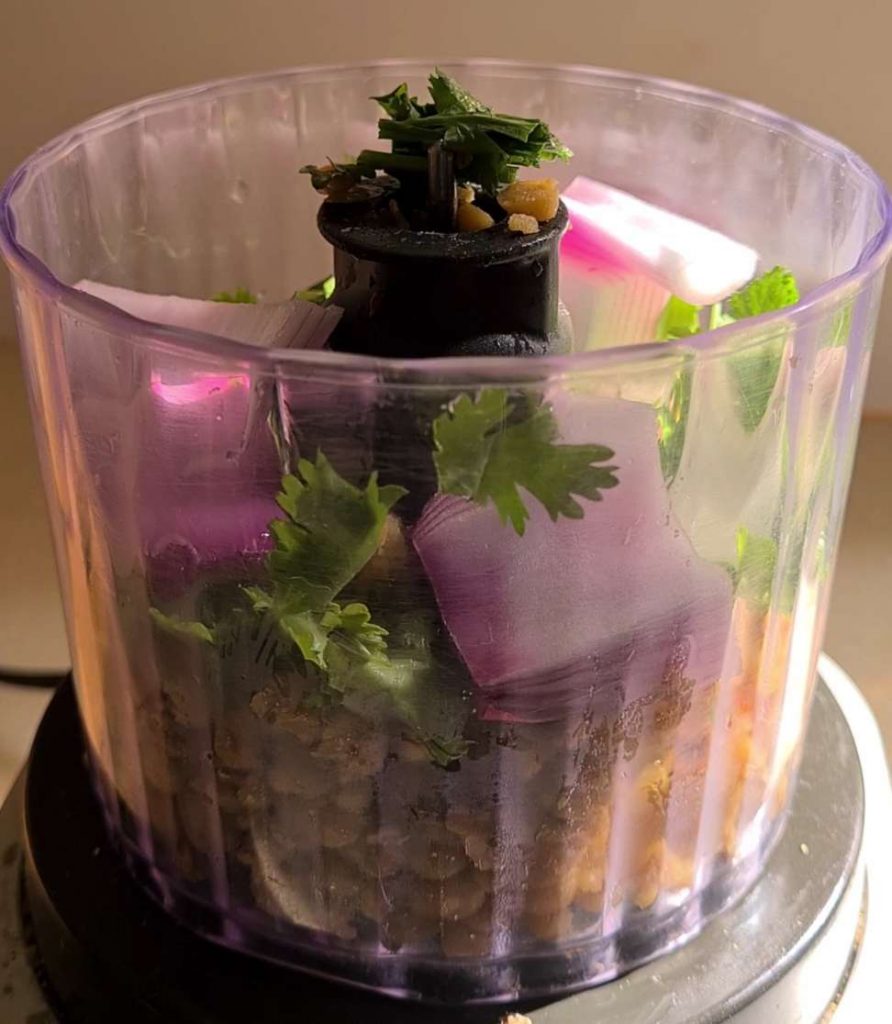
    patty or kebab filling ingredients in a food processor
    processed kebab or patty mixture stil in the food processor

    After your dal and potatoes have cooled down, chuck everything in a food processor, all seasonings, onions, coriander etc and just process till you get a smooth mix. And viola! your kebab mixture is ready.

    My potatoes were boiled separately, so I had to make the patty mixture outside of the food processor.

    boiled potatoes in a steel bowl
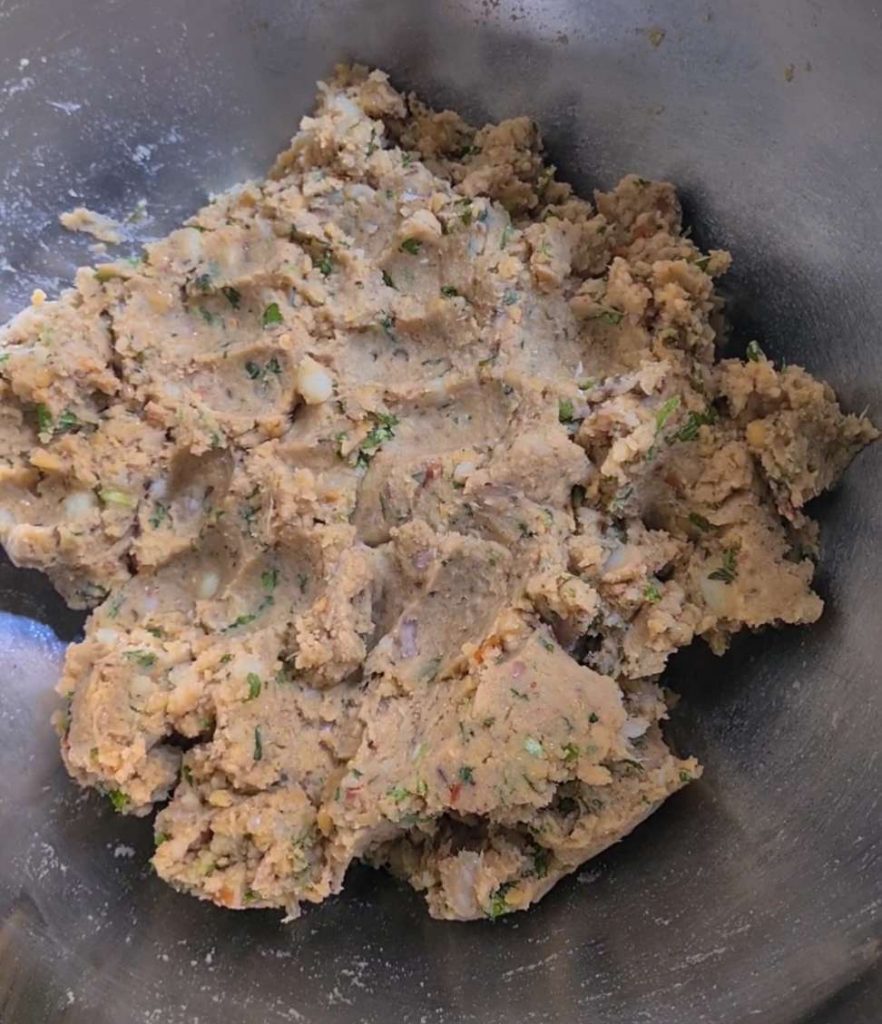
    bun kebab patty mixture in a steel bowl.

    You should end up with a smooth patty mixture. This is a great time to do a taste test to check seasoning and spices.

    NOTE: IF you want, you can freeze your kebabs at this point to use for a later date.

    After shaping your patties, you are going to prepare the egg coating. To do this, beat eggs in a bowl with an electric beater for 5 to 6 mins. Your eggs should look light and fluffy. Dip the kebabs in the frothy eggs and be very gentle while handling your kebabs now. Use a large spoon to coat the kebabs with eggs. Place the coated kebabs on a greased heated frying pan.

    beaten egg frothy and white
    egg coated patties in a frying pan

    Flip the kebabs once the egg gets golden on one side. Add another tbsp of oil after flipping kebabs.

    4 egg coated patties in a pan
    golden egg crusted kebabs ready in a frying pan

    Stack all the fried kebabs in a plate ready for assembly.

    Making the Green Tamarind Chutney

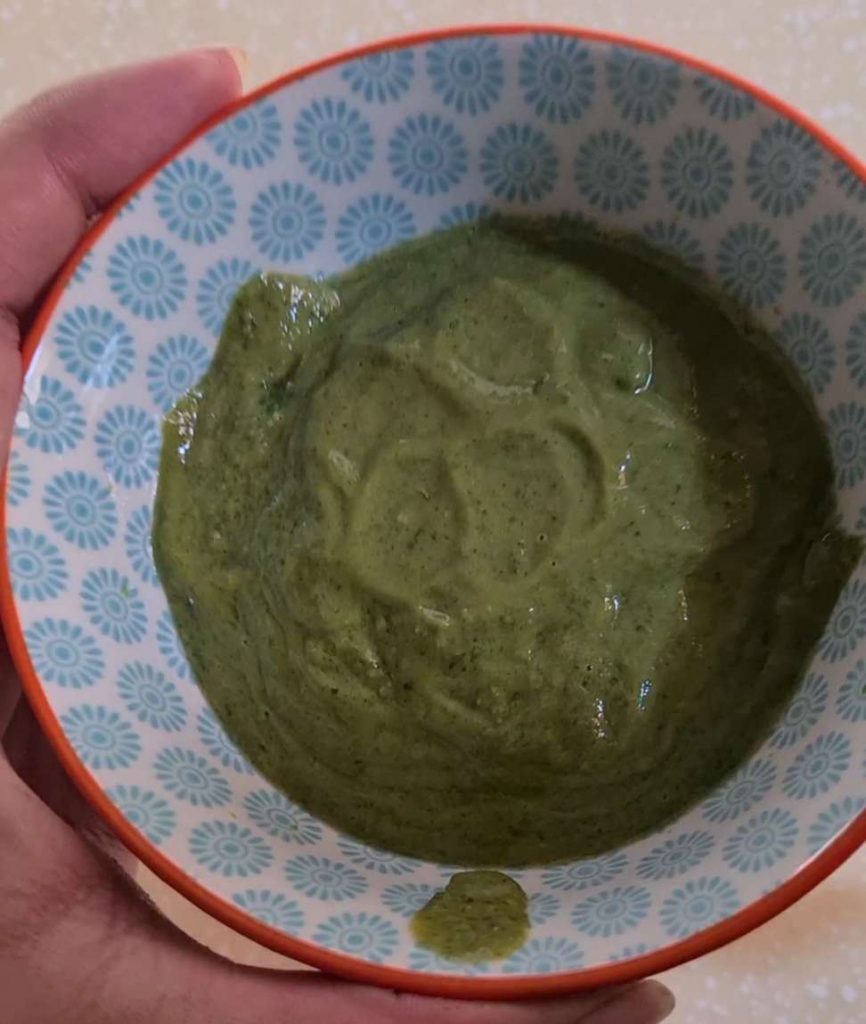
    The chutney in this recipe is different from the regular mint chutney or the sweet tamarind chutney. This is a specifically street style food chutney which works with a lot of other street food too. Its sweet and spicy at the same time and literally takes 2 mins to whip up. Just put all the listed ingredients in a blender and viola! Its ready!

    ingredients for spicy tamarind chutney
    green chutney for bun kabab ready in a bowl

    Assembling Bun Kababs

    The street style bun kebabs are almost fried in oil. I think we can dial it down a notch at home, mostly because we eat it pretty regularly. Toast both sides of the bun in the same frying pan. With butter is alwaysss the way to go but of course, skip it if you want.

    buns toasting a frying pan with butter

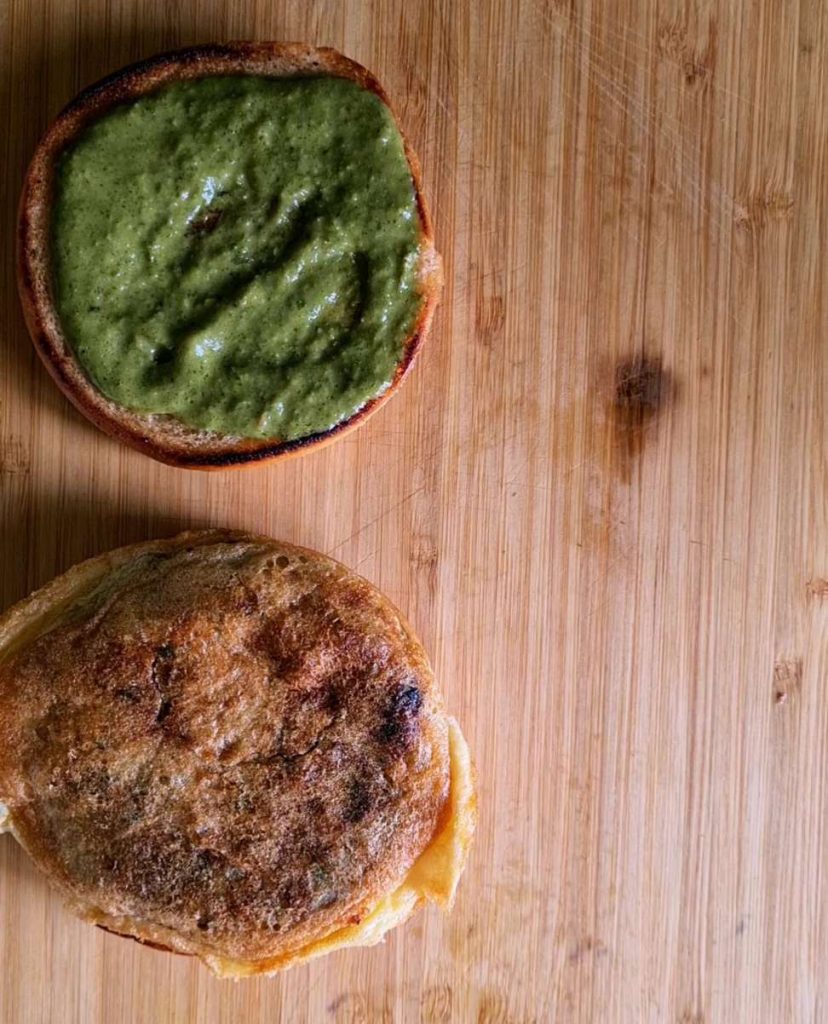
    Add a layer of chutney on the toasted buns, and any other veggie you want. Place the kebab and now top it off with some onions. Here’s where you can go crazy and do as many toppings as you like. Add ketchup or cucumber or tomatoes or coleslaw or a fried egg! Close the bun kebab with top toasted bun and digg innnn!

    slathering green chutney on 2 toasted buns
    Add chutney
    a kebab placed on the bun
    Add kebab
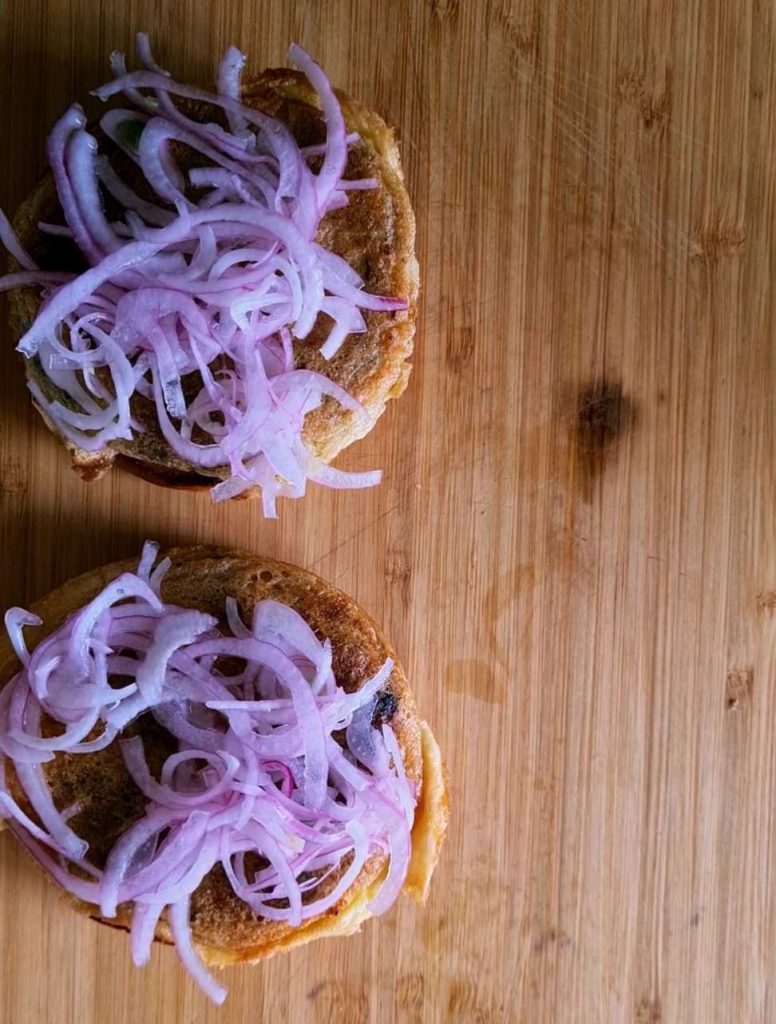
    sliced onions on top of the kababs in a bun
    Add onions
    assembled bun kababs ready
    Place bun

    Expert Tips

    • Always make sure to dry all the water of the boiled dal and make it as dry as possible. IF you are dal is very wet, it can break the patties.
    • Use a tablespoon of oil when adding egg coated kababs to the frying pan, the eggs tend to absorb all the oil, so you want to be careful. Add another tablespoon after you flip the kababs.
    • The kababs are towards the delicate side. Handle with a little care when your dipping them in egg. A flat spatula is best
    • If you are making these for a high tea, you can easily fry the kababs in advance, like about 2 3 hours in advance, and simply assemble them when needed.
    • Dipping the onions in vinegar or lemon juice will keep them fresh for longer and take care of that bitterness they hold.
    • Toasting the buns both sides will keep them crispier for longer and the inner side won’t get soggy quickly after you’ve slathered it with chutney.
    2 whole bun kebabs, and 1 sliced in half with chutney and sliced onions on the side

    FAQS

    Can I exclude eggs / etc ingredients from the recipe?

    Eggs play an important role in keeping the patties hold their shape. If you are planning to skip eggs, I’d recommend coating the patties in plain flour before frying. Keep in mind, that they are going to be delicate, as they aren’t meant to be fried on their own.

    Can I skip potatoes from the recipe?

    Potatoes act as a binding agent, I will NOT recommend skipping it.

    Is this recipe too spicy?

    Pakistani streetfood is definitely on the spicy side. Reduce the heat by excluding green chilies from the chutney and reducing the red chilies by half.

    Why do my patties break?

    These patties are generally delicate to begin with, so improper handling or technique can cause it to break. First of, make sure to always use dal with all the water from the boiling pot drained, and be gentle while flipping and dipping the patties. If you still find your patties break, add 1 tsp of cornflour in the patty mixture.

    Similar Recipes

    • croquettes served on a platter.
      Crispy Chicken Vegetable Croquettes
    • Lahori Chargha Recipe
    • A green plate with 4 pieces of dahi baray in it with some yogurt sauce
      Dahi Baray and batch freezing
    • Balochi Chicken sajji in a black plate with tomatoes and coriander
      Best Balochi Chicken Sajji at home


    an assembled bun kebab in focus, with 2 in the background, a green chutney and sliced raw onions peaking from the side

    Bun Kebab

    A popular Pakistani street style burger made with split chickpea and potato patties, chutneys and a toasted bun.
    4.75 from 12 votes
    Print Pin
    Course: Breakfast & Brunch, Snack, Snacks, Sides and Starters
    Cuisine: South Asian
    Prep Time: 30 minutes minutes
    Cook Time: 50 minutes minutes
    Total Time: 1 hour hour 20 minutes minutes
    Servings: 18 kebabs
    Calories: 300kcal
    Author: Wajiha

    Ingredients

    Split Chickpea (chana dal) Boil masala

    • 6 cloves of garlic
    • 1 inch piece of ginger
    • 1 cup split chickpeas chana dal soaked overnight
    • 1 tbsp cumin seeds
    • 1 tsp ajwain carom seems
    • 8 to 10 whole button red chilies
    • 2 + 1/2 tsp salt
    • 4 cups water

    Kebab mix

    • 2 medium potatoes boiled* 500 gm
    • 1 cup coriander leaves (cilantro) or half a bunch
    • 1 big onion
    • 2 tsp mango powder / khattayi powder*
    • 1 tsp black pepper powder
    • 1 tbsp chat masala

    Green chutney

    • 4 tbsp tamarind pulp
    • 6 tbsp Yogurt
    • 4 Green Chilies serrano
    • 3 cloves of garlic
    • 1/2 tsp Salt
    • 1 tsp roasted cumin powder
    • 1/2 tsp black pepper powder
    • 1/2 cup Coriander leaves
    • 1/2 cup Mint leaves
    • Water to dilute if needed.

    Assembling

    • 12 Round buns or pav without sesame seeds
    • 2 medium thinly sliced onions
    • 2 eggs
    • kebabs
    • Cooking oil for frying kebabs
    • chutney
    • ketchup optional
    • 2 Cucumber sliced or other veggies optional

    Instructions

    DAL KEBAB PATTIES

    • Soak split chickpeas (dal) overnight or for 12 hours. Change water once or twice. (see notes)
    • Drain all the water and transfer dal into a pressure cooker or a normal pot.
    • Add all the boiling masala in the pot.
    • Add 5 cups of water or as much needed for a pressure cooker.
    • Cook the lentils for about 30 mins or so, to soften the dal. Check a single grain to see if you can break it with your hand. It should be that tender. Dry out the excess liquid. (you can also chuck in potatoes in the dal to cook them together if you don’t want to boil the potatoes separately)
    • Allow the dal/potatoes to cool down, then add it to a food processor. Add all the other ingredients mentioned for the kebabs.
    • Process till you get a nice smooth patty mixture.
    • Taste and adjust seasoning accordingly
    • Make round medium sized patties (that fits in the buns you have)

    CHUTNEY

    • Add all ingredients for chutney in a blender and blend away to make a smooth chutney. You can add more yogurt or tamarind if you want.
    • Adjust the seasoning according to your liking. Add water if you want a thinner consistency.
    • Set aside

    ASSEMBLING

    • Break 2 eggs in a bowl and beat with an electric beater for 5 to 6 mins, until the eggs turn nice and frothy.
    • Place a frying pan on stove at medium flame with about a tbsp oil.
    • Dip the kebabs in the beaten eggs. Use a large spoon to coat the kebabs. Place the coated kebabs on the heated frying pan.
    • Flip the kebabs once the egg gets golden on one side. Add another tbsp of oil after flipping kebabs. Set aside.
    • Toast buns with or without butter in the same pan.
    • Add a layer of chutney on the toasted buns, place kebab and sliced onions on top. Add ketchup or cucumber or any other condiment of choice. Close the bun kebab with top toasted bun and serve hot with more chutney and onions on the side.

    Notes

    • If you live in a hot humid climate, soak the lentils on the counter for 4 hours, and soak overnight in the fridge.
    • If you don’t have mango or khatai powder, add 1 tbsp of tamarind paste during the last 10 mins of boiling the split chickpeas
    • You can boil the potatoes together with the dal as well.
    • This recipe is definitely spicy, reduce red chilies and green chilies by half if you can’t eat spicy food.

    Nutrition

    Serving: 1servingCalories: 300kcalCarbohydrates: 27gProtein: 8gFat: 5gSaturated Fat: 1gPolyunsaturated Fat: 4gCholesterol: 31mgSodium: 464mgFiber: 3gSugar: 7g
    Can’t wait to see your remakes! Tag meon IG with your pictures @butteroverbae

    Easy make-ahead Sehri Recipes and Ideas

    February 19, 2021

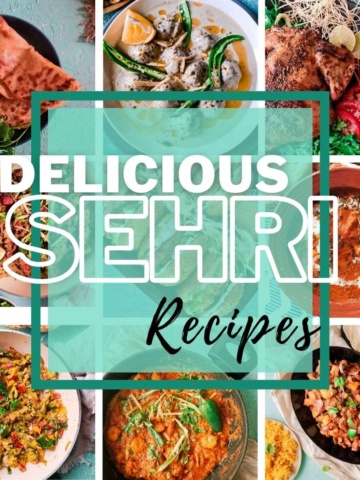
    a collage of pictures of different recipes with the article heading written on it

    It’s that time of the yearrr folks! The holy month of Ramadan is upon us and I don’t know about you, but I’ve started preps already! Fasting during Ramadan means you need a good Sehri (pre-dawn meal) plan to ace time management. You need your food to be easy, nutritious and filling. I’ve got you covered fellow faster!

    Tips for Sehri

    It’s always better to be prepared in advance so that you are not spending most of your time in the kitchen during Ramadan. Here are a couple of pointers to keep in mind for Sehri, along with some great recipe recommendations.

    • Jot down a rough menu list in advance for Sehri and Iftar. This way you know exactly what you are going to have and you can work on freezing as much food as you can beforehand so that the actual Sehri time is not a crazy “running around the house” scenario.
    • Yogurt based food and drinks are awesome in keeping you hydrated throughout the day. So drinks like lassi or smoothies, side serving of raw yogurt are great additions to your Sehri meals.
    • Try to keep your water intake to a minimum and Sehri and spread it out throughout the non-fasting period instead.
    • I’ve put together a pretty awesome list for Sehri for you, most of which are freezable, and the rest are easy to whip up. Up ahead
    [mv_create key=”111″ type=”list” title=”Sehri Menu Ideas” thumbnail=”https://butteroverbae.com/wp-content/uploads/2018/10/IMG_6652_result-Optimized.jpg” layout=”numbered”]
    a collage of pictures of different recipes with the article heading written on it

    How to make Frozen parathas at home

    February 10, 2021

    a folded square paratha or fried flatbread on a dark blue plate with some coriander on the side.

    These frozen parathas are a LIFESAVER on lazy days when you want proper meals but also don’t want to spend a minute extra in the kitchen. Homemade frozen parathas (fried flatbreads) are a much more nutritious, and sustainable option than the store bought ones and um…they taste like real parathas ( a…yess offense packaged “parathas”)

    You don’t need to sit and spent an entire day in the kitchen rolling out parathas to freeze. You can simply use the leftover roti/chapati dough every other night and use it to freeze parathas. I roll out 1 or 2 parathas every time I have said leftover atta. And before I know it, within a month I am looking at a stack of fresh homemade 30 40 parathas, which btw is a LOT! and perfect if you are meal prepping for Ramzan (Muslim fasting month)

    FAQS

    Can you freeze fully cooked paratha?

    Fully cooked parathas usually don’t do well in the freezer and somehow or the other, their taste, texture and softness doesn’t last. Unfortunately my friends, I’d have to say NO to this.

    Is frozen paratha good for health?

    The parathas you get in the store are normally made from the same dough they make puff pastries from. This is because, they need a large quantity of fat to keep commercially produced parathas soft on the inside and crispy on the outside. Even if they offer you whole wheat options, they are still giving you a ton of butter with it. Since paratha is something us brown folks consume on a regular basis, buying the store bought ones might not be such a good idea. Ofcourse, the one you freeze yourself at home is wayyyyy better, infact its nutritious! Using good quality organic ghee, and wholemeal wheat flour, your homemade parathas can be a good source of Vit B, fibre and good carbs. Plus no added preservatives is always a bonus

    How long can I freeze the parathas for?

    They can last upto 2 months in the freezer and sometimes 3. Beyond that, they might be subjected to freezer burns because alas, we aren’t using a truck load of butter/ghee in them, so the shelf life is limited.

    Can I use oil instead of ghee?

    You can most definitely use oil instead of ghee, but then opt for freezing method 2 for better results. (see under freezing section)

    Ingredients

    ingredient to make paratha dough
    • Chakki Atta (Wholemeal wheat flour) – Chakki Atta is the best option to make parathas or rotis and is the choice of flour in most brown households for all types of flatbreads. It is definitely more nutritious than all purpose flour. Please note, Chakki Atta is different from the regular whole wheat flour you get in American grocery stores. So if you want to make authentic parathas, look for chakki atta specifically. You can find them in Asian grocery stores.
    • Salt – Goes without saying but your parathas need seasoning too. A few pinches of salt ar enough to add flavor to your flatbreads.
    • Water – Room temperature or lukewarm water works best for kneading the dough.
    • Melted Ghee (clarified butter) – We are going to need ghee in the dough as well as while rolling and folding the parathas. I prefer using melted ghee because you end up using less this way. Since so many steps involve applying layers of ghee, you will end up using more than a tbsp per paratha is you use solidified ghee. If you want, you can use oil too, but the results may vary with it.

    Prepare Dough

    For preparing the dough, you can use a stand mixer with the hook attachment or simply do it by hand. There’s a small video tutorial at the end of this post too!

    a green bowl showing stage 1 or crumbly dough stage of kneading flour for paratha

    Start with flour, salt and melted ghee. And allow the ghee to spread evenly throughout the dough. Then slowly starting adding water until your flour is fully combined. You are NOT kneading at this point. Simply allowing all the flour to soak up water and form a dough. It may seem crumbly or not smooth, which is fine! Trust the process!

    Cover the dough with cling wrap and let it rest in the fridge for 30 to 40 mins. This allows the gluten in the dough to be activated and makes kneading much easier.

    A well rested, cold dough is easier to work with and gives you a
    good paratha/roti texture.

    a smooth firm kneaded dough ball sitting in a teal bowl

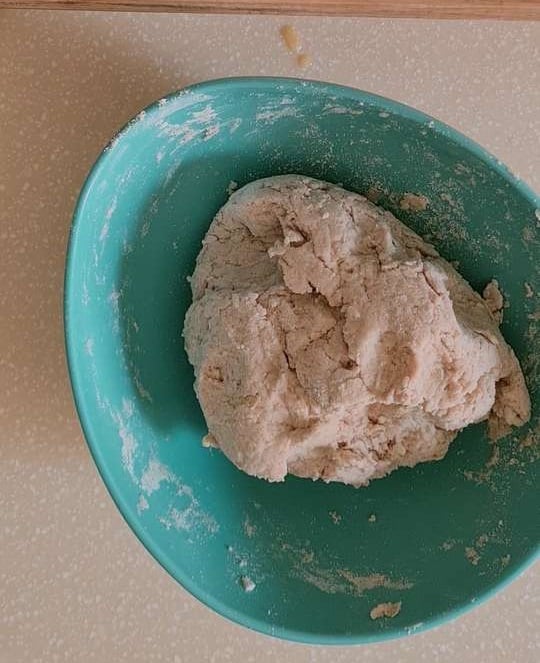
    Take out your dough from the fridge and now knead it for about 5 to 6 mins with your fists. You will eventually get a uniform smooth dough, that springs back a little when you poke it. Now you can decide to roll out the parathas straight away or keep the dough back in the fridge, where it can last for 5 days.

    Instructions

    Rolling out Parathas

    • dividing kneading dough into smaller parts by a metal divider
      Step #1
    • 4 dough balls dusted with flour
      Step #2

    STEP 1 & 2– Divide your dough into smaller segments and make small dough balls from your dough. Coat with lose flour before placing them on the countertop.

    • a circular rolled out disc for paratha
      Step #3
    • an orange brush being used to brush ghee on the paratha disc
      Step #4

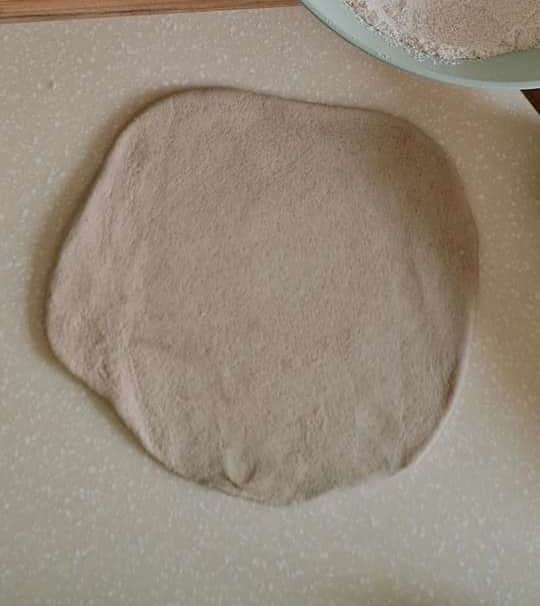
    STEP 3– Flatten the dough balls by pressing them with the palms of your hand. Flatten them as much as you can with ease. Sprinkle more flour on the dough discs if they become too sticky. Use a rolling pin to flatten out one dough disc into a medium disc shape. The shape doesn’t need to be perfect. Just a rough round shape is good enough.

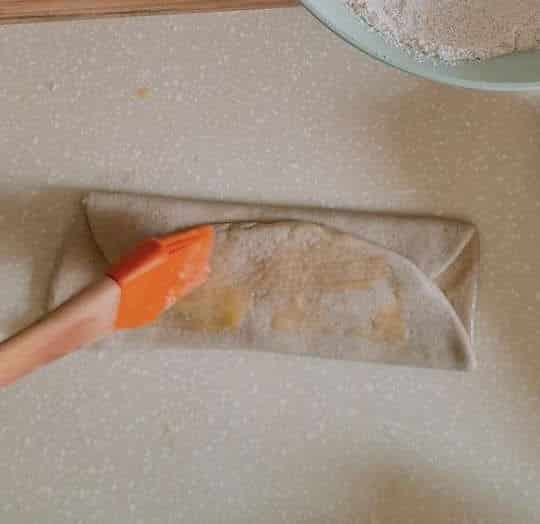
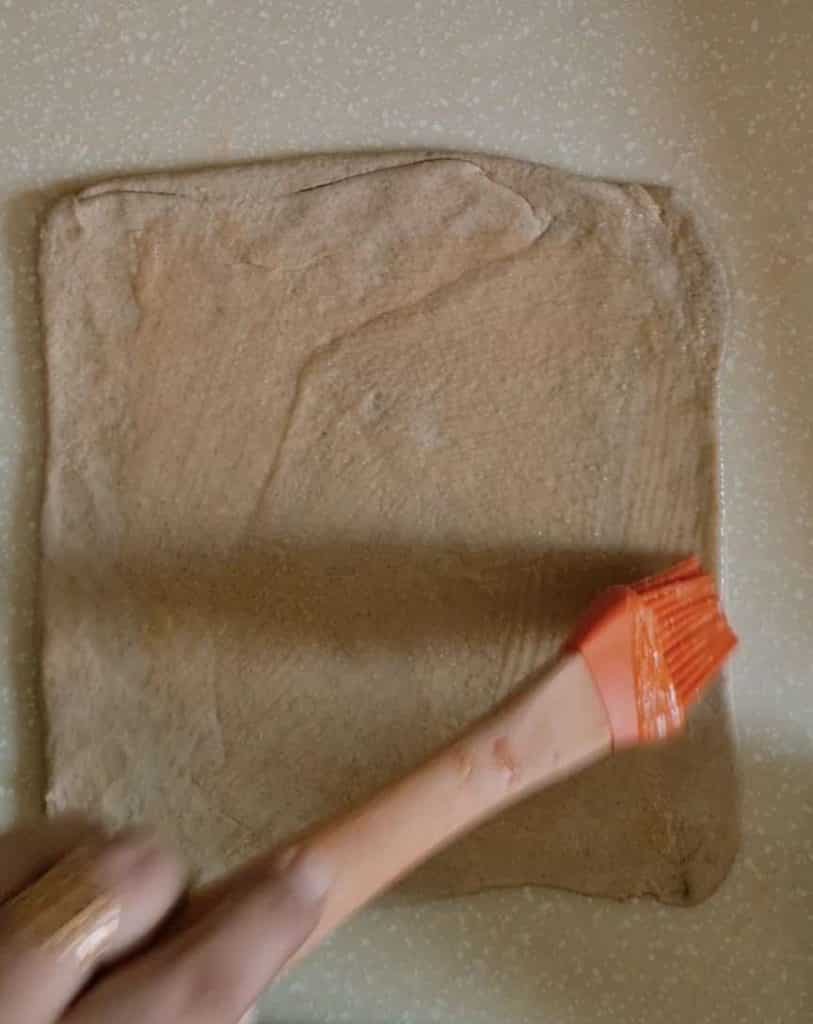
    STEP 4 – Use a brush and cover the surface of the disc with ghee. Sprinkle some lose flour on top of the ghee and start folding as shown in the pictures below

    • steps showing paratha being folded
      #5 Lift one edge and fold in
    • steps showing paratha being folded
      Step #6 Lift the opposite edge and fold in.

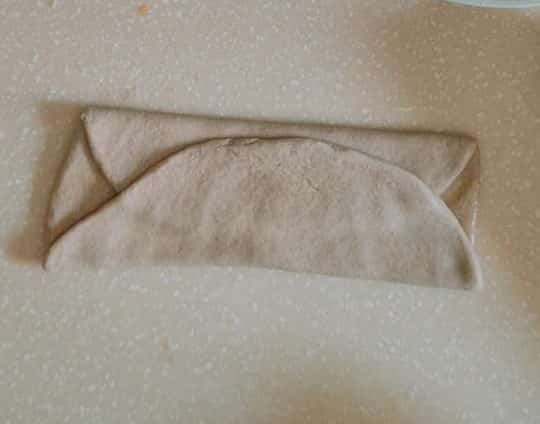
    STEP 5 & 6 – Lift one edge of the disc and fold towards the centre. Now do the same on the opposite side to form a burrito.

    • steps showing paratha being folded
      Step #7
    • steps showing paratha being folded
      Step #8

    STEP 7 – Use the brush and cover the surface of the exposed top of the paratha and sprinkle some lose flour again.

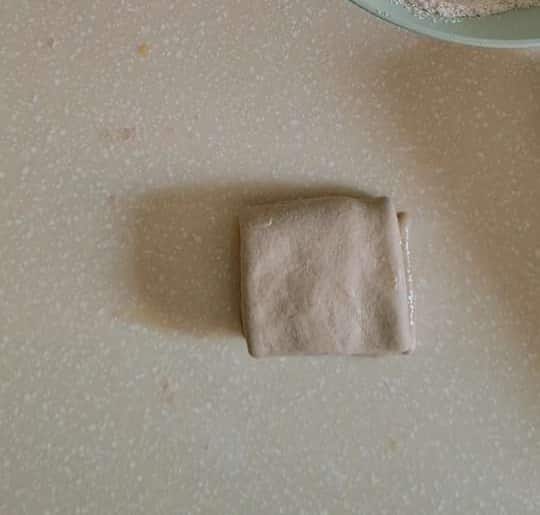
    STEP 8 – Bring in one of the open ends of the paratha towards the centre and bring the other to overlap the first one to form a square.

    • steps showing paratha being folded
      Step #9
    • square paratha rolled out
      Step #10

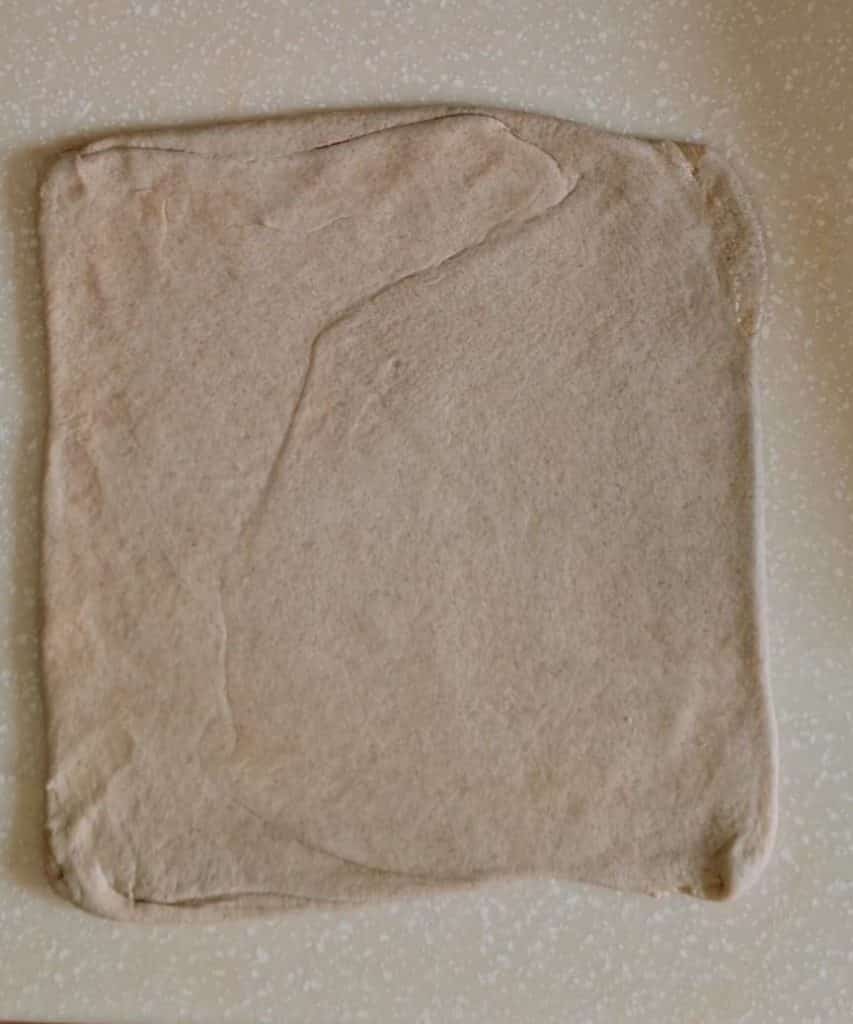
    STEP 9 & 10 – Coat the square dough with flour again and roll it out to form a square paratha. Sprinkle lose flour again if the dough becomes sticky. Parathas are thicker than rotis when rolled out.

    How to freeze paratha

    There are 2 methods to freeze parathas, you can use whichever one you find easier. For both methods, you will needs sheets of butter paper or wax paper, and a ziplock bag or an airtight box.

    METHOD 1 – FREEZING RAW PARATHAS

    In this method, you simply brush some melted ghee on either side of the rolled out paratha and place them on a sheet of wax paper. Add another layer of wax paper and layer the rolled out parathas this way Keep the tray in the freezer to turn the parathas solid. Once they harden up, transfer them into a ziplock bag and store for upto 2 months

    • brushing ghee to a rolled out paratha
    • rolled out paratha on top of parchment paper

    METHOD 2 – FREEZING SEMI COOKED PARATHAS

    Another approach is to half cook the paratha before freezing. Heat a pan and cook the paratha on one side long enough to see the color of the paratha change on top. When that happens, remove the paratha and keep on the side to cool down. Stack the parathas with wax papers in between each paratha and since these aren’t delicate, you can directly put them in a ziplock bag and freeze (for upto 2 months)

    a large ziplock bag with raw uncooked frozen parathas in it

    Cooking Frozen paratha

    • frying frozen paratha
      Place frozen paratha on hot pan (not thawed)
    • frying frozen paratha
      Flip
    • frying frozen paratha
      Flip again

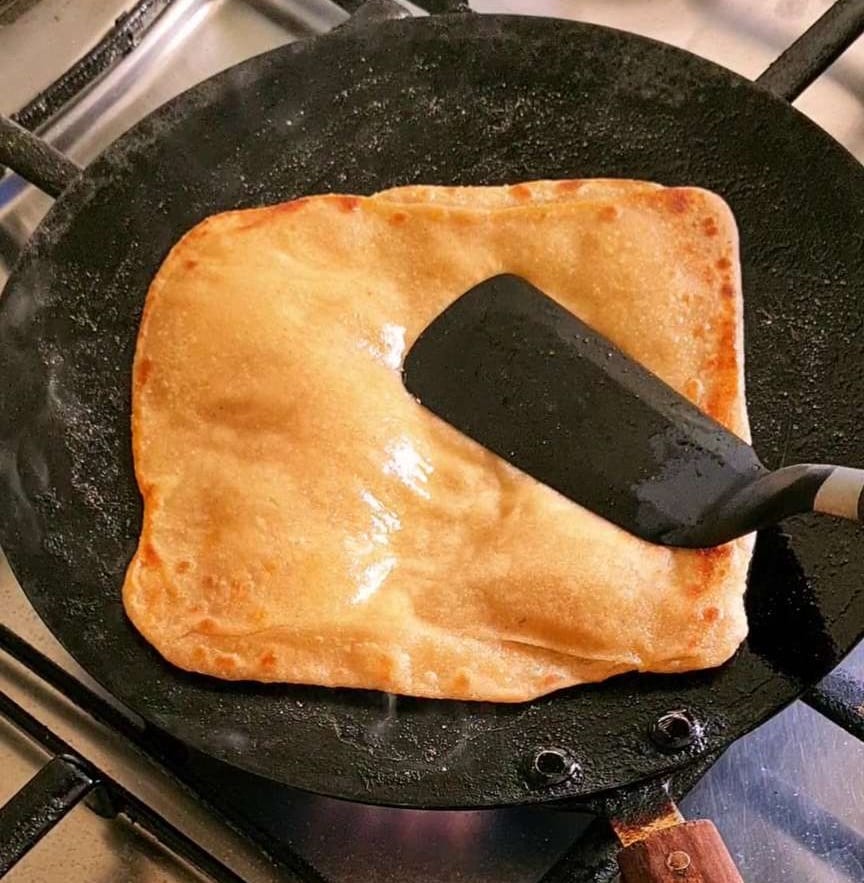
    You don’t need to thaw frozen parathas. Simply place the solid paratha on a hot pan and brush a little ghee on all corners. Flip over when the top changes color. Brush ghee on this side too and flip over when the bottom gets nice golden brown color all around.

    Enjoy with your favorite curries, kebabs.

    Expert Tips

    • Make sure your ziplock bags are sealed properly. You can use a box or a zipper bag to store your parathas but it needs to be airtight. The freezerburn from being exposed in the freezer is real and will make your parathas hard when you make cook them.
    • Always use oil or ghee in the dough when making frozen parathas.
    • Sprinkling flour on ghee while folding the paratha gives it better layers and makes it flaky.
    • Label your bags with dates of when you started adding parathas to it, so that you have a rough estimate of when your parathas will expire.
    • You can prepare a big batch of parathas to freeze together all in one go or do it in increments, every other night when you are making fresh parathas, just roll out 1 or 2 extra and freeze!
    • On those lazy days, bring out some frozen dam keema (slow cooked beef mince) or frozen chicken curry from your stock, pair it with your frozen parathas, and you have to hardly spend 10 mins in the kitchen max to serve food.
    a folded square paratha or fried flatbread on a dark blue plate with some coriander on the side.

    Similar Tutorials

    How to make crispy fried onions for curries
    How to make Chili oil

    a folded square paratha or fried flatbread on a dark blue plate with some coriander on the side.

    How to freeze parathas

    Parathas are fried flatbreads from India / Pakistan. Follow these instructions to make parathas from scratch and freeze them for future use
    4.95 from 17 votes
    Print Pin
    Course: Side Dish
    Cuisine: South Asian
    Prep Time: 40 minutes minutes
    Cook Time: 5 minutes minutes
    Total Time: 45 minutes minutes
    Servings: 8 parathas
    Calories: 237kcal
    Author: Wajiha

    Equipment

    1 Rolling Pin
    11 sheets of wax papers
    1 ziplock bag or airtight container

    Ingredients

    • 3 cups Chakki Atta Flour wholemeal wheat flour see notes
    • 2 tbsp melted ghee clarified butter for dough + 3 tbsp for layering
    • 1½ cup warm Water or as needed.
    • 1/2 tsp salt
    • more ghee needed if cooking on the spot

    Instructions

    • In a bowl, add flour, ghee and salt. Mix well.
    • Now add water gradually and knead the dough as you go. You can do this manually by hand or use a stand mixer with the hook attachment.
    • Once your dough is mixed, don’t knead any more. Transfer the dough into a clean bowl, cover it and refrigerate for about 15 to 20 mins.
    • Bring out the dough and now knead for 5 mins with your fists. Knead till you get a smooth dough.
    • Make small dough balls from your dough. And keep placing them on a surface that has been sprinkled with flour.
    • Flatten the dough balls by pressing them in the palms of your hands. Flatten them as much as you can with ease. Sprinkle more flour on the dough discs if they become too sticky.
    • Use a rolling pin to flatten out one dough disc into a medium round shape.
    • Use a brush and cover the surface the rolled out dough with ghee.
    • Lift one edge of the disc and fold towards the centre. Now do the same on the opposite side.
    • Your paratha should look like a log right now. Use the brush and cover the surface of the exposed top of the paratha.
    • Bring in one end of the paratha towards the centre and bring the other to overlap the first one to form a square.
    • Dust the square dough with flour and roll it out to form a square paratha
    • TO FREEZEMETHOD 1 – RAW PARATHA
    • In this method, you simply brush some melted ghee on either side of the rolled out paratha and place them on a sheet of wax paper.
    • Add another layer of wax paper and layer the rolled out parathas this way
    • Keep the tray in the freezer to turn the parathas solid.
    • Once they harden up, transfer them into a ziplock bag and freeze.

    METHOD 2 – HALF COOKED PARATHA

    • Heat a pan and cook the paratha on one side long enough to see the color of the paratha change on top.
    • When that happens, remove the paratha and keep on the side to cool down.
    • Stack the parathas with wax papers in between each paratha and since these aren’t delicate, you can directly put them in a ziplock bag and freeze
    • COOKING
    • You don’t need to thaw frozen parathas. Simply place the solid paratha on a hot pan and brush a little ghee on all corners.
    • Flip over when the top changes color.
    • Brush ghee on this side too and flip over when the bottom gets nice golden brown color all around.
    • Serve with your favorite curry or kebab.

    Notes

    • Chakki atta or wholemeal wheat flour is different than regular whole wheat flour, you can find it in Asian grocery stores. Most bags also have pictures of roti or paratha on it.
    • If you don’t want to roll out parathas straight away, keep the kneaded dough back in the fridge where it can last upto 5 days
    • Your frozen parathas can last 2 months.
    • IF you want to use oil instead of ghee, go for method 2 of freezing.
    • You can use any other folding method than the one mentioned in the this post as well.

    Nutrition

    Serving: 1servingCalories: 237kcalCarbohydrates: 3gFat: 3gSaturated Fat: 1gPolyunsaturated Fat: 1gCholesterol: 4mgSodium: 179mg
    Can’t wait to see your remakes! Tag meon IG with your pictures @butteroverbae
    https://www.instagram.com/p/CK4FY2oBqvY/

    Sweet Tamarind Chutney (Imli Chutney)

    January 27, 2021

    sweet tamarind chutney in an open jar.

    This sweet and tangy tamarind chutney aka Imli Chutney is made with dates, tamarind, and spices. And it’s literally a MUST-have around the house for all Pakistani/Indian chaats and snacks.

    sweet tamarind chutney in an open jar.

    ‘Imli’ or Tamarind is a super sour flavoring ingredient. This recipe uses a LOT of it and balances that sourness out with some heat from spices and sweetness from dates (or other sweeteners). The overall hit of flavor is definitely sweet and tangy with a bit of heat in there.

    No Pakistani/Indian Chaat is complete without imli chutney, oh and neither is the ever-so-popular dahi bhalley (or baray). It can last for months in the fridge and more so in the freezer!

    [feast_advanced_jump_to]

    Ingredients/Substitutes

    Here are a couple of pointers and notes about the ingredients.

    ingredients labelled on a wooden board.
    • Tamarind (Imli)-
      This is the main ingredient of the chutney and therefore a must. The most easily available tamarind is in these 3 forms:
      • Tamarind block with seeds
      • Tamarind block without seeds
      • Tamarind Paste
        The paste is a ready-to-use option where no real cooking is needed. While the block tamarind takes a little bit of time to extract the tamarind concentrate. I’ve mentioned how to use both in the recipe
    • Sweetener – The sweetness comes from the dates in this recipe. It adds a layer of flavor depth that regular sugar does not. I used organic date syrup available at my local grocery store. But worry not, if you can’t get your hands on that, get date paste instead OR make your paste at home with whole dates. However, dates aren’t compulsory to use in the recipe. Use any sweetener of your liking:
      • Regular white sugar
      • Brown sugar or molasses
      • Coconut sugar
      • Artificial sweeteners like stevia
      • Honey
      • A combination of these sweeteners.
    • Salt, spices – The flavoring in this recipe comes from roasted cumin, coriander, and red chilies. Also known as the DAHI BARA spice mix. You can make your own spice mix or buy a boxed dahi bara spice blend at your local Asian grocery store.
    • Optional Ingredients – Asafoetida (hing) and dry ginger powder (saunth) are also 2 commonly used ingredients in tamarind chutney. Add a pinch of Asafoetida and 1/2 tsp of ginger powder to add another layer of flavor.

    NOTE: Asafoetida has a very strong aroma and taste, so if you’ve never tried it or added it to your food, it’s best to avoid it with this chutney.

    See the recipe card for full information on ingredients and quantities

    Step-by-Step Instructions

    I’ve put together all the steps in a simple pictorial for you to see how easy this is to make.

    You can skip steps 1- 4 if you are using ready-to-use tamarind paste for this recipe.

    tamarind blocks in a strainer with a bowl underneath.

    STEP 1: Place a colander in a heat-proof bowl and put tamarind blocks inside the colander.

    hot water with tamarind block in a strainer and bowl.

    STEP 2: Pour boiling water at least 2 cups or enough to soak the entire block completely. Set aside for 10 minutes.

    a slotted spoon breaking up tamarind block in water.

    STEP 3: Use a spoon or fork to break the block of tamarind into little pieces.

    colander removing tamarind chunks and tamarind juice visible in bowl below.

    STEP 4: Add 1 cup of cold water to reduce the temperature. Now use your hands to squeeze all the chunks of tamarind to release all the tamarind juices from the seeds etc. Pick up the colander and allow all the tamarind juice to strain into the bowl

    IMPORTANT: Always test the water temperature first before dipping your hands into it to squeeze out the juices from the tamarind block. You can also repeat step 4 as much as you like if you feel there is more tamarind juice to be extracted, all your water will cook down eventually.

    tamarind juice in a glass pot on the stove with a spoon in it.

    STEP 5: Transfer the liquid into a pot and add all the seasonings.

    tamarind juice simmering in a glasspot.

    STEP 6: Boil the tamarind juice at medium flame for 20 minutes.

    tamarind juice reduced to half in a glasspot.

    STEP 7: Allow the liquid to reduce to half of its original volume.

    adding date syrup to tamarind juice.

    STEP 8: Add date syrup/date paste/ or any sweetener you prefer. Simmer the chutney for 10 minutes at medium-low heat.

    tamarind chutney resting on the counter.

    STEP 9: Allow the chutney to cool down uncovered.

    a spoon showing thickness of the tamarind chutney in the glasspot.

    STEP 10: Your chutney will thicken as it cools down, transfer to airtight jars.

    Allow your chutney to cool down and store them in airtight glass jars in the fridge. Go ahead and enjoy it as you like!

    sweet tamarind chutney in 3 jars.

    Expert Tips

    • Always use a glass jar to store condiments.
    • Make sure your jar or storage bags are dry before pouring your chutney in it.
    • Don’t overcook the chutney to get a thicker consistency. You may end up burning it. Instead, let the chutney air dry while it cools. It’ll thicken up considerably.
    • Always use a clean dry spoon whenever using the chutney from the fridge.
    • The chutney tends to boil like rice does, so make sure your chutney water only reaches up to 3 quarters of your saucepan and there is enough room for the chutney to rise while it boils.

    Frequently Asked Questions

    How to store Imli Chutney?

    Pour the chutney into a dry glass jar with an airtight lid. Keep the chutney refrigerated when not in use. Use a clean dry spoon everytime you need to have some chutney time.

    How long can I store the chutney for?

    The chutney can stay fresh in the fridge for upto 70 days and indefinitely in the freezer. The longest it has stayed in my freezer is for about a year

    Can I use anything other than dates to sweeten the chutney?

    Ofcourse! In Fact you can use any sweetener you like! There’s a whole list of substitutes up ahead. The only reason dates are preferred in this chutney is because they not only act as a nutritious sweetener, but also add that thick texture to the chutney.

    Serving Suggestions

    Like I said, this imli ki chutney works as a topping sauce or a dipping sauce with a LOT of snacks and mains. Here are some ideas:

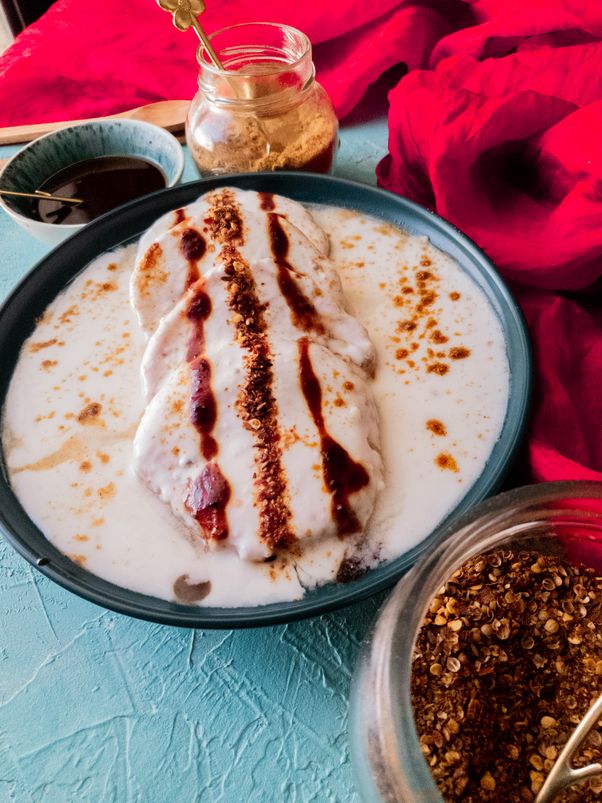
    a plate with dahi bara in yogurt sauce surrounded by spice jars
    Dahi Bhalla with imli chutney
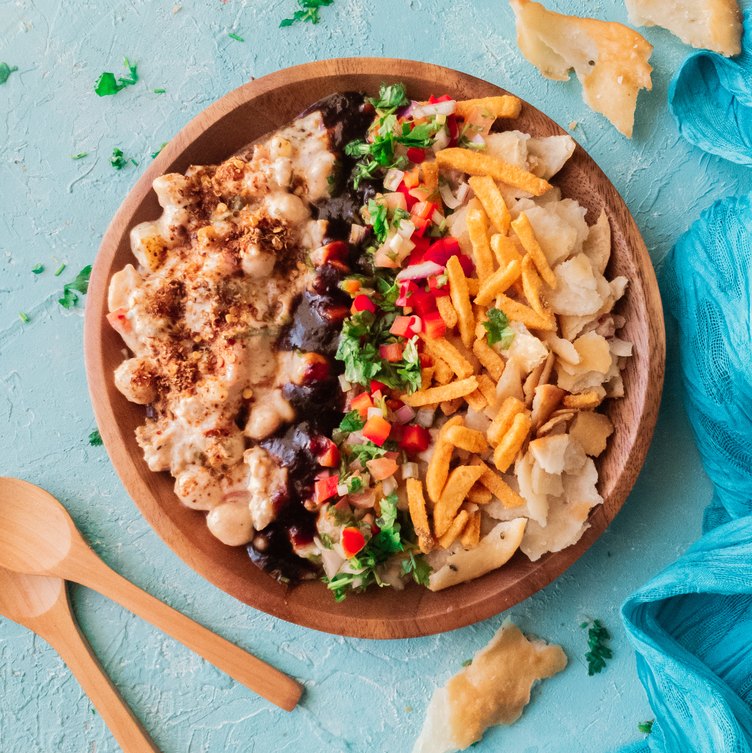
    A bowl with chips, chutney, white sauce in chickpeas
    Mix Chaat with sweet tamarind chutney
    • On dahi bara (fried lentil fritters in yogurt)
    • With mix chaats like Papri Chaat (mix chickpea, veggies and yogurt)
    • Perfect to pair with bbqs like chicken tikka etc
    • Use as the sweet chutney for pani puris
    • I would totally give this as favor to my non-desi folks to try it out.
    • On paratha rolls, sandwiches, or wraps.
    • With Indian/Pakistani fried snacks like pakoras, kachori samosas, etc.

    Similar Recipes for you to try.

    • easy spicy indian mint chutney recipe
      EASY MINT CHUTNEY RECIPE & HOW TO PRESERVE IT
    • tomato chutney served in a steel bowl.
      Tomato Chutney – Hyderabadi style
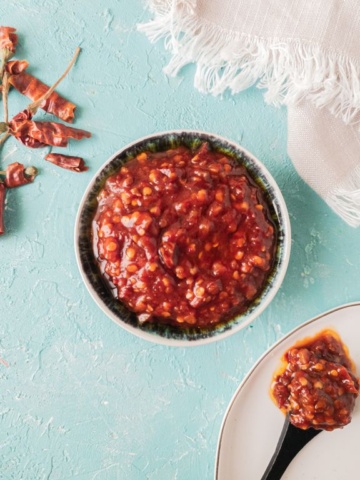
    • a bowl with schezwan sauce with a few red chilies on the side against a blue backdrop
      Schezwan Sauce
    • a folded square paratha or fried flatbread on a dark blue plate with some coriander on the side.
      How to make Frozen parathas at home

    Do you have any questions? I’m happy to help! And of course, If you try this recipe, I’d loveeeee to see it or simply hear about it! Hit me up in the comment section below and I’ll get back to asap! Happy Cooking!

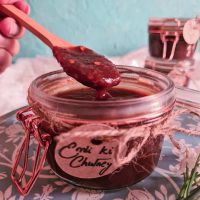
    a wooden spoon taking out a spoonful of imli ki chutney in a labelled jar

    Sweet Tamarind Chutney

    A classic sweet and tangy chutney made with tamarind and dates.
    5 from 5 votes
    Print Pin
    Course: Dips & Condiments
    Cuisine: South Asian
    Prep Time: 15 minutes minutes
    Cook Time: 20 minutes minutes
    Total Time: 35 minutes minutes
    Servings: 3 cups
    Calories: 287kcal
    Author: Wajiha

    Ingredients

    • 1½ cup date syrup see notes for substitutes.
    • 1 tsp salt or to taste see notes
    • 2 tbsp Dahi bara spice mix Homemade or bought
    • 1 tsp crushed red chili flakes
    • 1 tsp chat masala powder see notes

    Tamarind- Use only ONE of these three options

    • 300 gm tamarind pulp block with seeds
    • 200 gm tamarind pulp block without seeds
    • 100 gm tamarind paste unflavoured

    Instructions

    Tamarind Chutney using Tamarind blocks

    • Place a colander in a heat-proof bowl and put tamarind blocks inside the colander. Now, pour boiling water at least 2 cups or enough to soak the entire block completely. Set aside for 10 minutes.
    • Use a spoon or fork to break the block of tamarind into little pieces. Add another 1 cup of cold water to bring down the water temperature. Now use your hands to squeeze all the chunks of tamarind to release all the tamarind juices from the seeds etc. Test the water temperature first before dipping your fingers into it. Don't worry about how much water you are using, we'll cook it down eventually.
    • Pick up the colander and allow all the tamarind juice to strain into the bowl. Transfer the tamarind juice to a cooking pot. You can repeat the previous step if you think there is more juice to be extracted.
    • Add all the seasoning (minus the date syrup) and boil the tamarind juices at medium flame for 20 minutes. Your tamarind juice should be reduced to half its original quantity.
    • Now add date syrup, date paste or any other sweetener you prefer. Let the chutney simmer for another 10 minutes at medium-low heat.
    • Turn off the heat and do a taste test to check salt, heat and sweetness. Adjust salt according to your liking.
    • Allow the chutney to cool down uncovered. It'll thicken a bit more as it cools. Transfer into waterproof jars and store in the fridge.

    Tamarind Chutney using tamarind paste

    • Add all the ingredients in a cooking pot with 4 cups of water. Boil at medium high flame for 5 minutes.
    • Turn off heat and do a taste test to check salt, heat, and sweetness. Adjust salt according to your liking.
    • Allow the chutney to cool down uncovered. It'll thicken a bit more as it cools. Transfer into waterproof jars and store in the fridge.

    Notes

    DATE SYRUP ALTERNATES

    1. Make your own date paste at home by soaking 1 and 1/2 cups of pitted dates in boiling water for 10 mins. Discard the water and blend the dates in a blender to make a paste. 
    2. Other sweeteners you can use are Jaggery, brown sugar, and honey. Use 1 cup of any of these sweeteners for the recipe given above. 

    Other Notes

    • Dahi bara masala is a dry roasted ground spice mix made with whole red chilies, cumin seeds and coriander seeds. For this recipe, use 8 whole red chilies, 1 tbsp cumin seeds and 1 tsp coriander seeds. Dry roast them in pan and grind to make a coarsely ground spice mix.
    • Chaat masala is a South Asian finishing spice used to sprinkle on salads, and street food and other recipes. You can easily get this in any South Asian grocery store. IF you don’t have any, you can skip it altogether and just increase the dahi bara spice by 1 tsp.
    • Optional Ingredients – Asafoetida (hing) and dry ginger powder (saunth) are also 2 commonly used ingredients in a tamarind chutney. Add a pinch of Asafoetida and 1/2 tsp of ginger powder to add another layer of flavor.
    • Store the chutney in an airtight jar in the fridge. It can last for 2 to 3 months. 
    • To freeze the chutney, transfer it into a ziplock bag and freeze. Simply thaw on counter when need to use. 

    Nutrition

    Serving: 1cupCalories: 287kcalCarbohydrates: 76gProtein: 3gFat: 0.5gSaturated Fat: 0.1gPolyunsaturated Fat: 0.03gMonounsaturated Fat: 0.1gSodium: 786mgPotassium: 692mgFiber: 8gSugar: 60gVitamin A: 17IUVitamin C: 1mgCalcium: 54mgIron: 2mg
    Can’t wait to see your remakes! Tag meon IG with your pictures @butteroverbae

    Chicken Tikka Samosa

    January 22, 2021

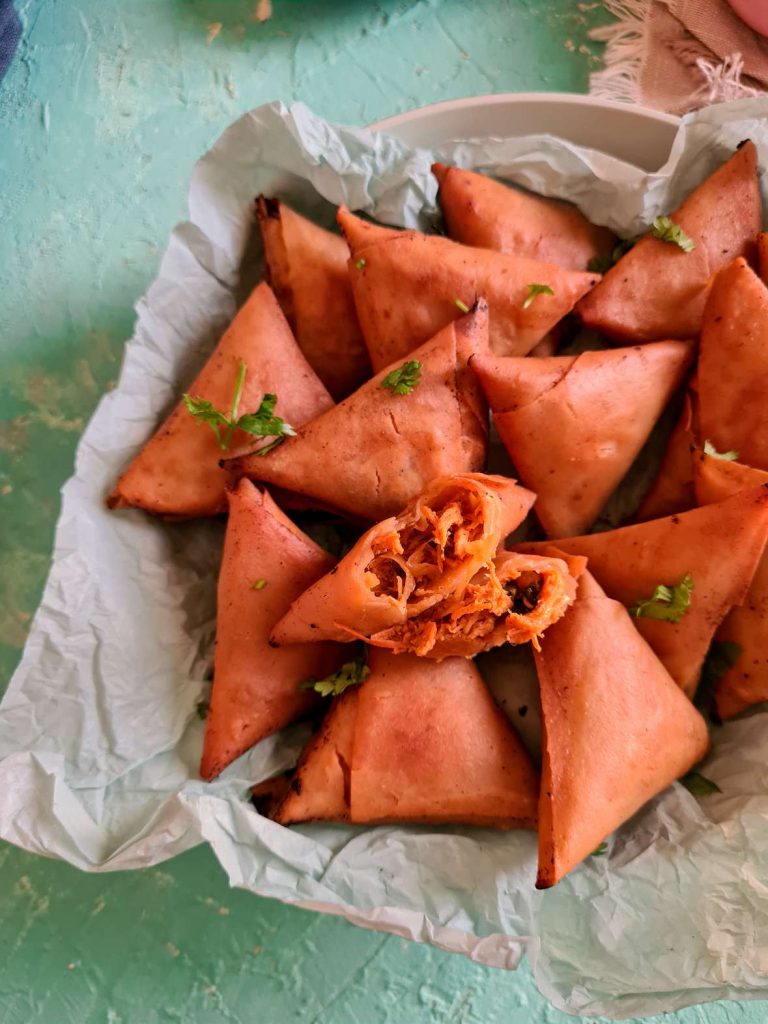
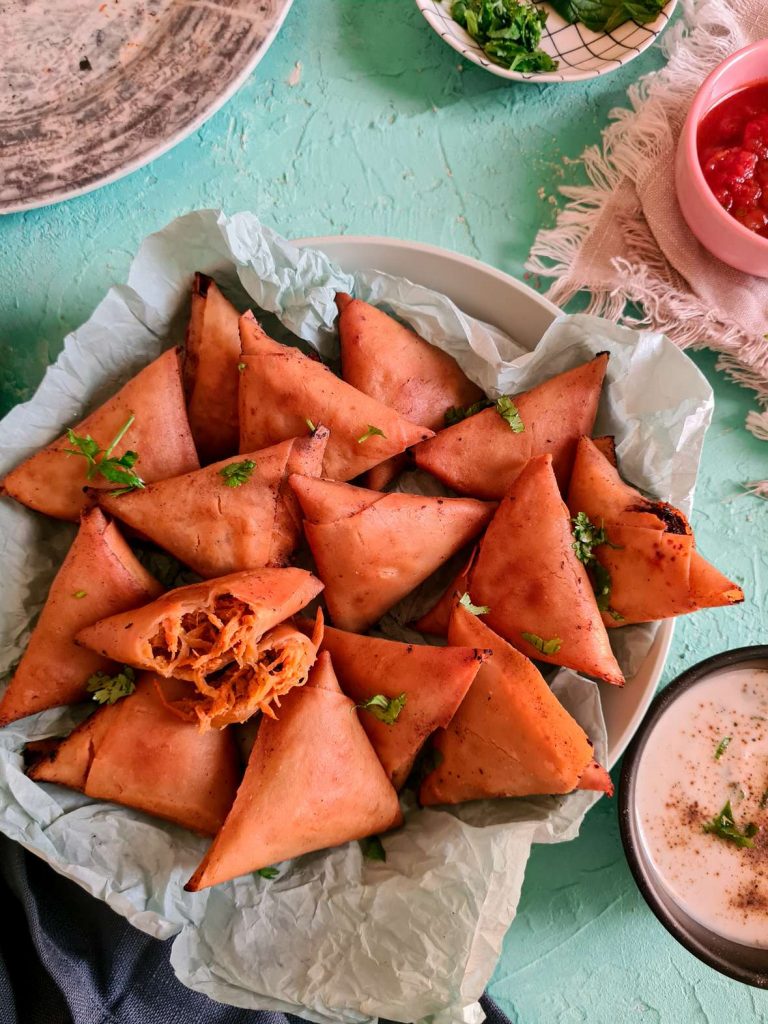
    chicken tikka samosa in a bowl.

    Chicken tikka samosa are our favorite Ramadan treat! This recipe is also the perfect excuse to use any leftover chicken tikkas from last night.

    WHAT are SAMOSAS?

    Samosas are fried or baked pastry which has savory or sweet fillings in it. There are different ways you can fold a samosa. Most popular ones include the triangles, moon shaped or boxed. You can either make the wrapping pastry from scratch or use ready made sheets. This recipe uses ready-made samosa sheets.

    chicken tikka samosa folded and fried in a bowl

    Ingredients

    Chicken Tikka Filling

    • Chicken – For this recipe you need boneless chicken fillets, thigh or breast. If you are making it with regular bone-in chicken, make sure to pick of all the bones before shredding the chicken.
    • Chicken tikka spice mix – I used my homemade chicken tikka spices to season and flavor this recipe. But you can also use the boxed ready to use spice mix available at most grocery stores. Follow the instructions on the box and just add an additional 1/2 tsp of salt and 1/2 cup additional yogurt to the marinade to compensate for the additional onions and mint that is going to go in the filling.
    • Cream – This recipe needs about a dollop of cream. You can use any cream available to you, including the canned ones, fresh, tetra pak or cooking creams.
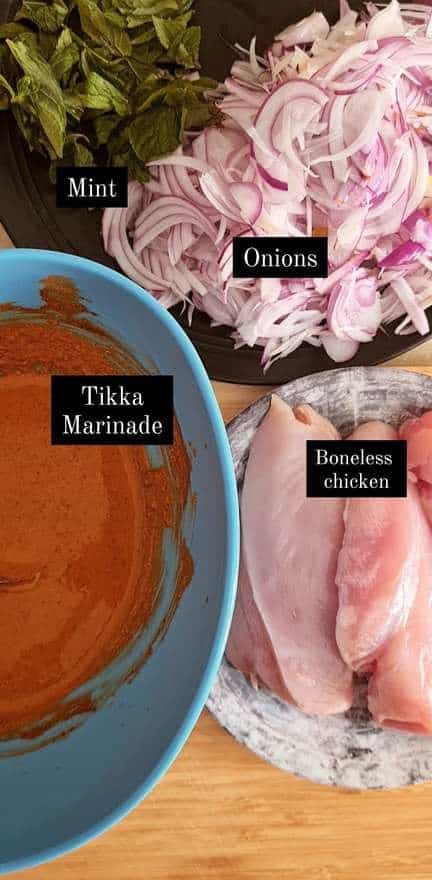
    • Onions and Mint – The onions help in forming the bulk of the filing so that you can make more samosas (life hack!) but also, they add to the tikka-ness of the filling, it that even makes sense lol
    • Charcoal – A small piece of coal to give that smoky flavor to the tikka chicken filling. If you are sensitive to smoke, you can also use 1/2 tsp of liquid Smoke. It is essentially a smoke essence that you can use with ease to flavor your dishes.
    sliced onion, mint leaves, raw chicken fillet and a tikka marinade shown seperately as ingredients

    Wrapping

    • Flour slurry – You need a DIY edible glue to keep the folded samosa edges intact. A mixture of flour and water is the most popular choice, but you can also use just water as well. I personally prefer the flour slurry because I feel like it flows into small nooks and seals those as well.
    • Samosa Wrappers – These are long rectangular dough sheets that are easily available in South Asian or Mediterranean stores. You can also make them at home if you are willing to put in the effort. You can also use square spring roll sheets and cut them into 3 strips. Each strip can be used to fold samosas. Here in the Middle East, the brand that I use is called Switz which is way better than others available in the market.

    Instructions

    When you make the chicken marinade, and marinate the chicken, you will notice that the marinade is more than needed. That’s ok! You need the leftover marinade to season the onions.

    The chicken only needs a 20 mins marination time.

    chicken fillets marinated in red tikka masala in a pot

    Simply grill the marinated chicken pieces in a pot or on a pan at low flame. Add 1/2 cup of water as well towards the end. Cook the chicken covered and pierce the pieces to check if they are cooked.

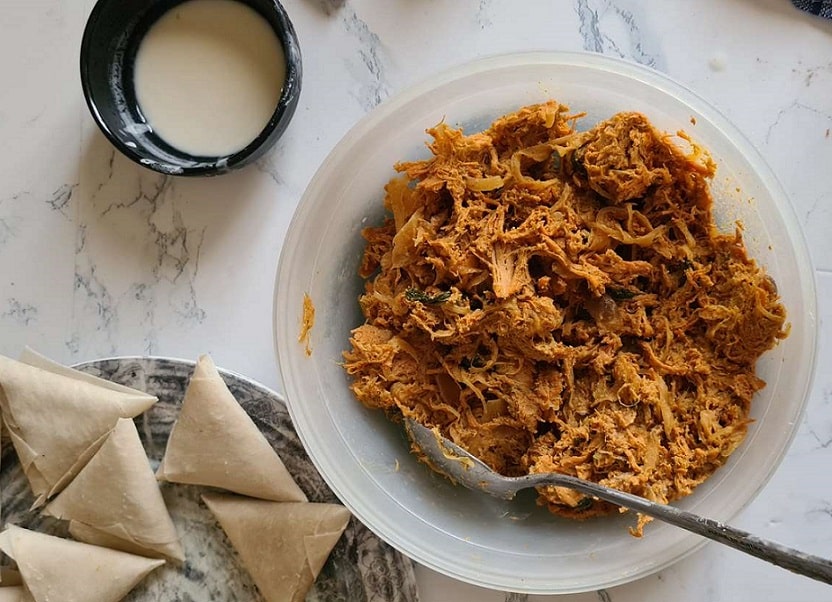
    Now remove the pieces of tender chicken in a bowl and shred them. I find using a hand mixer does the job within 2 mins! Simple use an electric beater or a stand mixer with the paddle attachment and see the magic happen!

    • shredded chicken tikka

    Now come back to the pot with another tablespoon of oil and add in your onions, mint and leftover tikka marinade. You need to cook these for about 10 mins at low flame or until all the water from onions have dried out.

    NOTE: Always dry out water from onions or any other vegetable for samosa fillings, because excess moisture can leach out while frying and cause the oil to splatter or make your samosas soggy.

    • raw onions, mint leaves and tikka marinade in a pot
    • orangish red spicy onions cooked in a pot

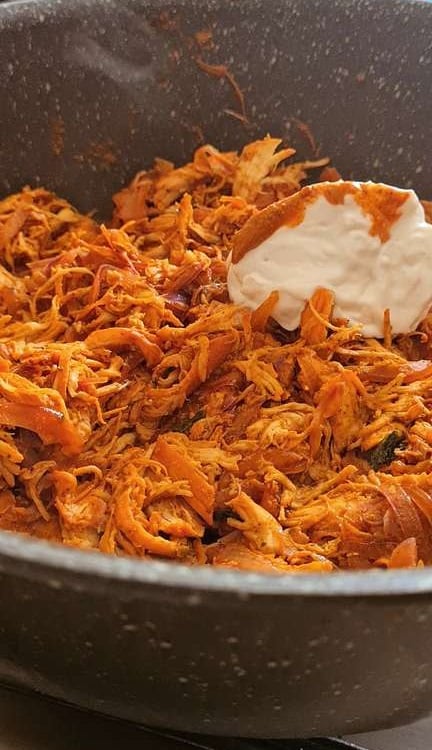
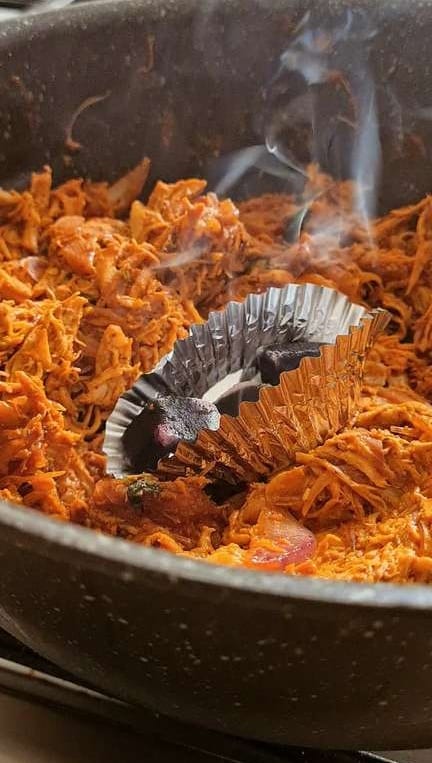
    Add the shredded chicken back in the onions with a bit of cream and mix well. Now I heated up some coal on the stove and added it to the chicken with a tablespoon of oil on top of the coal and covered it for about 10 mins. This gives your filling a nice smoky flavor.

    PROTIP: Use an aluminum muffin liner to hold your coals safely on top of the chicken.

    • a dollop of cream added on top of samosa filling in a pot
    • an aluminum muffin liner with coal in it kept in pot with samosa filling in it

    After your filling cools down, you start assembling. You’ll need your samosa wrappers, your flour and water slurry, a plate lined with foil to place all the folded samosas in and some extra foil. If you are new to folding samosas, HERE’s a tutorial you can watch which is quick and easy!

    samosa filling in a bowl, with a white slurry in a bowl on the side and some raw folded samosas in  a plate

    Cooking methods

    Now you can decide if you want to fry them straight away or freeze them for a later date. To freeze, simply put the samosas in the freezer and once they harden up you can put them in a ziplock back and store.

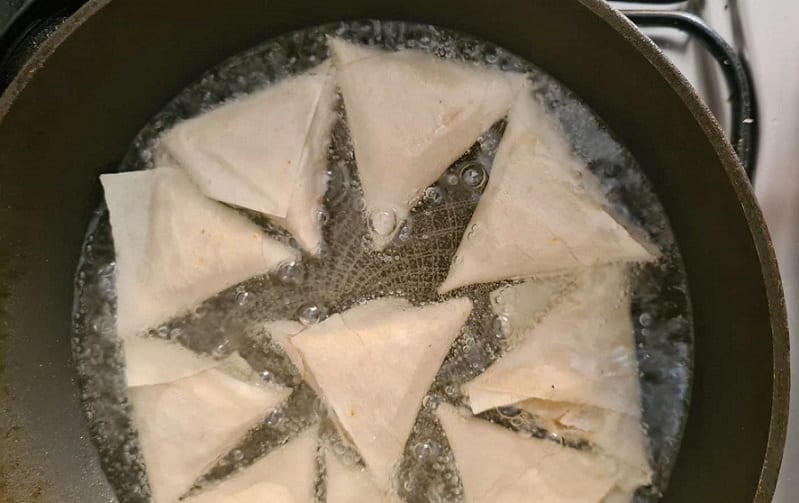
    Frying – Simply heat some vegetable oil (or any oil of your choice) and shallow fry the samosa at medium flame until golden on both sides. Remove them and place them on towel papers to blot any extra oil.

    Airfryer – Preheat to 350 degree F or 175 Degree C and Coat each samosa with oil and arrange them in your air fryer basket. You’ll need about 15 to mins of air frying time. Depending on the size of your basket, you may need to do this a couple of times.

    Baked – To bake the samosas, preheat the oven at 350 degree F or 175 Degree C and grease a baking tray. Place your samosas on it and use a brush to coat it with oil. Bake for 20 mins, flipping over at 10 min mark. Remove when they turn a nice golden brown.

    raw samosas frying in oil in a wok

    Tips

    • Make sure to dry out all the water from onions to make a nice water free filling. If your onions will retain water, after you fry your samosas, they can turn soggy OR produce oil splatters
    • Never overcrowd your plate while freeze the samosas to harden up. Always leave enough space in between so that your samosas don’t touch. Or else the can get stuck together and break when you try to seperate them. Once they are hard enough, then you can easily store them in a ziplock back
    • Same tip for frying, air frying or baking. DO NOT over crowd your pans, or airfryer basket, to get nice crispy samosa.
    chicken tikka samosas in a bowl with sauces on the side

    FAQS

    Can I use leftover Chicken tikka from last night to make this filling?

    Absolutely! In Fact that’s how I made these samosas for the first time. Just use half of the marinade quantity mentioned and start the recipe from shredding the chicken!

    Can I reheat leftover fried/baked samosas?

    Yes you can! IT won’t be exactly like it was when freshly baked or fried but it’ll be VERY close. Heat a frying pan at medium flame and then turn it to low. Simply place the samosa on a frying pan (sprayed with cooking oil) and leave at low flame for 10 mins, flipping halfway through. They should be ok!

    I don’t like onions very much, can I skip it or substitute it?

    The onions help this recipe in 2 ways, they add bulk to the filling so you’ll have more filling than you would with just chicken. And it also bring about a mild sweetness. IF you are not a fan of the onions, you can skip it and use boiled and grated cauliflower instead. IF you want to skip vegetables completely, then reduce all the spice quantities mentioned by half.

    Can I use the filling in other recipes?

    Wraps, sandwiches, open sandwiches, puff pastry or for stuffed buns. These are all amazingggg options to use the tikka chicken filling in. You can also add the filling to boiled and mashed potatoes to make potato and chicken cutlets.

    Similar Recipes

    As you can see, I am little obsessed with this spice blend!

    Chicken Tikka Biryani
    Grilled Chicken Tikka
    Chicken Tikka Nachos
    Chicken Tikka Sandwich
    Tikka flavored chicken nuggets

    samosas laid on a blue paper with some ketchup on the side

    Chicken tikka samosas

    A tikka flavored chicken and onion filling for samosas
    4.88 from 16 votes
    Print Pin
    Course: Appetizer, iftar, Snack
    Cuisine: Fusion Food, pakistani
    Prep Time: 35 minutes minutes
    Cook Time: 20 minutes minutes
    Total Time: 55 minutes minutes
    Servings: 33 medium samosas
    Calories: 45kcal
    Author: Wajiha

    Ingredients

    • 500 gm boneless chicken fillets
    • 2 tbsp cream fresh / canned / cooking or any that is available
    • 4 cups sliced onion or 240 gm (or 4 medium onions)
    • 1/2 cup mint leaves about a handful
    • 3 tbsp all purpose flour
    • 30 samosa sheets.
    • 2 pieces charcoal to give smoke.

    Chicken Marination (to use boxed spices see notes)

    • 1 1/2 tsp Salt
    • 1/2 tsp Black pepper powder
    • 1 tsp Red chili powder
    • 1/4 tsp Turmeric powder
    • 1 tsp Cumin powder zeera
    • 1/2 tsp Garam masala powder all spice powder
    • 1 tbsp Garlic ginger paste
    • 1 tsp Coriander powder
    • 3 pinches of orange-red food color
    • 2 tbsp Lemon Juice
    • 2 tbsp Vinegar
    • 1/2 cup yogurt

    Instructions

    • Mix everything together from the chicken marination list and marinate the chicken in it for about 20 mins.
    • In a pot or a pan, add 2 tbsp of oil and turn it on at medium flame.
    • Tap the chicken pieces to make sure the extra marinade stays in the bowl and add the chicken fillets in the pot. Sear lightly on both sides for 5 mins. Add 1/2 cup of water and cover the lid to cook the chicken through for another 10 mins.
    • Turn off the flame and remove the chicken in a bowl. Use the paddle attachment in a stand mixer or a hand held electric beater to shred the chicken within 2 mins. Set aside.
    • In the same pan, add another 1 tbsp of oil at medium low flame and add onions, mint leaves and left over chicken marinade.
    • Allow the onions to cook for around 10 mins or until all the water from the onions dries up.
    • Add the chicken and cream back into the onions. Mix at high flame for 2 mins. Turn off the flame and allow the chicken to cool down.
    • Assembling
    • Make a flour slurry by mixing flour with about 1/2 cup of water. You can also use plain water if you like.
    • Use a tablespoon of filling to fill each samosa wrapper and sealing with the flour slurry.
    • Place all wrapped samosas on a plate and fry/bake directly or freeze for later.
    • Frying/Baking
      Airfryer OR Baked- Preheat airfryer or oven at 350 degree F or 175 Degree C and Coat each samosa with oil and arrange them in your air fryer basket. You’ll need about 20 to min to get a nice golden color, flipping the samosas at the 10 min mark. Depending on the size of your basket, you may need to do this a couple of times

    Notes

    • You can also use Boxed or packet pre-made chicken tikka spice mix instead of using all the ingredients mentioned in the chicken marination, simply follow instructions on the box and add 1/2 tsp extra salt.
    • To freeze samosas, allow them to harden up on a plate in the freezer without touching each other, and then put them in a ziplock bag and freeze for about 3 to 4 months.

    Nutrition

    Serving: 1samosaCalories: 45kcalCarbohydrates: 2gProtein: 3gFat: 1gSaturated Fat: 0.4gPolyunsaturated Fat: 0.2gMonounsaturated Fat: 0.3gTrans Fat: 0.003gCholesterol: 16mgSodium: 123mgPotassium: 56mgFiber: 0.2gSugar: 1gVitamin A: 65IUVitamin C: 1mgCalcium: 11mgIron: 0.3mg
    Can’t wait to see your remakes! Tag meon IG with your pictures @butteroverbae

    Hyderabadi khatti dal

    January 18, 2021

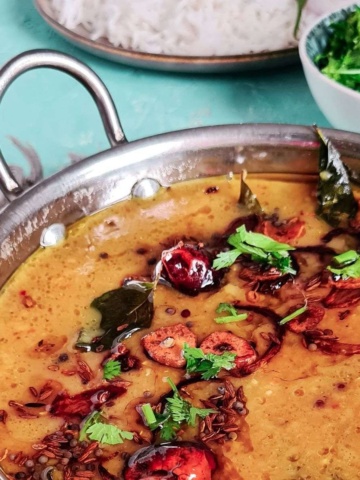
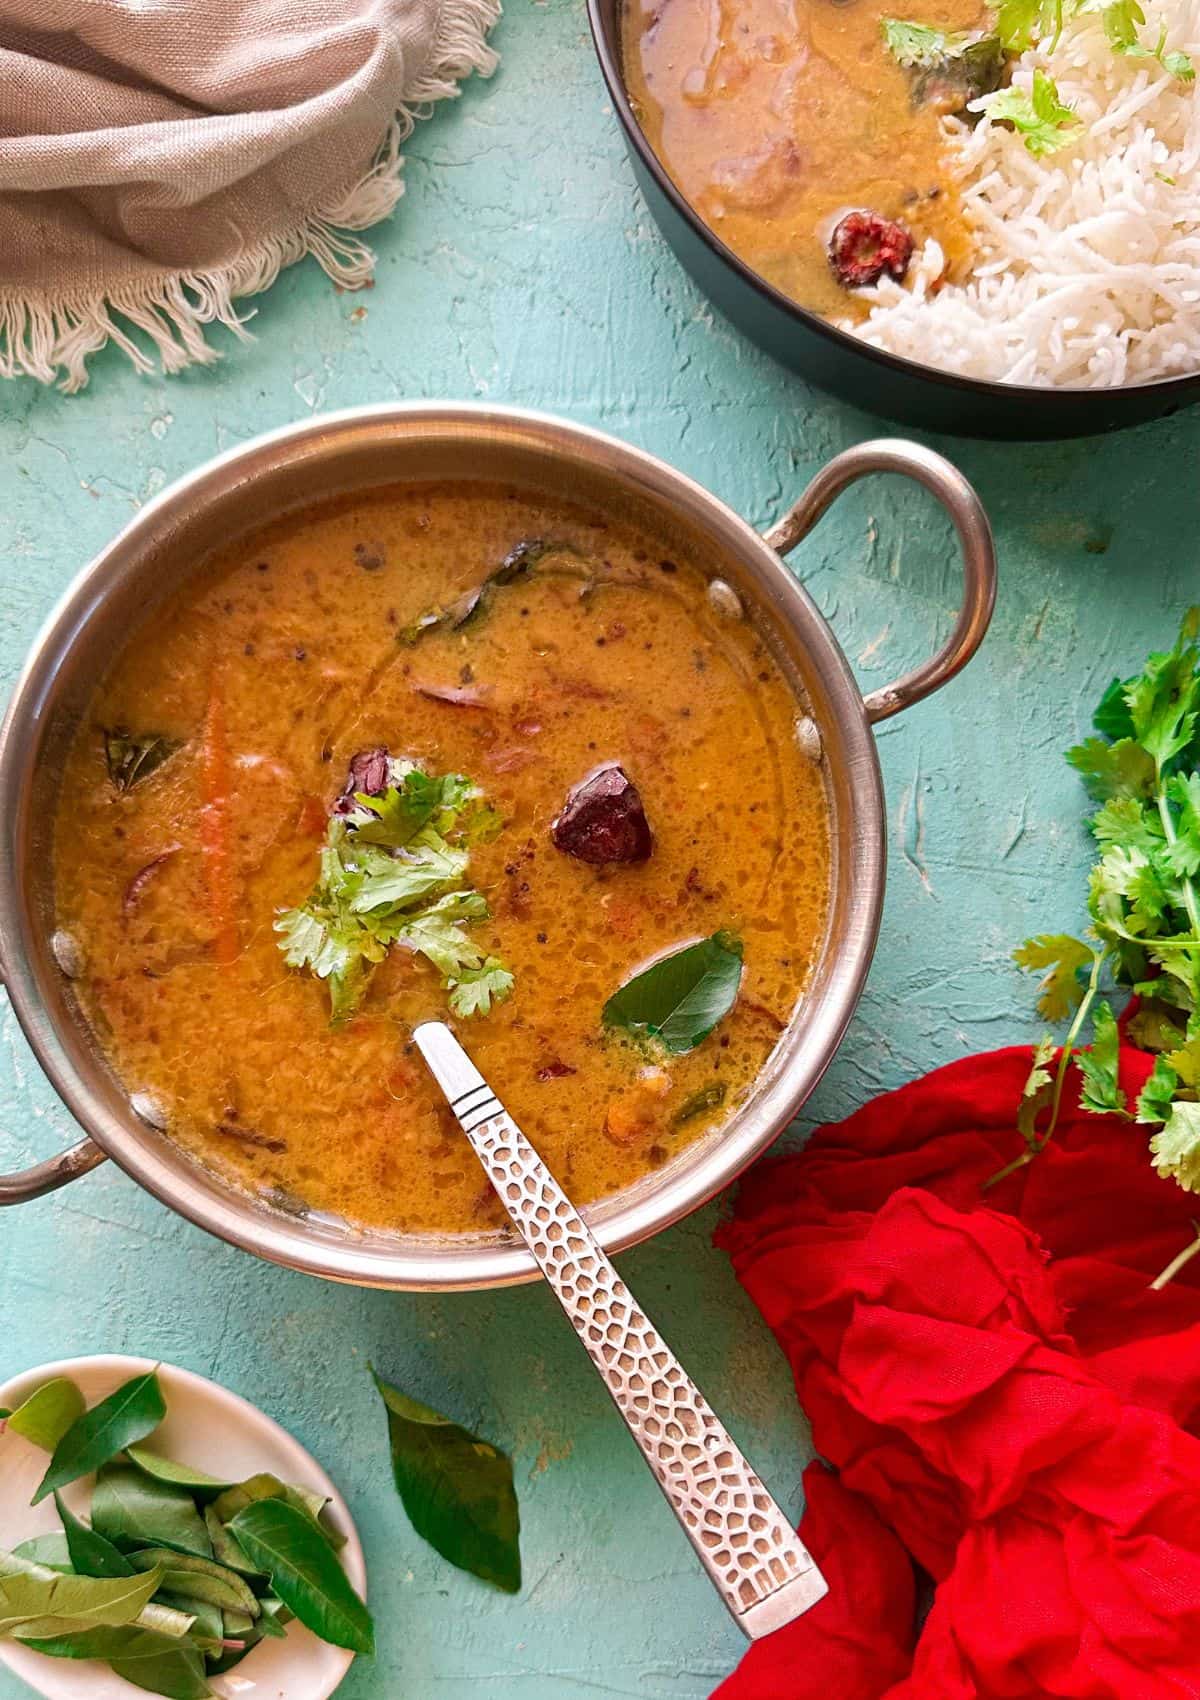
    a view of khatti dal in a steel bowl with some rice and coriander show from the side.

    Learn how to make authentic Hyderabadi Khatti dal at home with this step-by-step recipe. I’ve made lentils (dal) in many different ways over the years. But my family is particularly fond of this red lentil (masoor dal) that packs a delicious tangy taste, making it irresistible. It’s simple, light, nutritious, and perfect for beginner cooks too.

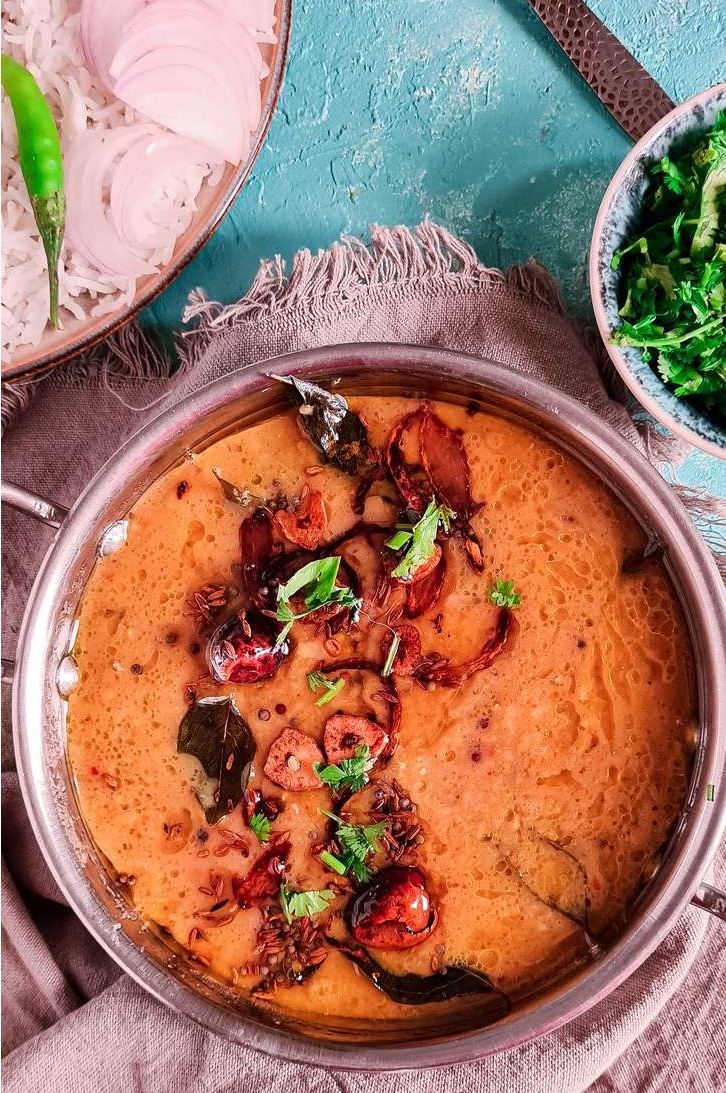
    khatti dal from top view

    What is Khatti Dal?

    Khatti literally translates to “sour”. This recipe uses tamarind to add a nice tart/tangy flavor to the dal. Hyderabadi Cuisine in India/Pakistan is notorious for using tang as a prominent flavor in their recipes. And that is where khatti dal originated from too. Their tamatar ka khatta (tangy tomato chutney) pairs sooo well with so many pulaos outside of their Cuisine too.

    Khatti dal (tangy dal) is usually made of red lentils (masoor dal) or split pigeon pea (arhar dal/tuvar dal). It’s eaten with steamed rice, paper, and other sides made with meat or vegetables. (my favorite being fried fish)

    2 of my khalas (maternal aunts) got married into Hyderabadi families. And I love all the authentic and traditional Hyderabadi food that I’ve gotten to experience through them over the years. And now, that I have so many of you as readers of this blog, I can’t wait to share more.

    Ingredients

    You need basic South Asian pantry staples to recreate this dal at home. Here are a couple of notes on the list:

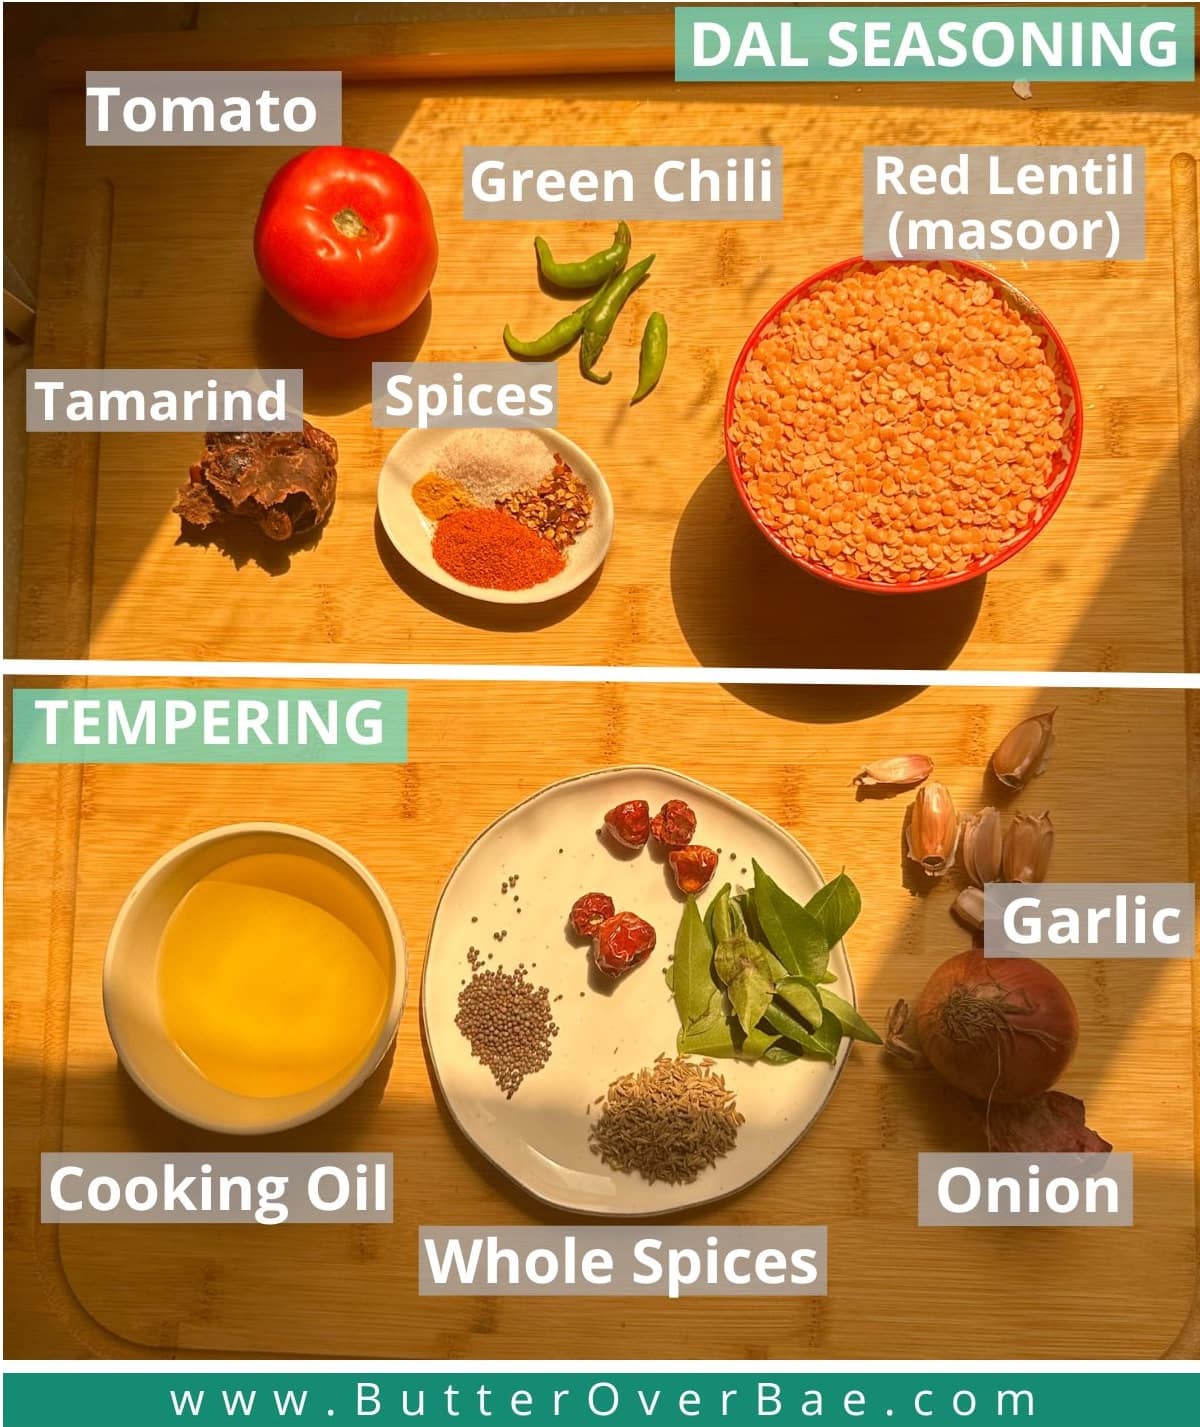
    labelled ingredients for khatti dal.
    • Lentils – We usually make this dal with red lentils which is masoor dal. But people also make it with split pigeon pea (tuvar/arhar dal). Masoor dal is easily available in most stores around the world, distinctive of its orange color.
    • Tomato, onion, and garlic – These are staples for any South Asian recipe. Only use fresh tomato for this recipe. No puree, paste, or canned tomato.
    • Seasoning – You need standard spices like turmeric, salt, red chili flakes, red chili powder, green chilies
    • Whole spices – These are fried in oil and added on top of the dal. Mustard seeds, curry leaves, and cumin seeds are the main trio that makes this dish Hyderabadi
    • Oil – Any neutral oil like vegetable oil is used for this recipe. You can also use coconut oil etc for your recipe, just remember these oils have a slight aroma and flavor of their own too.
    • Coriander leaves – Chopped coriander leaves for the garnish.

    TAMARIND

    Tamarind (emli) – This is the star of this recipe and the main ingredient that brings out the tart flavor. Most grocery stores hold tamarind in either its original raw form, in a block form or a ready-to-use pulp bottle. If you use raw or block tamarind, you will have to soak it in hot water for 10 mins to release the pulp. Then you can simply use your hands to squish the block to release the pulp. Strain and use. To skip this entire process completely, simply get the ready-to-use tamarind pulp. The quantity of tamarind depends on your own preference. You can always add more or less depending on how much tanginess you like.

    See the recipe card for full information on ingredients and quantities

    Step By Step Instructions

    All dals are usually prepared in 3 easy steps – Soak, Boil, and Baghaar.

    Once you soak the dals, almost all dals require 2 cooking steps. One step is boiling the lentils to soften them up. And the other step is making Baghar/Tarka. A baghar (tempered spices) is a process of adding fried spices to a dish, either as the first or as the last step. This dal uses a finishing tarka.

    How Long to soak the lentils?

    This has become an ongoing debate amongst online communities mostly because someone somewhere read the word “antinutrients” online and freaked out. In simple words, anti-nutrients are just some chemicals found in naturally occurring pulses like legumes, beans, and lentils. They are usually removed by soaking them before cooking and cooking itself. (you can read more about anti-nutrients here if you want). Red lentils are the smallest-sized lentils out there, and 30 min of pre-soak time is enough to get rid of any anti-nutrients in the dal.

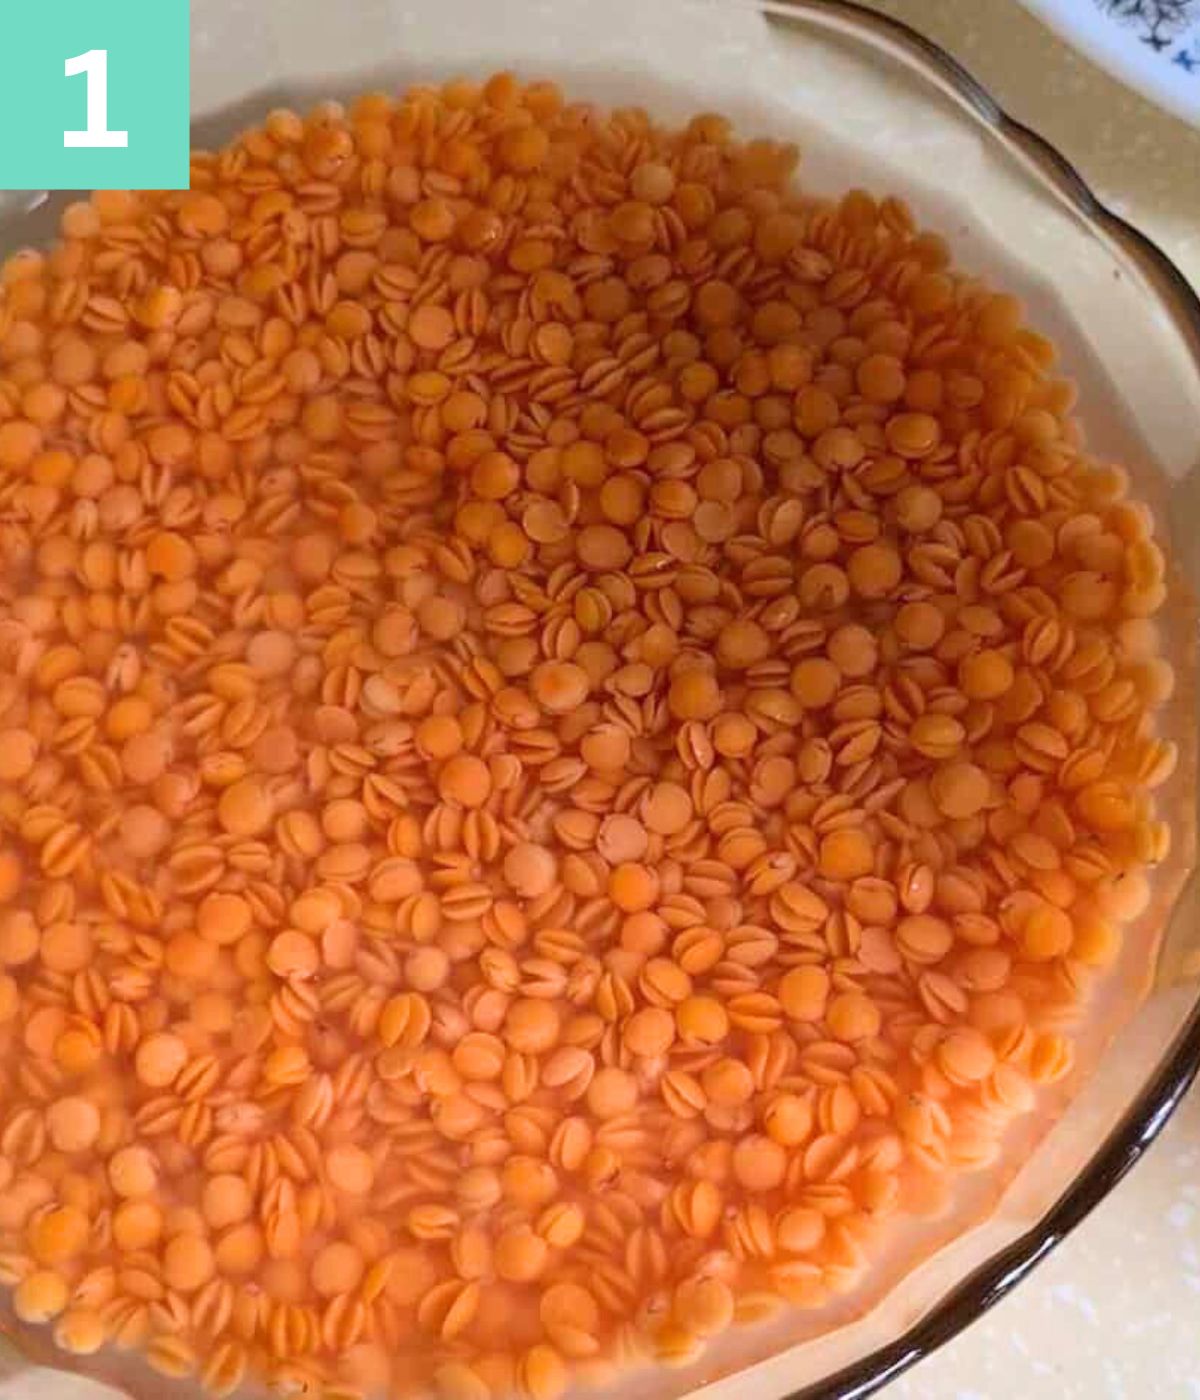
    soaked red lentils in water.

    STEP 1 – Rinse the dal with water at least once and then soak the dal in water for 20 to 30 mins.

    STEP 2 – Boiling the Dal

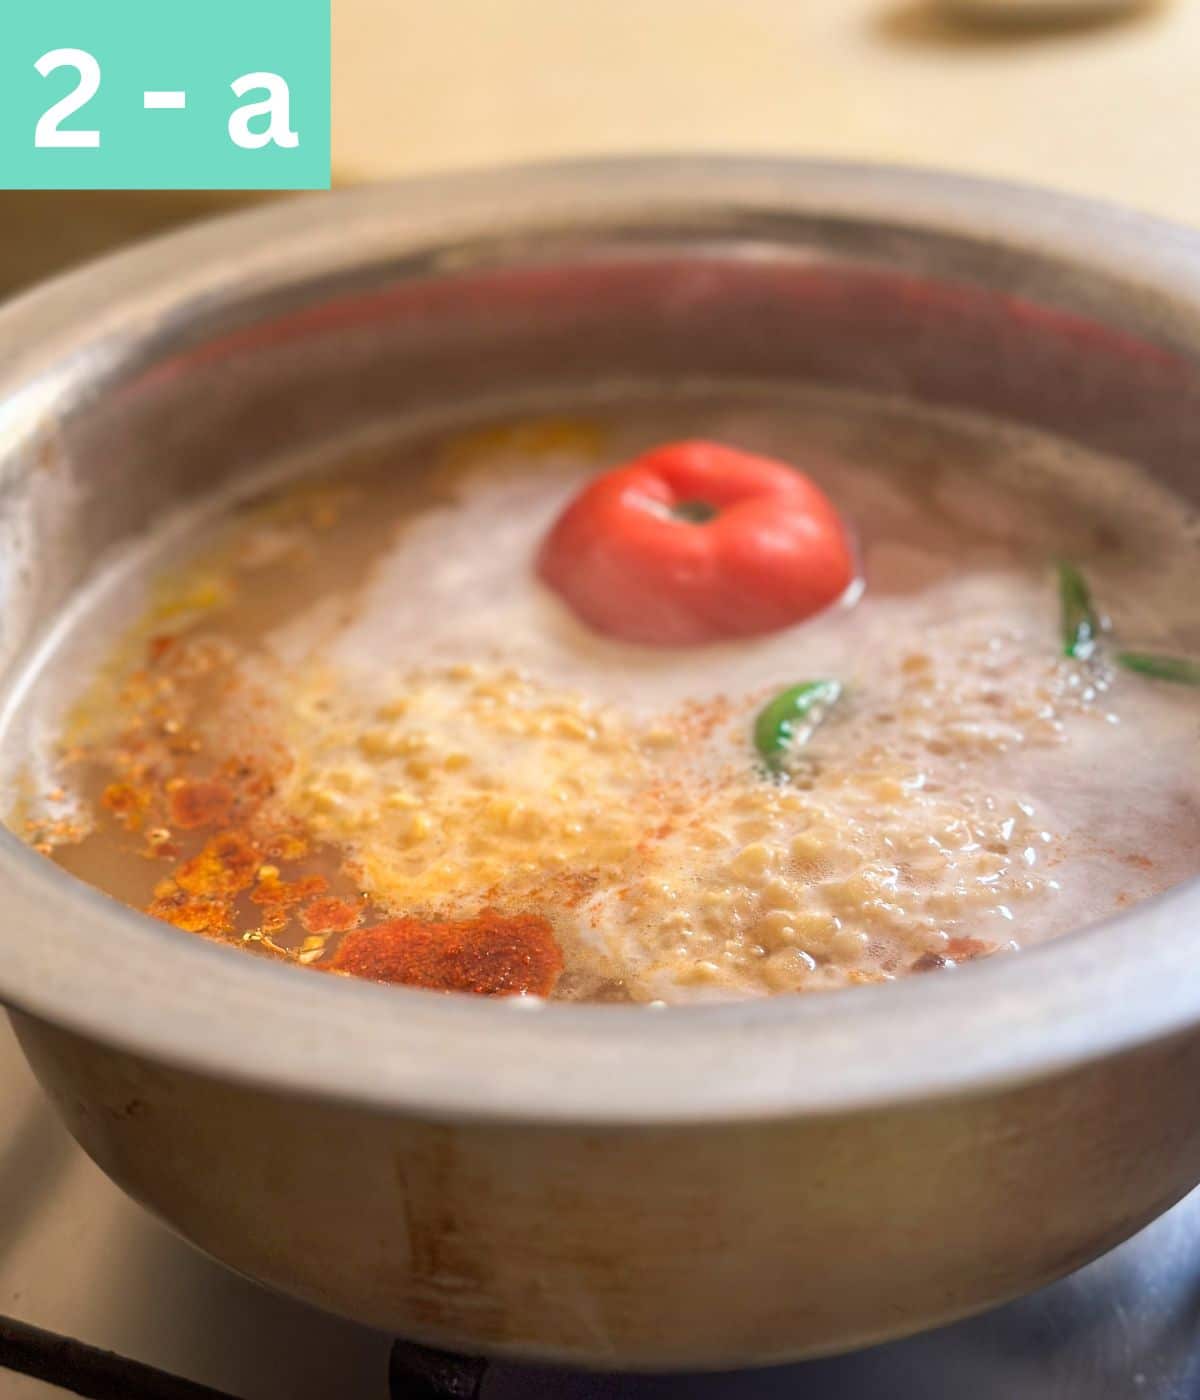
    lentils, spices and tomato in a pot with water.

    STEP 2a- Add spices, tomato, and soaked lentils in a pot with water and bring to a boil. Now cover with a lid and boil for 20 mins or so

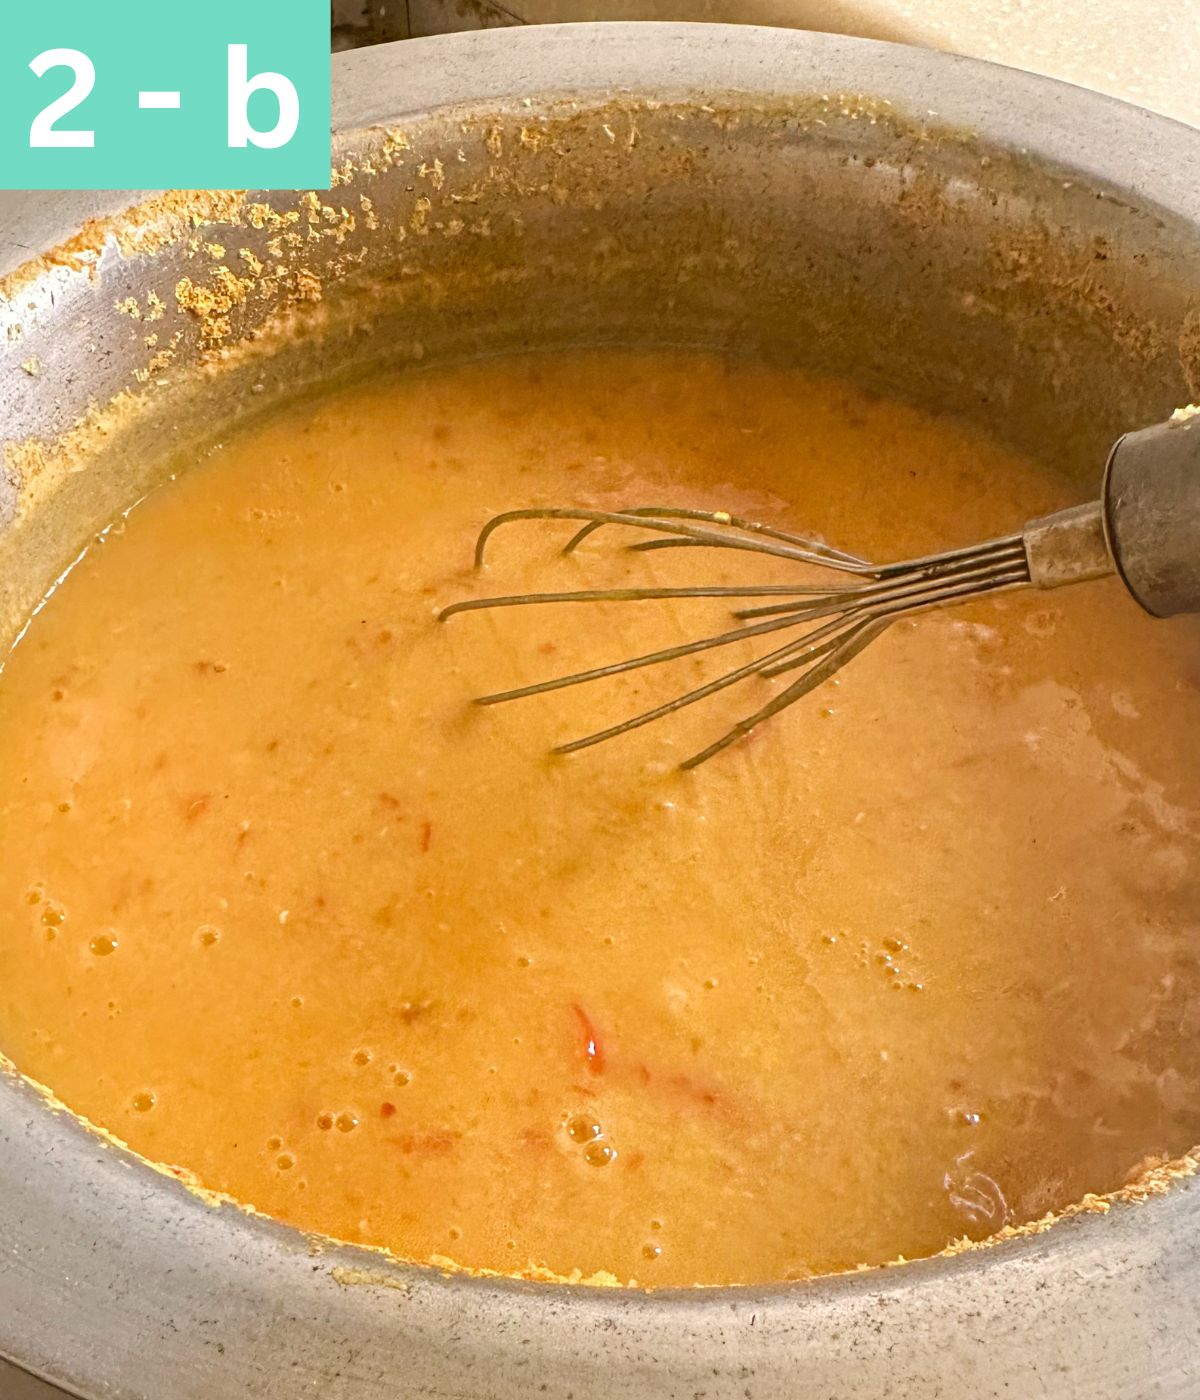
    red lentils and tomato tender and mashed in a pot, with a whisk in it.

    STEP 2b– After the end of 20 mins, use a hand whisk to mash the tomato into the dal. Whisk the dal to make sure all the dal is mushy and you have a nice somewhat smooth dal mix.

    PROTIP: Keep the lid of your dal slightly askew, to prevent your dal from boiling over and dripping all over your stovetop. If your dal is not disintegrating to form a nice soupy consistency, then use a hand blender to quickly reach your soupy consistency.

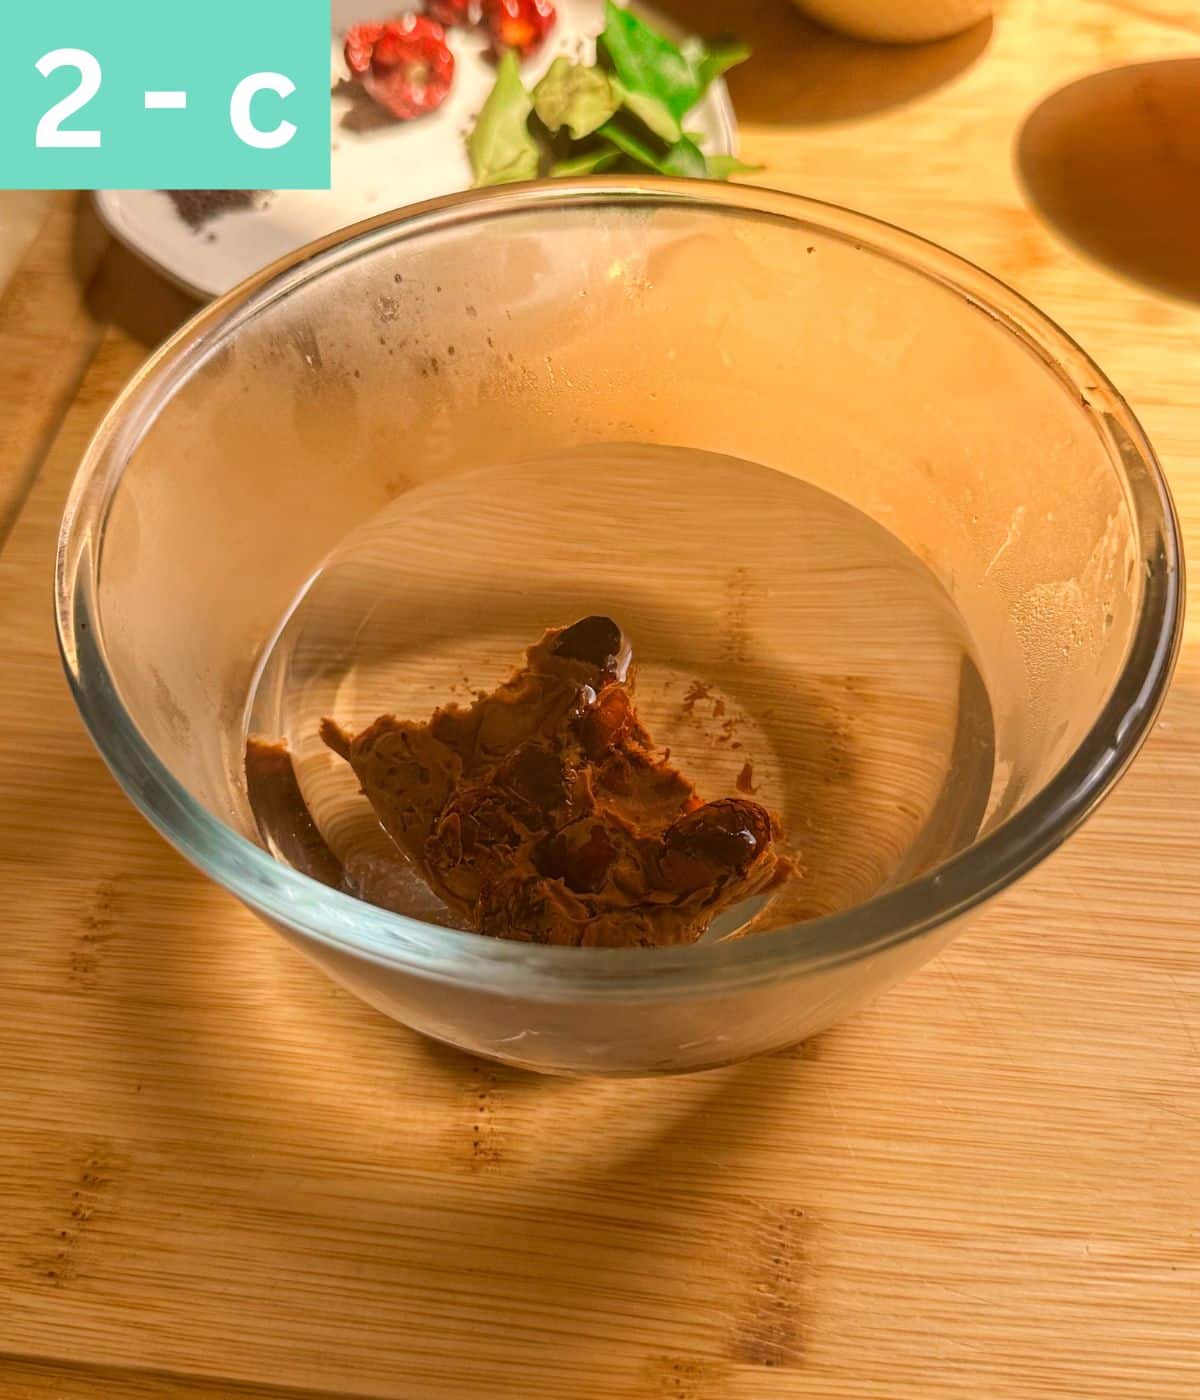
    a small block of tamarind soaked in water in a bowl.

    STEP 2c– Soak a small block of tamarind in a bowl of hot water for 15 mins to release the pulp

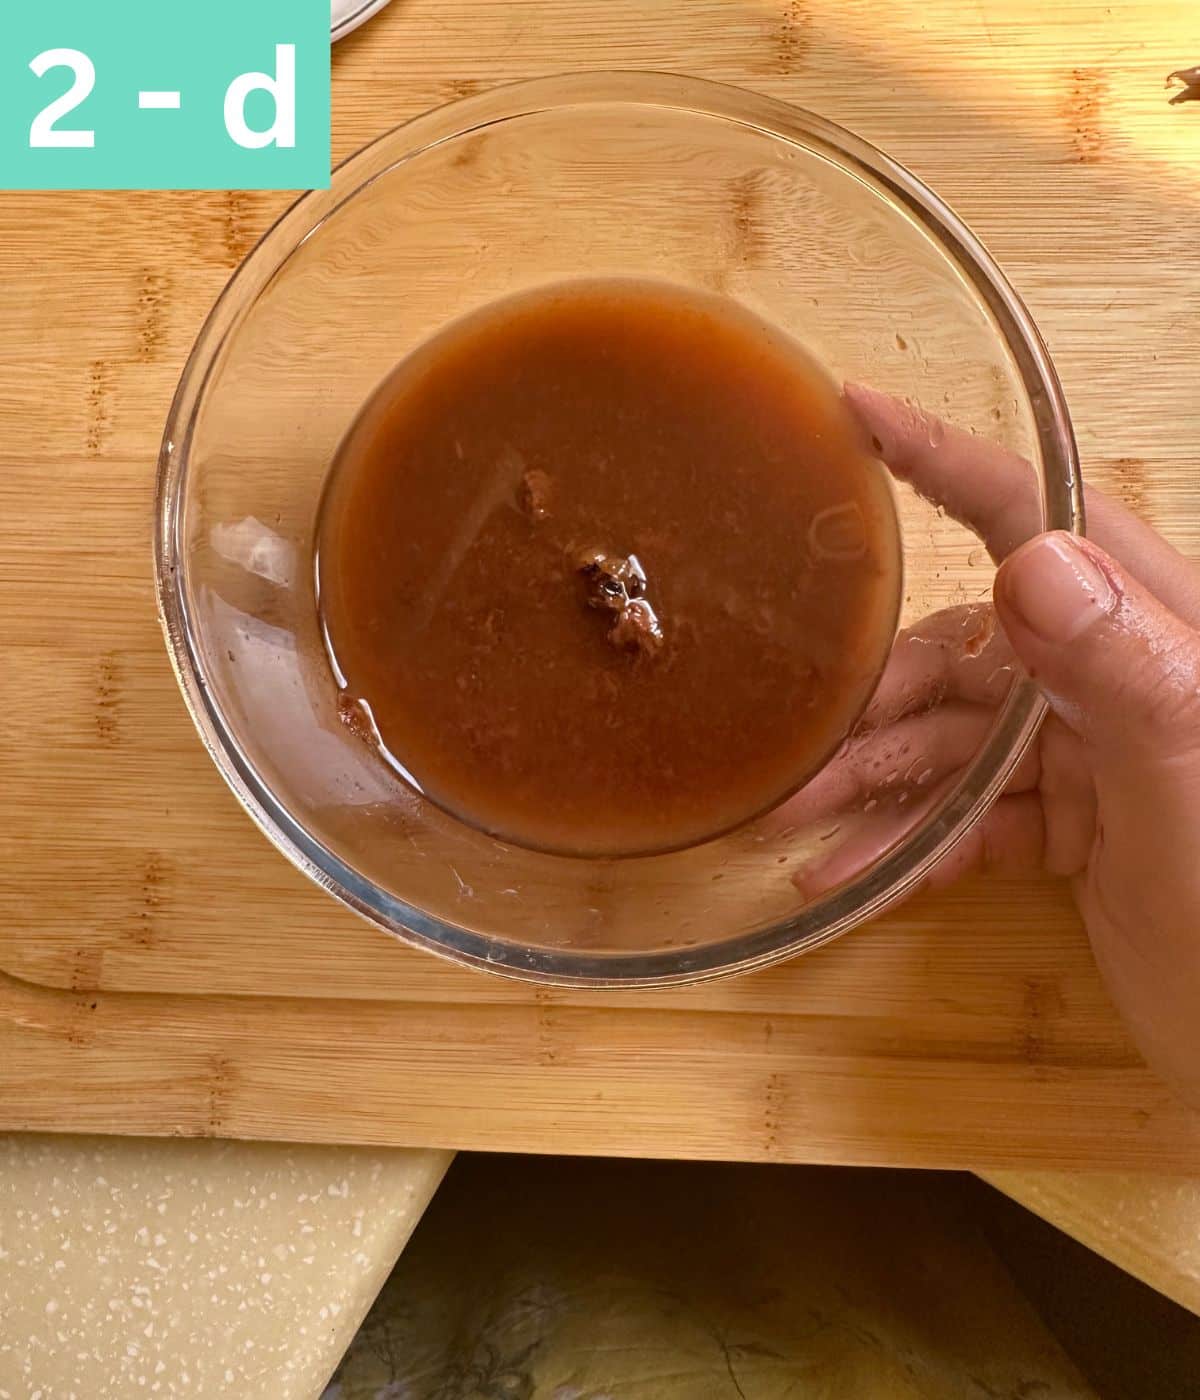
    pulpy tamarind water in a bowl.

    STEP 2d– Use a fork or a spoon to break the block and release all the juices from the pulp.

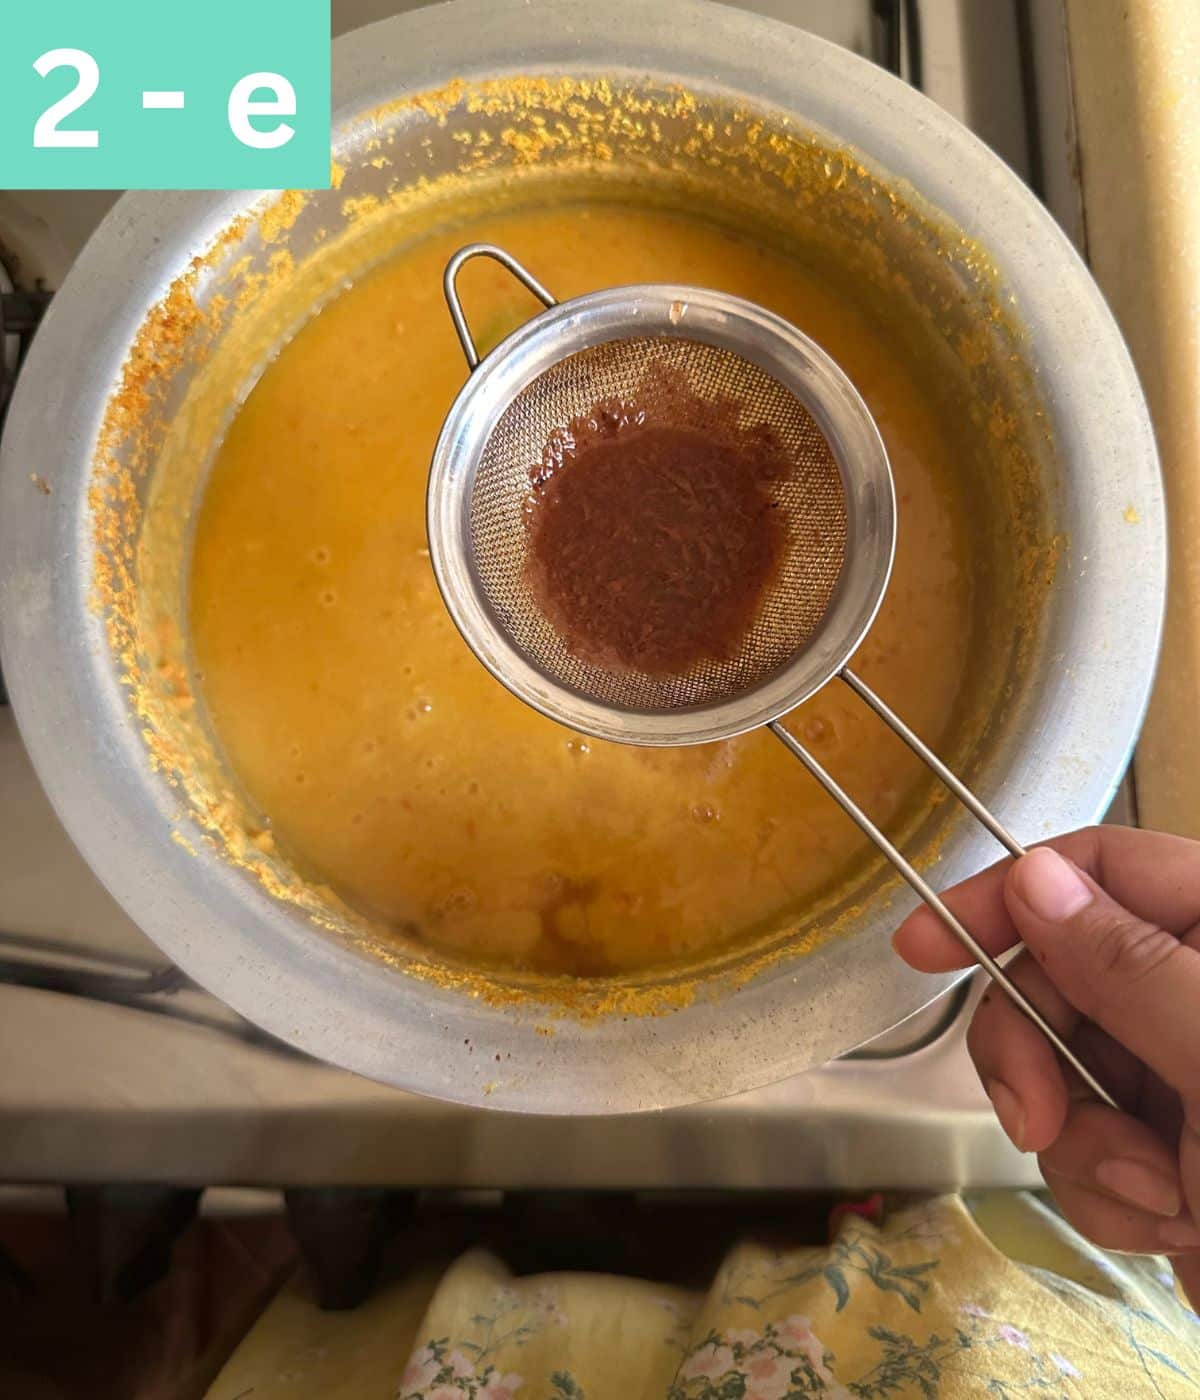
    a small tea strainer being used to add tamarind water to dal without impurities.

    STEP 2e– Pour the tamarind liquid into the dal through a strainer.

    STEP 3 – MAKING THE TARKA

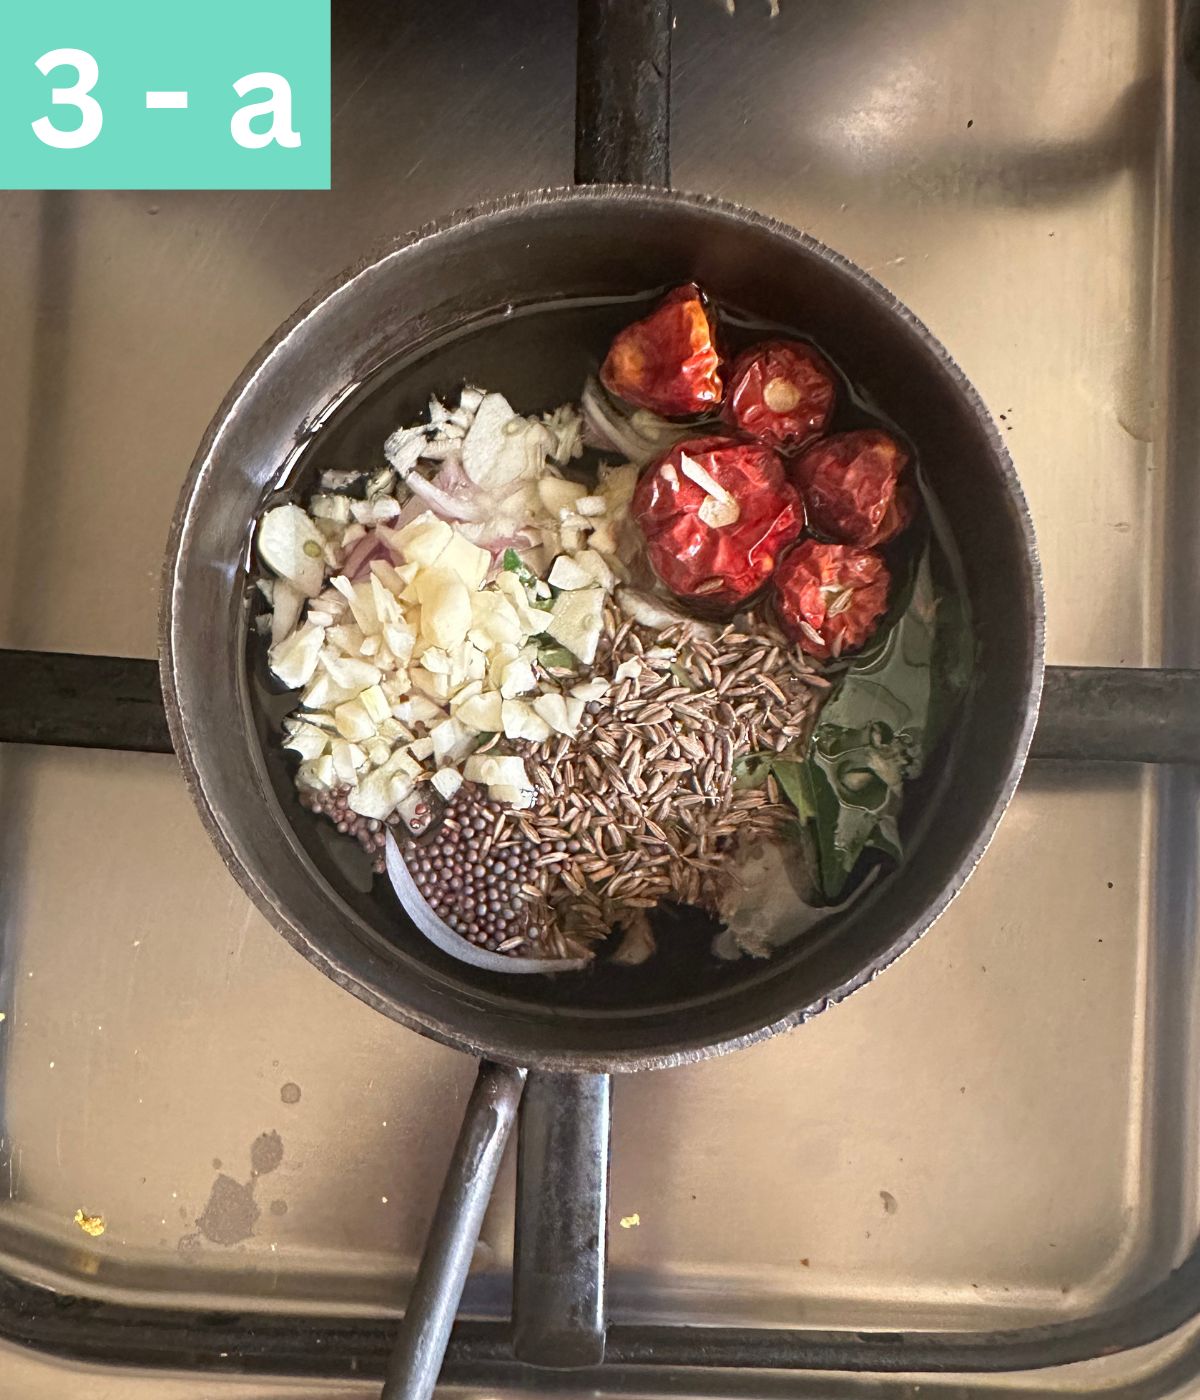
    uncooked whole spices in a pan with oil for tempering.

    STEP 3a– Add whole spices, garlic, onions, and curry leaves in a frying pan and fry in oil.

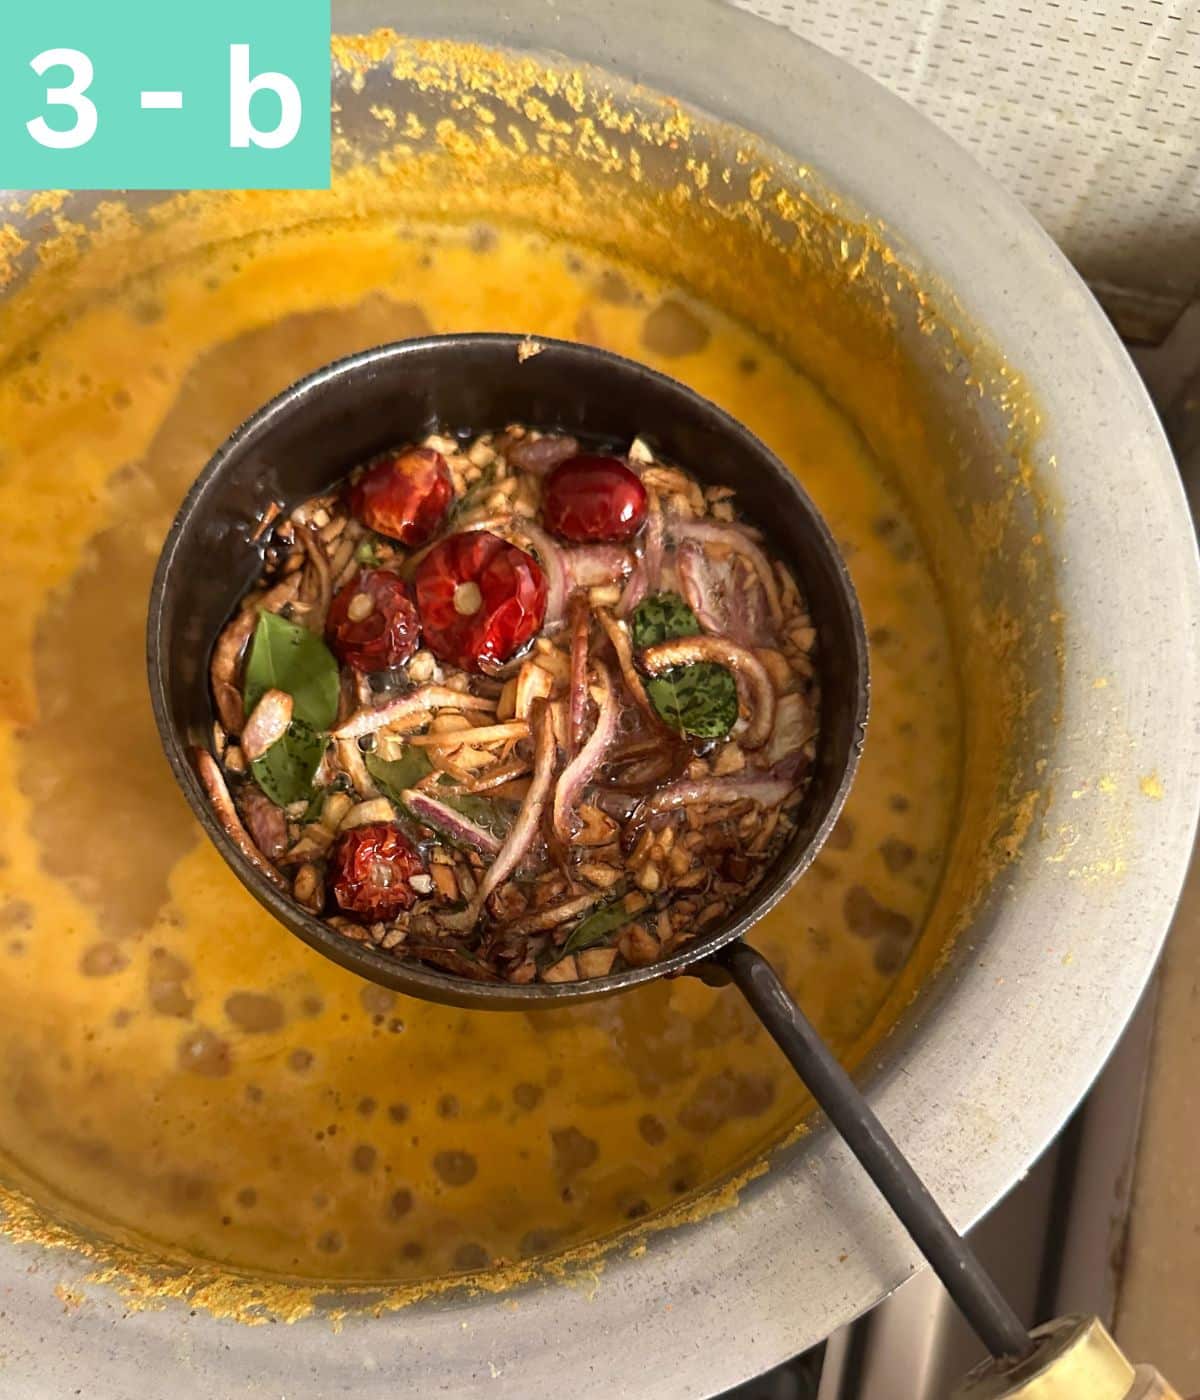
    fully tempered spices with brown onions ready to go in dal.

    STEP 3b– Fry them until the onions turn golden brown.

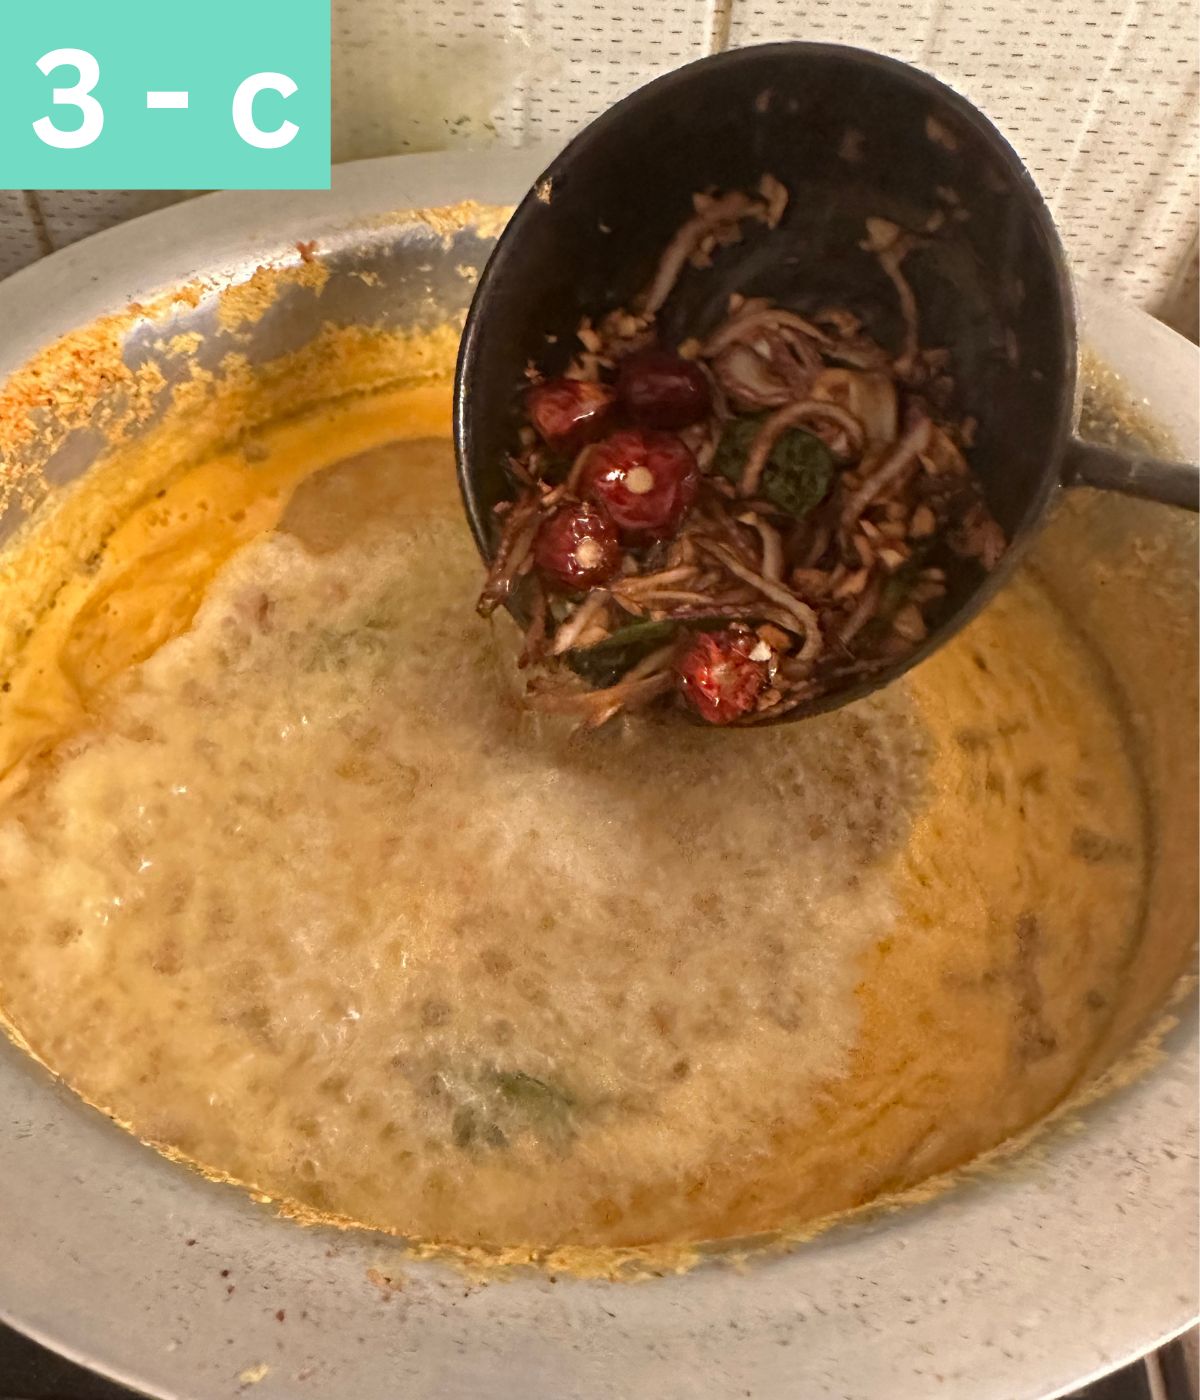
    adding tempered spices to dal.

    STEP 3c– Add the tarka (tempered spices) to the dal.

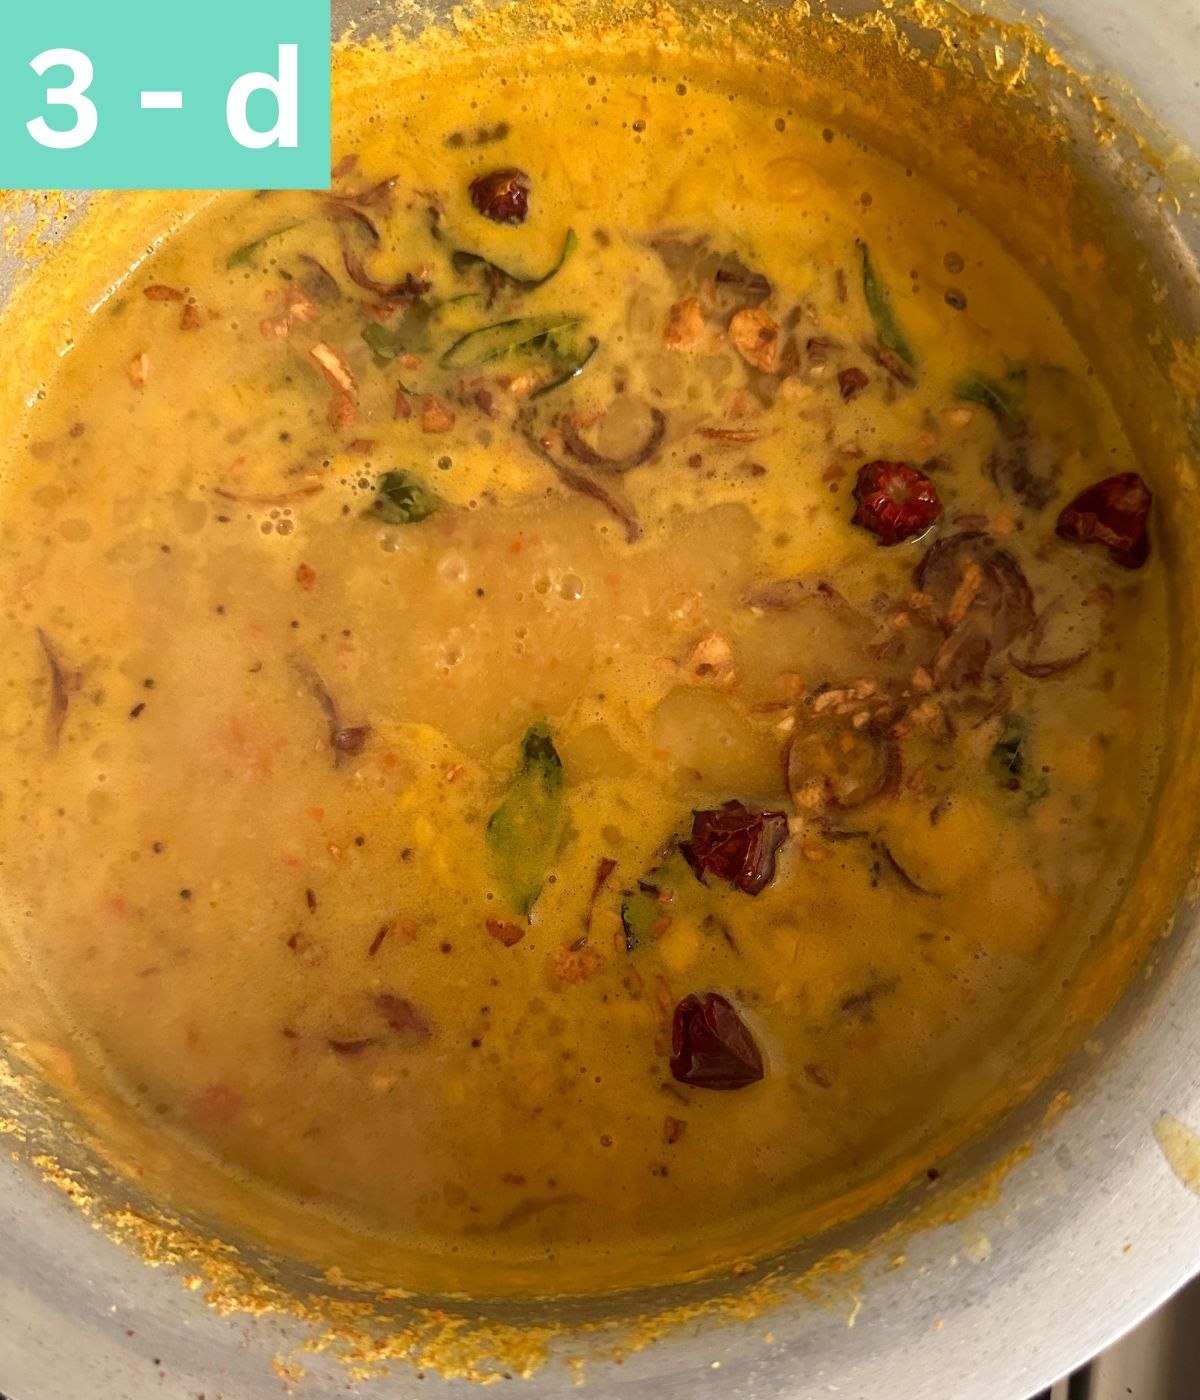
    tarka on top of dal, ready to be served.

    STEP 3d- After adding Tarka, cover the dal with a lid for 5 mins. There is no mixing involved. Simply allow the tarka to sit on top of the dal till you are ready to serve.

    While the Tarka sits on top of your dal, the flavors and aroma infuse together to create a simple yet delicious dish. When you are ready to dish out, garnish with chopped coriander or cilantro and serve hot with rice and all the amazing combos mentioned below

    hyderabadi khatti dal, ready in a bowl.

    Expert Tips

    • For the reasons mentioned above, it’s always best to soak dal before using it, this removes anti-nutrients and reduces cooking time. Discard the water that was used for soaking and use fresh water to boil the dal.
    • Some versions of masoor dal or any dal, sometimes take too long to disintegrate in the water to give a smooth consistency. On those days I like to use my hand blender to quickly give my dal the consistency I want. You can find one here on Amazon.
    • You can use the microwave to reheat dals, but they are best reheated on the stove.
    • Let your dal sit in the pot for 10 mins after you’ve added your tarka/tempered spices, this helps in infusing the flavors in the dal.

    What is Khatti dal paired with?

    Eaten with rice or roti, these are other things you can pair with khatti dal

    • Papad and Achar like Carrot Pickles (gajar ka achar)
    • Any vegetable curry like Lauki ki bhujia (Bottle Gourd mash)
    • Spicy masala fish fry
    • Spinach and potato cutlets
    • Grilled Chicken Tikkas
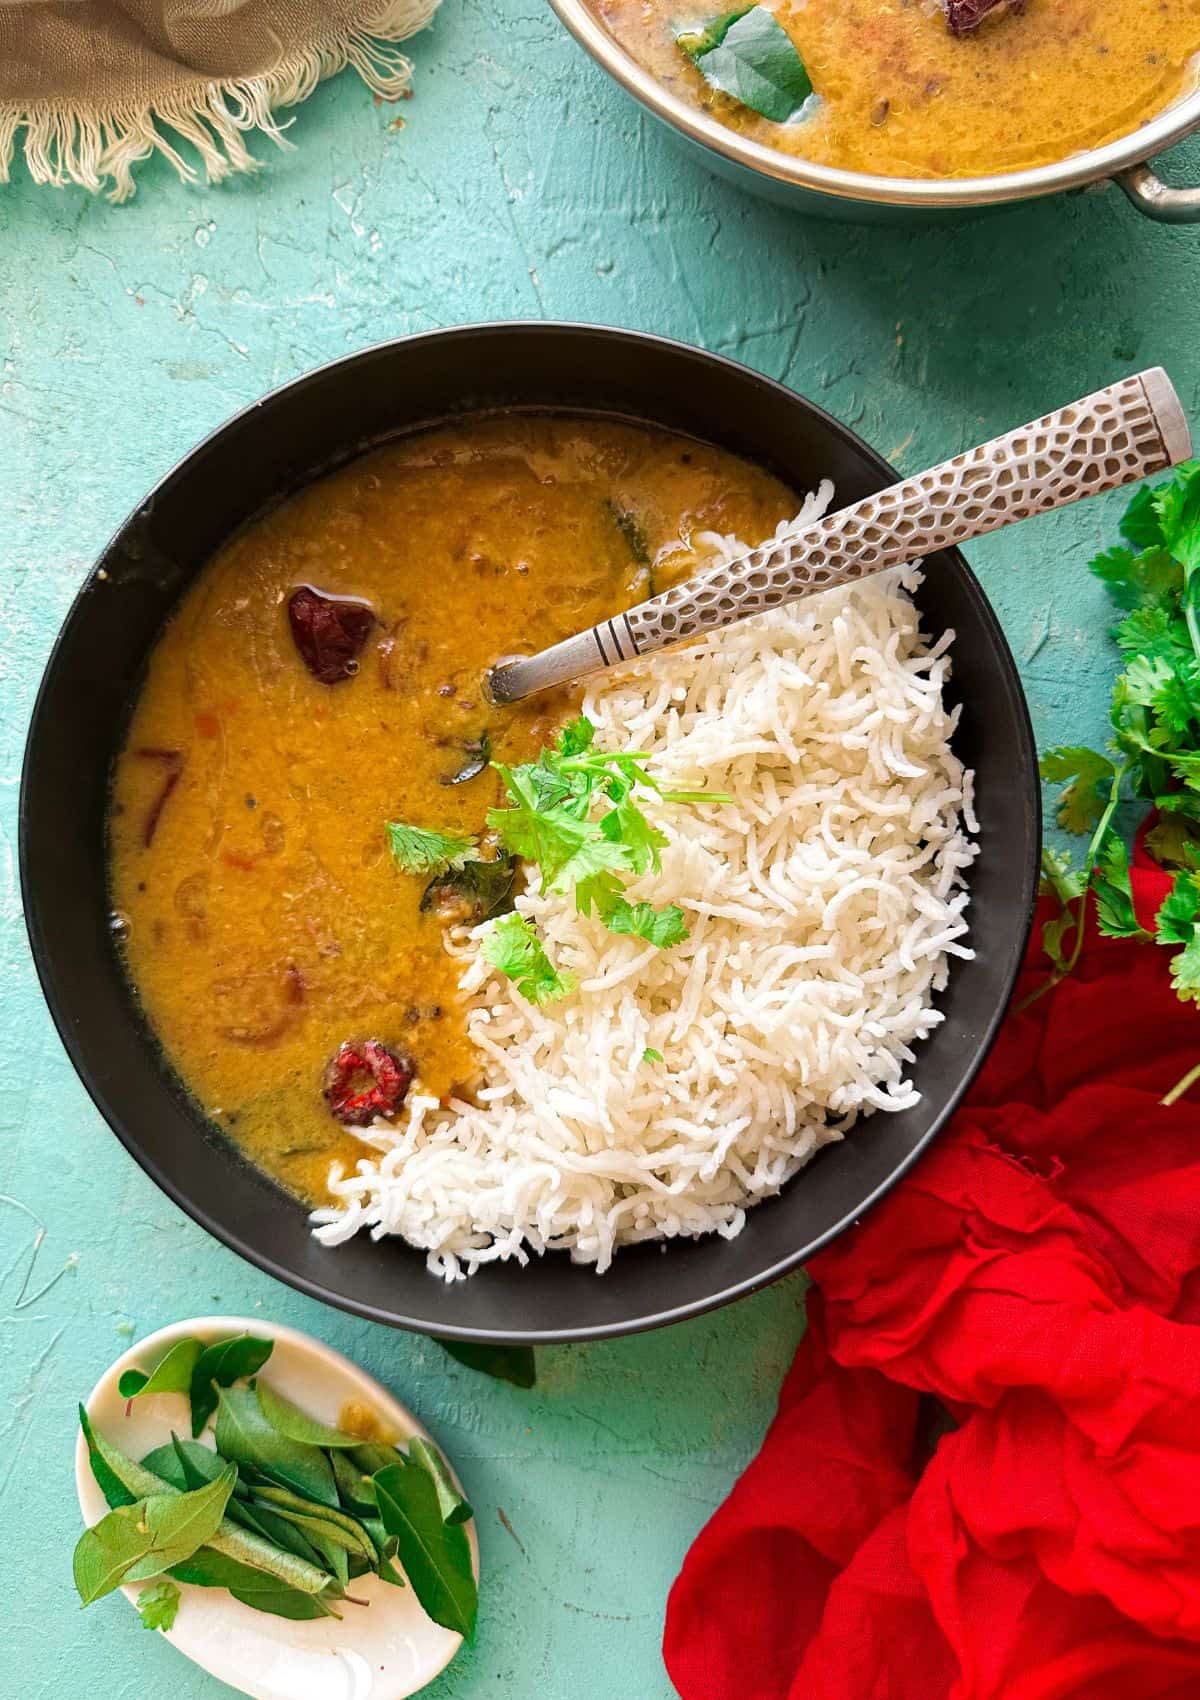
    khatti dal served with rice in bowl.

    Recipe FAQs

    What if I soak my lentils for longer than needed, will it cause problems?

    There is nothing wrong with over-soaking your lentils. It will only reduce cooking time, that’s all. Let’s say you soaked your dal and decided not to cook it that day, simply put it in the fridge, and bring it out the next day when you decide to cook it.

    How long can the khatti dal stay in the fridge?

    Dals are best for weekly meal plans because they can easily stay fresh in the fridge for up to 5 days. Simply reheat them in a pot and they will be good as new.

    Can you freeze dal?

    If you think you are not going to have the leftover dal right away, it’s always best to freeze it. If you are meal planning, freeze the dal BEFORE adding the tempered spices. Whenever you are ready to eat, simply thaw it on the counter, heat it up, and make fresh Tarka to make the dal taste as good as a freshly cooked one.

    What can I do with leftover dal

    I use all my leftover dals to make oats khichdi. Tangy lentil oats are a great way to utilize leftover dal.
    You can also add pieces of leftover roti or chapati to the dal and cook for 10 mins. Then eat it with a spoon.

    Can I use a substitute for tamarind?

    NGL, the perfect tang in this recipe comes from tamarind. But if you are cornered, you can use mango powder or vinegar instead.

    Similar recipes

    • masala moong masoor dal in a white plate
      Masala moong masoor dal (red & yellow lentils)
    • tomato chutney served in a steel bowl.
      Tomato Chutney – Hyderabadi style
    • tangy savory lentil oats
      Tangy Savory Oatmeal and Lentil bowl
    • chickpea curry in a steel bowl with a plate of more curry on the side
      Cholay ka salan – Spicy Chickpea curry

    Do you have any questions? I’m happy to help! And of course, If you try this recipe, I’d loveeeee to see it or simply hear about it! Hit me up in the comment section below and I’ll get back to asap! Happy Cooking!

    a top view of the khatti dal in a steel bowl

    Hyderabadi khatti dal

    A traditional sour Red lentil recipe from the Hyderabadi Cuisine of India/Pakistan, eaten with rice
    5 from 16 votes
    Print Pin
    Course: dinner
    Cuisine: South Asian
    Prep Time: 10 minutes minutes
    Cook Time: 30 minutes minutes
    Total Time: 40 minutes minutes
    Servings: 6 servings
    Calories: 249kcal
    Author: Wajiha

    Equipment

    Hand blender optional

    Ingredients

    For Lentils

    • 1 cup red lentils masoor dal
    • 1 large tomato with the stem removed
    • 1/2 tsp turmeric powder haldi
    • 2 tsp salt or to taste
    • 1/2 tsp crushed red chili flakes
    • 1 teaspoon red chili powder
    • 4 whole green chilies

    Other

    • 2 inch block of dry tamarind or Emli soaked in 1 cup hot water see notes
    • coriander/cilantro for garnish

    For Tempered spices or Baghaar

    • 1/2 an onion sliced
    • 4 cloves of garlic sliced or chopped
    • 1/2 tsp mustard seeds rye daana
    • 7 to 8 curry leaves
    • 5 to 6 whole red chilies
    • 1 tsp cumin seeds
    • 1/2 cup oil or less if you want

    Instructions

    • Soak lentils for 30 mins to 1 hr. Discard the water
    • In a pot add lentils and all ingredients for the lentils along with 4 to 5 cups of water.
    • Bring the lentils to a boil, then reduce flame to medium and cover the pot. Do not cover the pot all the way through, leave the lid a little askew. You can also use a pressure cooker for this step
    • After 30 mins or so, use a whisk (or a dal ghotni) to whisk the dal around and make it more uniform. Let the dal simmer on the stove.
    • In a bowl, soak tamarind in hot water for 5 mins. Use a sieve to strain the tamarind to get puply water and remove all the impurities in the sieve. Collect all the water released from it. Add it to the dal.
    • Cook for another 10 mins to cook the tamarind.
    • Turn off flame.

    Baghar – Tempering the dal

    • In a pan add oil and all the ingredients for tempered spices. Fry them at medium flame until the onions turn a nice golden brown.
    • Put the tempered mix on top of the dal and let it sizzle.
    • Make sure you get all bits of tempered spices into the dal.
    • Garnish with chopped coriander and serve with steamed rice and papad.

    Notes

    • You can also use tamarind paste instead of tamarind blocks. Just mix the paste with water to make a diluted version and add to the dal. I’ve given standard quantities, but feel free to add more tamarind if you like.
    • Your dal can stay in the fridge for up to 5 days.
    • You can freeze your dal for up to 3 months.

    Nutrition

    Serving: 1gCalories: 249kcalCarbohydrates: 17gProtein: 5gFat: 19gSaturated Fat: 1gPolyunsaturated Fat: 17gSodium: 878mgFiber: 5gSugar: 5g
    Can’t wait to see your remakes! Tag meon IG with your pictures @butteroverbae

    Pakistani Whipped Mocha Latte

    January 5, 2021

    pakistani whipped mocha latte in glass mug

    This Delicious frothy, creamy Whipped Mocha Latte is going to make your winters and blanket cuddles so much more delicious! This recipe gives you the deadly combo of chocolate and Pakistani style whipped coffee, and my friend, beware! you are about to get addicted!

    What is Pakistani Mocha Latte?

    A Mocha Latte is a flavored drink that combines coffee and chocolate together. It is often confused with MOCHA, which a high quality coffee bean from Yemen.

    If you’ve read my post about Pakistani Whipped Coffee, then you know the origin of whipped coffee. A Pakistani Mocha Latte is just a twist on the regular whipped coffee which is made with sugar, water and instant coffee, beaten together to make a frothy milk texture. Mocha means coffee plus chocolate. And that’s really what this recipe is! Adding a little chocolate to the classic whipped coffee! But of course this one’s warm, unlike Dalgona (read more on the differences here.)

    Ingredients for Whipped Mocha Latte

    • Instant coffee powder – So if you’ve made whipped coffee before, you know it needs instant coffee. No other kind of coffee is going to work for this. You can use any brand of instant coffee.
    • Water – Warm to hot water is ideal to make the perfect whipped coffee! This is the small amount of water that you will need to whip up your coffee.
    • Sugar – You can use regular sugar or sugar alternatives as well. Sugar substitutes include: brown sugar, coconut sugar, honey and artificial sweeteners like Stevia. Keep in mind, that white sugar gives the best results but you can still get a pretty good amount of air in your coffee with sugar substitutes as well.
    • Cocoa powder / Hot chocolate Mix – Regular and Dark cocoa powder, both will work perfectly well for this recipe. I personally like making this recipe with cocoa powder, but you can use a hot chocolate mix powder instead. Keep in mind, that hot chocolate mixes are already sweetened, so you will need to adjust your sugar accordingly.
    • Cream – Mixing cream with cocoa or hot chocolate mix adds a layer of depth and smoothness to the mocha latte. You can use any cream you have at hand. Double, whipp, fresh, canned. You can also use non-dairy cream substitutes like cashew or coconut cream.
    • Milk and water (half and half) – Once your mocha coffee base is ready, you can decide what you want to pour into it. Take equal parts of hot water and milk for this recipe. You can also do full milk if you want, or 3:1 milk and water ratio as well. You can also use non-dairy options instead.
    • Chocolate (optional) – If you want to create a stronger chocolate flavor, you can even add a few tablespoons of grated chocolate in the mix. Any chocolate of your liking will work just fine. I didn’t use any this time.
    top down shot of Pakistani whipped mocha latte

    How to make Desi Mocha Latte

    STEP 1 – Whip the coffee

    All you have to do is put almost equal parts of sugar, coffee and hot water in a mug and whip it up. You can use a milk frother to do this. If you are making a big batch, you can do the same step with an electric beater and use a large bowl instead.

    STEP 2 – Make it Mocha

    Now you are going to add your cocoa powder and cream into the whipped coffee and simply stir to combine. IF you want your coffee to taste more “chocolatey”, you can also add some chopped chocolate at this point. I’d suggest to go with some dark chocolate variety.

    STEP 3 – Assemble

    Warm up some equal parts milk and equal parts water. Pour it over your whipped mocha coffee and stir to mix well.

    STEP 4 – Make it fancy

    If you want, you can also add some whipped cream or marshmallows on top to give you hot chocolate feels. And then dust with some cocoa powder.

    a Pakistani whipped mocha latte

    FAQS about Whipped Mocha Latte

    Can I make a big batch of Mocha Coffee?

    Yes, you can bulk prepare the whipped mocha coffee for a larger gathering. Just drop 2 tablespoons of mocha coffee mix in every mug when you are ready to serve, and pour your milk on it.

    Can I make this Pakistani Mocha Latte into Iced Mocha ?

    Absolutely. Of course that makes it Chocolate Dalgona. But besides the nomenclature, you can use cold milk and ice instead of hot milk.

    How long can the whipped coffee stay in the fridge?

    You can bulk prepare whipped coffee and keep it in the fridge for 4 to 5 days easy. Just make sure the bowl is covered properly with a lid or cling wrap.

    How to make a lite version of the Pakistani Mocha Latte coffee

    • Use sugar alternatives like Stevia, honey or coconut sugar. Or skip sugar altogether
    • Go dairy free for cream and use cashew cream or coconut cream instead.
    • Use nut milk, oat milk or soy milk instead of regular milk
    • If you are cutting on caffeine, use the decaf instant coffee option.
    • Use dark cocoa instead of hot chocolate mix

    Other similar recipes for you to try

    Pakistani whipped coffee
    Apple Cinnamon Latte
    Date and Melon Shake

    pakistani whipped mocha latte in glass mug

    Pakistani Whipped Mocha Latte

    A twist on the classic Pakistani Whipped coffee, made with chocolate, whipped coffee and hot milk.
    5 from 18 votes
    Print Pin
    Course: Drinks
    Cuisine: South Asian
    Prep Time: 6 minutes minutes
    Total Time: 6 minutes minutes
    Servings: 1 serving
    Calories: 140kcal
    Author: Wajiha

    Ingredients

    • 1 tsp instant coffee powder
    • 1 tsp sugar see notes
    • 1 tsp cocoa powder or hot chocolate powder (see notes)
    • 1 tbsp cream
    • 1/2 cup warm water
    • 1/2 cup warm milk

    Instructions

    • In a cup, add instant coffee, sugar and 1 tbsp of hot water. Use a milk frother to whip the coffee up until light, and fluffy. This will take about 2 to 3 mins.
    • Add cocoa powder and cream. Use a spoon to mix everything together briefly.
    • Pour a mix of warm water and milk. Stir to combine. Top it off with more cream, chocolate or instant coffee powder.

    Notes

    • You can use sugar alternatives like honey, stevia or coconut sugar.
    • If you use hot chocolate mix, instead of cocoa powder, reduce the level of sugar by half.
    • To make the recipe dairy free, use nut milks and coconut cream or cashew cream instead.
    • You can use decaf coffee powder as well.

    Nutrition

    Serving: 1servingCalories: 140kcalCarbohydrates: 12gProtein: 5gFat: 8gSaturated Fat: 5gPolyunsaturated Fat: 2gCholesterol: 27mgSodium: 73mgSugar: 5g
    Can’t wait to see your remakes! Tag meon IG with your pictures @butteroverbae
    « Previous Page
    Next Page »

    Primary Sidebar

    Hey there! I am Wajiha, the blogger and cook behind Butter over Bae.
    My friends had an intervention for me, to stop me from spamming them with all my kitchen experiments and food pictures. But, instead, I made this! And now I put up my food spam for the world!

    My blog is literally all my food obsessions in one: Pakistani/Indian food, Pan-Asian recipes, and desserts! I’d loveeeee to show you around and tell you more. Grab a cup guys and click below

    Who this lady? →

    Summer Favorites

    • dripping rose syrup on malai kulfi icecream bar.
      Easy Malai Kulfi Ice Cream With Condensed Milk
    • pineapple coconut ice cream scoops in a bowl
      Dairy free No churn Pineapple coconut ice cream
    • 4 scoops of chocolate ice cream
      Easy Home-made Chocolate Ice cream
    • spinach and berry salad with feta cheese on a blue backdrop with a strawberry vinaigrette in a glass bowl on the upper left corner
      Spinach and Berry Salad with Strawberry vinaigrette
    • halal champagne served in goblets.
      Saudi Champagne
    • a tall glass with melon shake and a scoop of icecream in it with a straw. background showing cut up mlons and another glass from the side
      Date & Melon Shake

    Popular Recipes

    • paper towel with lots of crispy golden brown onion slices on it against a grey background
      How to make crispy fried onions and store them
    • Qeema macaroni
      Keema macaroni
    • Lahori Chargha Recipe
    • khageena or spicy scrambled eggs in a pan
      Khageena – Pakistani spicy scrambled eggs
    • 2 chicken tikka pieces sitting on a bed of rice in a black plate
      Easy Chicken Tikka Recipe
    • a plate of chicken pieces and colored rice with some onion and cucumber sliced on the side
      Pakistani chicken biryani, Karachi special

    Footer

    ↑ back to top

    Privacy Policy
    Terms & Conditions

    Contact

    • Instagram
    • Facebook
    • TikTok
    • Pinterest

    All images and content are copyright-protected. Please do not use my images or recipes without prior permission.

    Copyright © 2026 Butter Over Bae

    Rate This Recipe

    Your vote:


    A rating is required
    A name is required
    An email is required