
Hello World! Welcome the new WHITE Biryani that is quickly becoming a pet favorite at restaurants and parties! This Mutton White Biryani looks mild, but is AS spicy if not more than its colorful competitor, with delicious tender meat. This recipe includes easy to follow steps, and tips so even if your making biryani for the first time, you will NAIL It!

It only took me 6 months to perfect this recipe. A lot of blood and sweat, some tantrums, and NUMEROUS trials later, I have finally given my quest to the best WHITE biryani a rest. There may or may not have been an awkward celebratory dance ritual. Let’s dive right in!
What is White Biryani?
If you’ve had the regular colorful biryani, the White biryani is just as the name suggests, biryani with no food coloring. You have white and brown colored rice wrapped with flavorful spiced mutton pieces around it. Also known as “Sofiyani Biryani”, this biryani sees its root in Hyderabadi Cuisine made during the Mughal Era. But, might I add, Don’t be fooled by the lack of color this biryani has, it is Just as spicy as a regular biryani with a melt in your mouth textured protein.
Ingredients and their Substitutions
The ingredient list of any biryani you make at home without packet spices seems a little daunting at first! But hold on! They are very simple ingredients and you can totally get away by skipping a couple here and there. I’ve mentioned substitutes for you to use too.
- Meat – I used goat meat aka Mutton for Desi folks. A mix of boneless and bone in pieces are best. Just bone in pieces works too but definitely add some bones in the qorma for that rich mutton flavor.
- Powdered and Whole Spices – Both the spices are used generously in a biryani. There is no red chili powder or turmeric for white biryani. Whole spices are generally removed while eating. You can use tie the whole spices in a spice bag or a muslin cloth if you don’t want to bite on them. I’ve used whole red chilies, you can simply use red chili flakes.
- Qorma base – The qorma base for this recipe uses only fried onions and yogurt. You can fry onions on your own or get the packet pre-fried onions available in Indian/Pakistani stores. I also have a Guide on how to fry onions if you want to read it.
- Cream – This is a GAME changer for White biryani. For all the experiments I’ve done, adding a small amount of cream in the meat towards the end, made all the difference to bringing together a rather melt in your mouth kind of biryani. I used fresh cream and I would not recommend skipping it. Here are other options you can use: Tetra pack creams, media crema or table cream, tin pack cream by Puck or Almarai, cooking creams and if you Don’t have any of them, then Greek yogurt. If you live in Pakistan or India and you have some left over “malai” from boiling your milk, that will work too!
- Dried Plums – Also known as prunes. They bring the tart to the this biryani. You can use tomato instead if you are out of dried plums.
- Ghee and Oil – I’ve used a mix of oil and ghee for this recipe for flavor.
- Rice – Aged Long grain Basmati rice or newly Harvested long grain Basmati rice are best for all types of biryani. You can easily find it in any Indian/Pakistani store or online too. You can also use Sela rice if this is your first time making biryani. Just make sure to soak it according to packet instructions.
- Aromatics – I’ve used 3 ingredients that are simply added for enhancing the aroma of the biryani and have very little flavoring effect. There is Saffron Kewra water, mace and nutmeg (aka jayfil javetri). Kewra water is a Pandan leaf extract which elevates the biryani smell to a next level! Saffron kewra water is infused with Saffron. You can skip these ingredients if you don’t have them or use simple Kewra too. The taste of your biryani doesn’t depend on these so all’s good!
White Biryani Masala
Biryanis are made with heavy handed spices which are more pronounced than regular curries because the flavor mellows down once it is mixed with rice. The white biryani masala is unique in that it doesn’t use ANY red chili powder or turmeric. Most of its heat comes from whole spices, green chilies and whole red chilies. There will be no grinding necessary for this recipe. Just simply use a combination of powdered spices (easily available at all grocery stores) and whole spices.
NOTE: Don’t worry if you are missing some spices here and there, it’ll still come together and taste amazing!
Powdered Spices
- Salt
- coriander powder
- cumin powder
- black pepper powder
- Garam masala powder
- Green chilies – Use the smaller dark green ones which are spicier than Serrano. They are usually sold internationally as Thai Bird Chilies.
- 10 tangy prunes (dried Aloo bukhara) – (You can use 2 tomatoes instead)
- Whole button red chilies (you can use red chili flakes instead)
NOTE: It is important to use the right green chili in this recipe to bring heat to the biryani. Taste test the curry once its ready and if it doesn’t feel spicy, add additional red chili flakes to bring heat.
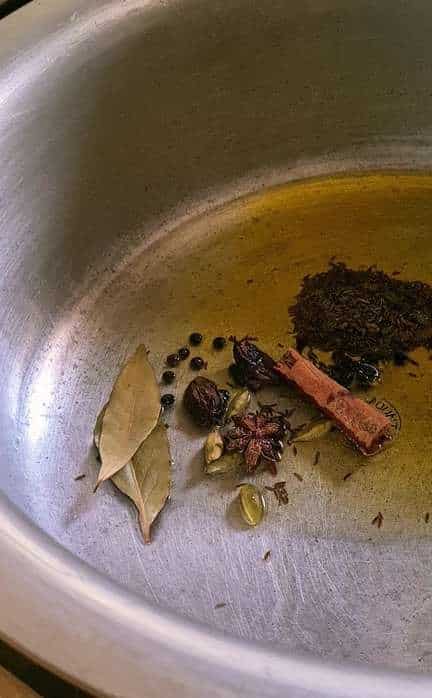
Whole Spices
- Green cardamom
- Bay leaves
- Black peppercorns
- Black cardamom
- Star anise
- Cinnamon stick
- Bitter cumin seeds (shah zeera) – You can use regular cumin seeds here
You can tie the whole spices in a muslin cloth or spice bag to avoid biting into it by accident.
How to make White Biryani – 3 Main steps
There are 3 Main steps to making any good biryani: Making the curry, Parboiling Rice and Assembling for Final Steam aka “Dum”
STEP 1 – Making the Mutton curry or Qorma
In this step, we prepare the mutton in curried spices and while it’s cooking, we soak rice on the side and parboil it.
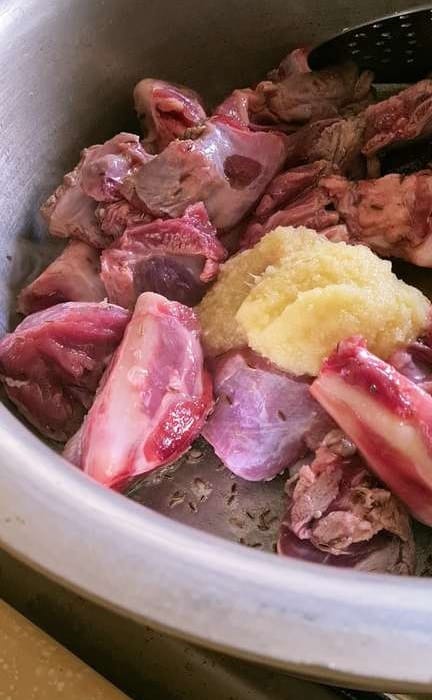
NOTE: Always sauté mutton or any protein in oil and garlic ginger paste at
high flame until it changes color and you don’t see any liquid in the pot. This helps in getting rid of any ‘smell’ that the goat meat or beef might carry.
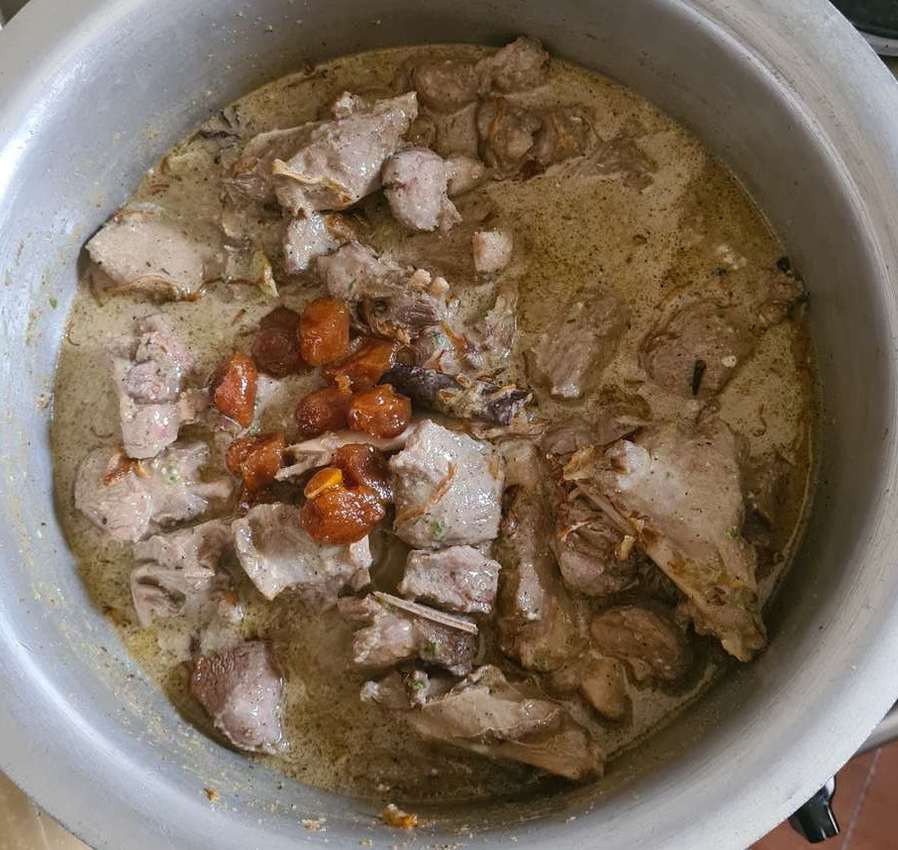
After sautéing mutton in oil, add the biryani masala, dried plums, fried onions and MOST of the yogurt. Let the mutton cook in the water that leeches out from the yogurt before adding any additional water to tenderize the meat. This takes about 10 mins, after which you can add water and let the mutton simmer.
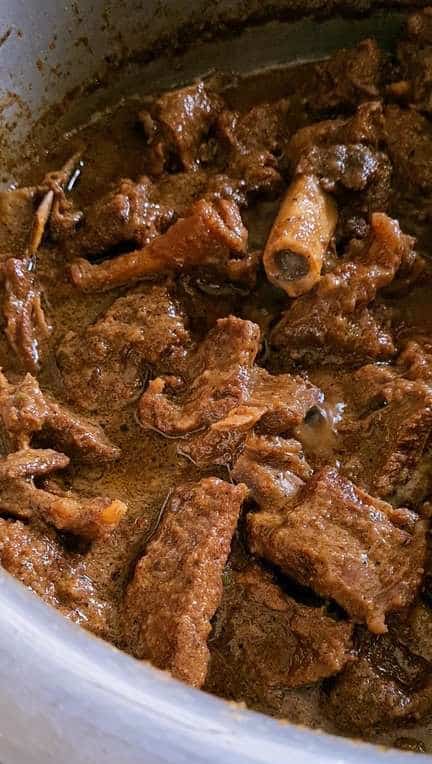
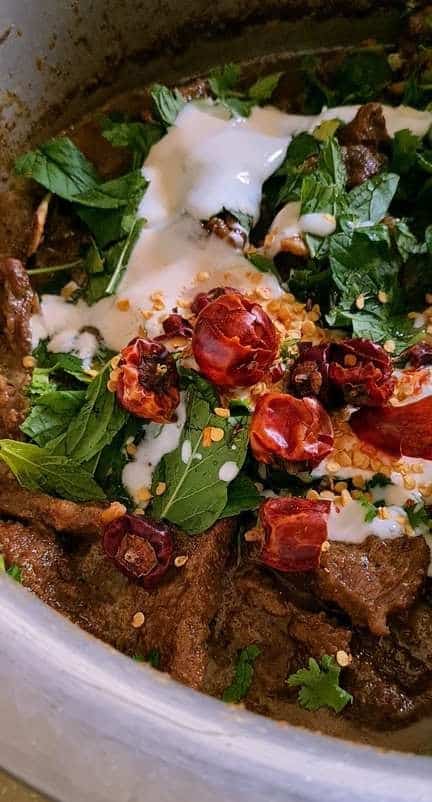

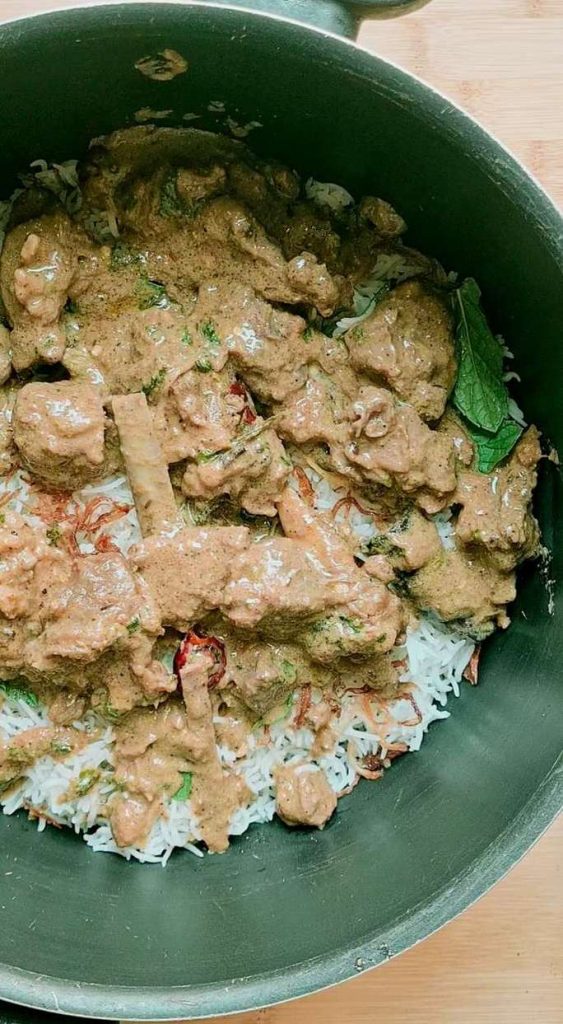
Once your mutton is fully cooked, you will see oil separating on the side. Reduce the flame to low and add the second set of ingredients. This includes left over yogurt, cream, button red chilies, and some mint and coriander leaves. We are NOT going to cook this down. Simply mix and cook for 2 mins until you turn the flame off. This semi-raw yogurt and cream are a GAMECHANGER for this recipe!
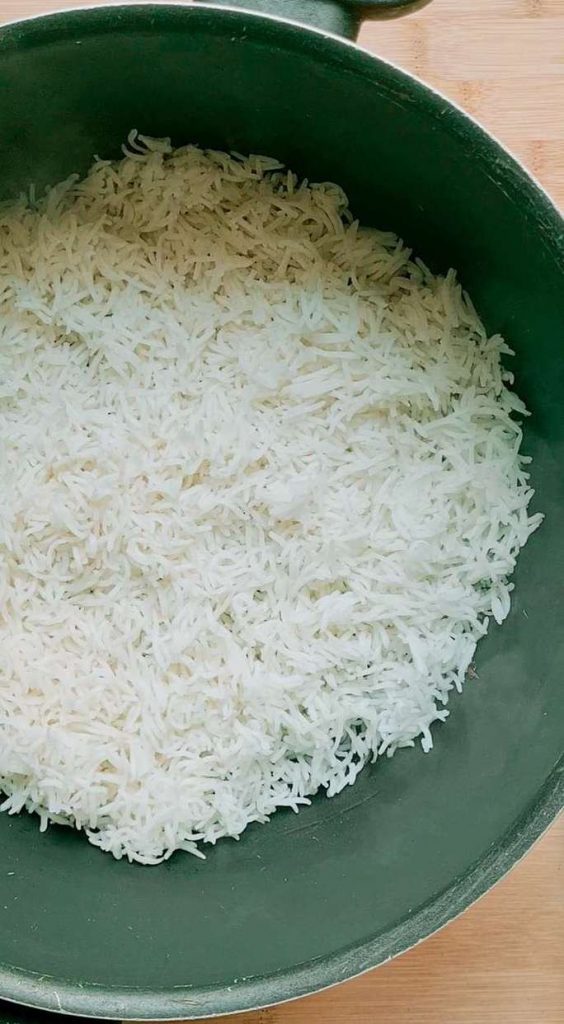
STEP 2 – Parboiling the Rice
Parboil your rice in a pot of boiling hot water. I only add 2 ingredients to my boiling water. Salt and Vinegar.
PROTIP: The vinegar helps in retaining a nice white color for the rice plus prevent them from breaking if they are slightly overcooked.
Here are some tips to ensure perfect parboiled rice.
- Only add rice to water once it starts to boil.
- Ideal boiling time for biryani rice is between 4 to 5 mins
- If you check a grain of rice between your fingers, it should break easily but still retain its shape, that’s the point where you stop boiling
- When in doubt, go for rice that are slightly underboiled than overboiled. You can always steam for longer.
- Drain the rice immediately to avoid over cooking
- Use a pot big enough to allow the rice to boil without clumping together.
STEP 3 – Assembling for Final steam (aka dum)
To layer, you will need your rice, mutton curry and garnish.
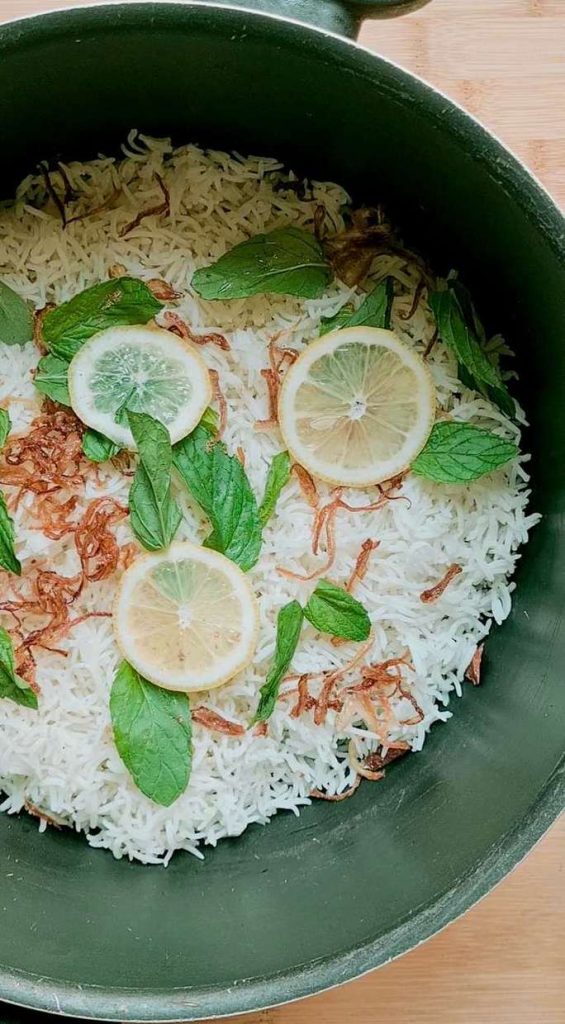
Garnish
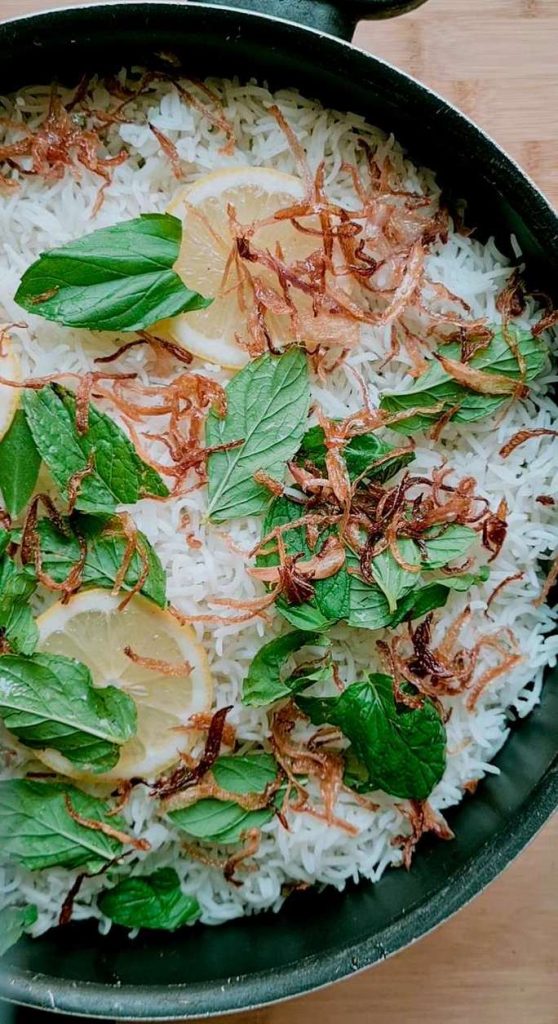
- For this recipe, I use lemon, lots of fried onions and mint leaves.
- I also use a few pinches of ground nutmeg and mace (jayfil javetri). You can skip the ground nutmeg and mace if you don’t have them at hand, they just add the “biryani aroma” to the dish. Some South Asian shops also carry “biryani essence” which you can use instead or skip it altogether.
- But I definitely won’t recommend skipping the onions because mannn the way they compliment this dish is beyondddd perfect!
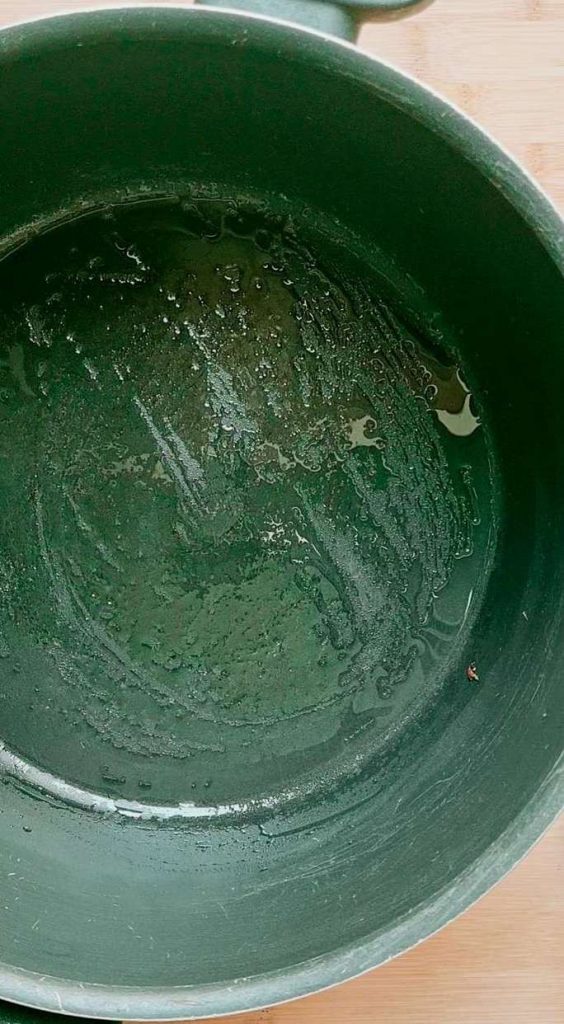
For layering the biryani, I always start with rice for this recipe. Since the oil in this recipe is towards the low side (compared to other biryanis,) I usually grease my pot too. Add in rice and then a layer of garnish. And finally, the mutton curry. Repeat again so that you have rice on top.
PROTIP: After the final layer, add a little bit of milk or diluted yogurt on top. This helps in evenly cooking the rice.
And then I seal the biryani and steam it at high for 8 minutes and then medium low for another 15. Perfect biryani EVERYTIME!
TIPS for perfectly Assembling and steaming Biryani
- Always make sure your pot is big enough so that there is at least 1/4th of the pot empty after your biryani is assembled.
- Seal your pot well to allow proper steaming. You can do this by either using a layer of foil between your lid and pot, or keep weights on top of your lid.
- Don’t open the pot multiple times to check in, you’ll allow the steam to escape and the top half of your biryani won’t cook through.
- Allow the biryani to “rest” for 10 minutes after steaming and before you start plating it out.
- Ideally, use a flat spoon like a spoodle or a plate to dish out biryani, to avoid breaking the rice grains.
I love serving all my biryanis with a nice kachumbar salad and a thick raita.
FAQs
Can I use this Recipe to make beef or Chicken white biryani?
Absolutely! Use same method for beef Biryani. For Chicken Biryani, skip adding water to qorma and simply cook it only for 10 mins in the yogurt water.
Which pot should I use to make Biryani?
To make the mutton curry and for steaming, its best to use a heavy bottomed pot or a Dutch oven. If your pot isn’t heavy bottomed, use a heat diffuser underneath it, like a flat griddle or a “tava”. This will prevent your curry from sticking to the bottom when its cooking and rice while steaming.
How can I double the recipe?
For Biryanis, I personally prefer I ratio of 1kg protein to 750gms of rice. Use the same ratio to double up. For reference, 750gm of rice is about 4 cups.
What do I serve with Biryani?
A good biryani only needs a raita (herbed yogurt), a tossed salad and a cold coke. That my friend is a wholeee mood. But you can add potato cutlets , on the side.
Can I add potatoes to this recipe?
Most biryani lovers would almost call a potato less biryani a crime, but sadly I’m on the potato-less side of that debate. Don’t shoot! If you want to add potatoes, just go ahead and use similar ratio for rice and mutton. For e.g 1kg mutton will now need 1 kg rice, which is 5.5 cups.
To prepare the aloo, peel and cut them according to the size of your liking. Boil them separately with salt and vinegar for 5 mins. Coat them with garam masala and/or chat masala and fry them. Simply add them while layering.
Other Biryani Recipes
Chicken Tikka Biryani
Pakistani style Chicken Biryani
Quick Biryani

White Mutton Biryani
Ingredients
Qorma
- 1 kg Bone in Mutton cut into pieces
- 2 tablespoon garlic ginger paste
- 2 tablespoon salt
- 2 tablespoon coriander powder
- 2 tablespoon cumin powder
- 1 tablespoon black pepper powder
- 2 teaspoon garam masala powder
- 20 serrano green chilies
- 10 Dried prunes Aloo bukhara
- 1/2 kg onions 4 to 5 big onions OR 4 cup sliced onions
- 1/2 kg yogurt divided into 400gm and 100 gm
- 1/4 cup cream see notes
- 2 tablespoon vinegar
- 1 cup mint leaves and chopped coriander leaves mix
- 6 to 7 button red chilies
- 1 tablespoon Saffron infused Kewra water see notes
- 1/4 cup desi ghee or butter
- 1/4 cup cooking oil
Whole Spices
- 5 green cardamom
- 2 bay leaves
- 8 to 10 black peppercorns
- 2 black cardamom
- 2 star anise
- 1 cinnamon stick
- 1 tablespoon bitter cumin seeds shah zeera
Garnish
- 3 to 4 pinches of Nutmeg and mace coarsely ground jayfil javetri
- 2 lemon cut in slices
- 1 cup mint leaves
- Fried onions
- 5 to 6 Green chilies optional
Rice
- 750 gm Long grain Basmati rice soaked in water for atleast 20 mins
- 1 tbsp vinegar
- 5 tbsp salt or to taste
Instructions
- Mutton Qorma
- Add green chilies and water in a blender to make a thick paste. Set aside.
- Fry onion slices in oil until deep golden in color, remove from oil and set aside. (Skip this step if you are using pre-fried brown onions)
- Leave back 1/4 cup oil from the onions in a large pot and add ghee. Add your washed mutton and saute the mutton at high flame, until all the water from the mutton doesn’t dry up (should take 4 mins)
- Add all the following ingredients in the pot: Green chili paste, garlic ginger paste, salt, whole spices, coriander and cumin powder, black pepper powder, garam masala powder. Sauté your mutton in the spices for another 4 mins to allow the spices to temper.
- Add most of the beaten yogurt (400 gm), prunes and half of the fried onions in the pot. Stir it around and cover. Let the mutton cook in the yogurt for about 15 mins.
- Add 3 to 4 cups of water and increase flame to allow the water to boil. Bring flame to medium and cover the pot. Let the mutton cook for another 30 to 40 mins till the mutton becomes tender. IF you are using a pressure cooker, adjust the water level accordingly.
- Once your mutton is tender, reduce flame to low and add all the remaining ingredients for the qorma: leftover yogurt, cream, button red chilies, mint and coriander leaves, kewra water and vinegar. Stir to mix the qorma together and only cook for 3 more minutes.
- Adjust sauce or spiciness at this point. Your qorma should taste more salty than regular qorma and spicier than regular qorma
- Rice
- Boil rice in water along with vinegar and salt.
- Only boil rice for about 5 mins or check to see if you can break your rice by your fingers. They should be harder than when you boil your rice for steamed rice.
- Strain your rice in a colander and set aside.
- Assembling
- Grease the bottom of your pot with oil or ghee that you will use to assemble your biryani.
- Add a first layer of rice, using up almost 1/3 of the rice. Use a plate or a flat spoon to do this.
- Then add about 1/3rd of the garnishes
- Next will be a layer of the mutton qorma. Use half of the qorma.
- Add another layer of rice and repeat the process.
- Finish off with the top layer being of rice and then garnish. (keep some fried rice aside to use for garnish while serving)
- On the top, add 1/4 cup of milk or diluted yogurt into the rice
- Cover with foil and then the pot lid.
- Ideally, add a girdle or a flat pan below the biryani pot when you bring it back on the flame.
- Cook biryani at high flame for 8 mins and then reduce the flame to medium low and cook for another 15 mins.
- Remove the lid slightly to check if there is steam build up inside the pot. IF you can see steam, turn off flame and let the biryani rest for 10 mins before mixing and serving.
- Serve with raita and salad.
Notes
- You can use regular Kewra water if you don’t have Saffron infused Kewra
Nisa says
This turned out so so good!! Thank you for this recipe!!
Wajiha says
That is awesome! it is one of our family favorites!
susan says
wanted to know if 20 chilly be tooo spicy
Wajiha says
Hey Susan so white biryani looks innocent but since its a South Asian dish, it is definitely a bit spicy. For the quantity mentioned, you can use 10 serrano chilies and taste it to see if you wanna add more later. You can always add chili paste at the end of the mutton curry prep, its fine if it doesnt get cook time, itll cook through when you add it to rice and steam it.
Aslam says
Nice thanks for sharing this recipe keep posting.