
Frying the perfect crispy crunchy golden brown onions is almost equivalent to the perfect gol roti (flatbread). In brown people world, its a sign of a “perfect wife/bahu or watever” I could give a rat’s behind as to what it makes me. All I know is I want my food to taste frikkin awesome ok? Whether I am making Biryani or Chicken curry or Pulao, I want my taste buds happy!
Just like garlic ginger paste, crispy fried onions is one of the basis of all South Asian cooking and if you nail it, you pretty much have MASTERED one of the CORE ingredients in almost ALL Indian/Pakistani curries.
So getting these beautiful crispy onions is honestly just a few tips and tricks away. But behold...since it is something we struggle with, the internet has come up with WEIRD and absolutely useless tips and tricks as well. I’ll mention some really popular myths below as well so that you know what to stay away from as well.
Where are fried onions used?
Fried onions are a staple in South Asian cooking. Here’s where they are used
- Used in gravies and curries like Chicken ka saalan
- They are used for layering and adding flavor. like in Biryanis and Pulaos
- Also used as garnishing or toppings on dals, and haleems.
- They are also used in certain kebab marinations and dam keema etc.
Different levels of fried onions.
| Light translucent color | Used for omelettes etc | not crispy |
| Light golden color | Use in vegetable curries and most International cooking. Also known as caramelized onions | not crispy |
| Light golden brown | Used in Spicy rices, curries, and marination | slightly crispy |
| Golden Brown onions | Used heavily in South Asian cooking as garnish, masala base, layering, can be stored for very long time | crispy |
A glimpse of what topics this post covers
- Choosing the right onions
- Peeling onions
- Cutting the onions
- Selecting the pot
- Selecting the oil
- How much oil to use
- Reaching the right color
- Letting the onions cool down
- Serving Size
- Storing fried onions
- What to do with left-over oil
Here’s are a few key things to know about frying onions.
Choosing the right onions
There are 6 kinds of onions:
- Red onion
- white onions,
- yellow onions,
- sweet onions,
- shallots and
- Scallions / Green onions
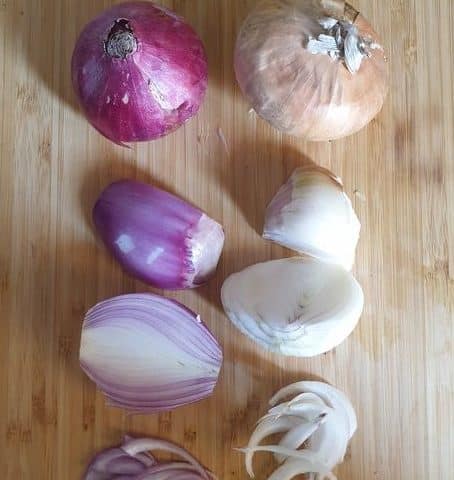
The internet will tell you that the ideal onions for frying are the sweet onions. And it won’t be completely wrong. They do have a uniform color through out and the perfect amount of natural sugars that fry up to give you a uniform golden brown color. But they don’t have thin layers, which when sliced, will not give you nice thin slivers. Thin layers are important for that crispy frying. You can use any, white onion, red onion, or sweet onion, as long as they have thin layers. And you will great results! Where I live, red onions are the ones with the thinnest layers so I pick those.
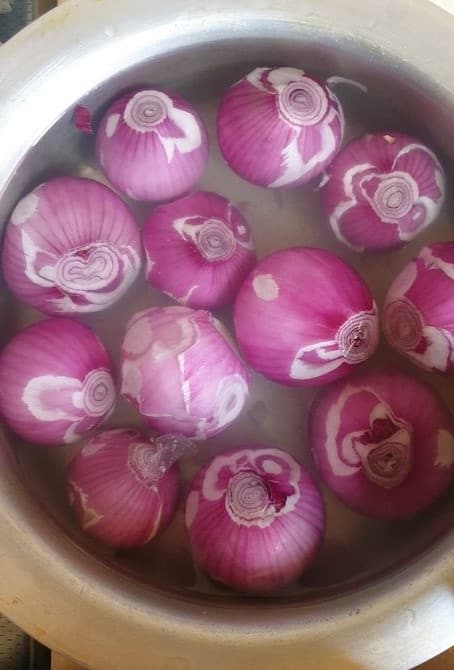
Peeling Onions
Keep dipping your peeled onions in a pot or bowl of cold water. Helps with the tears (more on that below)
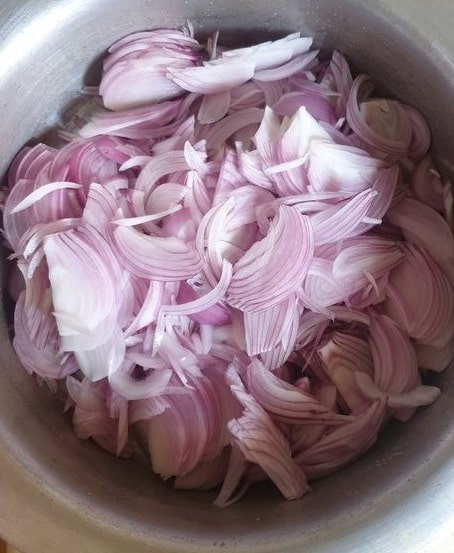
Cutting the onions
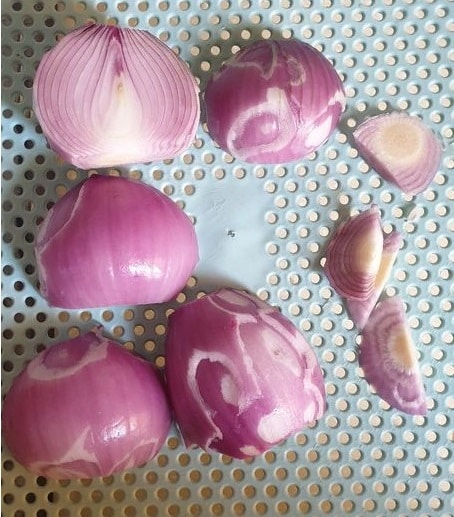
The onions are peeled, halved vertically and their roots are removed. And then cut into long thin slices. This is also known as the “biryani cut” onions. Obviously this is a tedious task to do by hand and when done in bulk can feel like a truckload of work. You can use the slicer option in your food processor to slice your onions the easy way. You can also use a manual mandoline slicer to do the deed as well. Of course the food processor is quicker, but a mandoline is also twice as fast as manual slicing.
How to avoid crying while cutting the onions
So, so far with all the methods I’ve tried, all I can say is, crying a li’l is inevitable (yeah you hate me I know). Maybe do it in a well ventilated area or near a candle so the gases don’t effect you as much? But here’s a good read on how to avoid crying if you wanna check it out.
Selecting the pot
So it all comes down to size and area. Imagine frying french fries. Your fries are going to get clumpy and soggy if you toss them in a small space. The same rule applies while frying onions. So opt for a wider shallow utensil with a thick base. Give your sliced onions room to crisp up individually.
Ideal pot:
Thick base, wide and can withstand high temperatures.
Selecting the oil
When frying onions, or any other thing for that matter, you want to make sure that your oil has a neutral flavor and a high smoke point. The temperatures can go up to 190 C while frying onions and you want to use an oil that can stay stable for that long. Basic vegetable oil like sunflower oil and canola oil can easily stay stable at those temperatures. If you are on a keto diet or are trying to live a healthier lifestyle, coconut oil is also a good option for frying as it can stay stable up to 180 C. As an alternative, you can also use ghee.
Important: Always use fresh oil when you want the perfectly nice brown onions. Oil that has been used once to fry before is going to take double or triple time to brown onions and you will end up with onions that have soaked up a LOT of oil!
How much quantity of oil to use
When frying onions for one time use, you can get away with using very little oil and stirring constantly to get a good color. But for a large batch, you will definitely need to use oil enough for deep frying. So adding a truck load of oil in the onions seems like OMG this is soooooo frikking unhealthy. But trust me when I say this. If you fry your onions right, your onions will NOTTT absorb a lot of oil. You can even measure the amount of oil you put in the pan before frying and how much oil is left AFTER frying.
While growing up I kept hearing this very popular TOTKA (aka tip) that adding onions in cold oil makes it crispier. This, of ALL THE hacks out there, is the only one that LEGIT works. All it does is absorb more oil. Always add onions to oil that has already started to heat up. Doesn’t need to be boiling hot, just warmed up. And keep frying your onions at high heat.
TIP: Add onions and oil together in a pot first and then putting them on a flame to fry for crispy onions
You can easily eyeball the amount of oil you want to add. Toss in your onions in the pot you are going to fry them in. And THEN add oil to it till it comes up to the level of the onions roughly.
TIP: Don’t I repeat DON’t Add stuff to your oil
Lots of internet groups and articles suggest to add baking soda or salt or sugar to your oil in hopes of achieving a uniform brown color. PLEASE do NOT commit this heinous crime! Not only will these ingredients make your onions absorb MORE oil, but it will also alter the natural sweet taste of the fried onions, and eventually might also effect the dish you are preparing your fried onions for.
TIP: Use a slotted stainless steel spoon or skimmer for stirring through the onions. Try not to stir too much, just occasionally a stir here and there, making sure all the onions are getting evenly fried.
Reaching the right color
When you keep your pot with onions and oils onto the stove, turn on the flame directly at a high. You will begin to notice the changes that the onions will go through during its frying journey.
(TIMINGS FOR BULK FRYING)
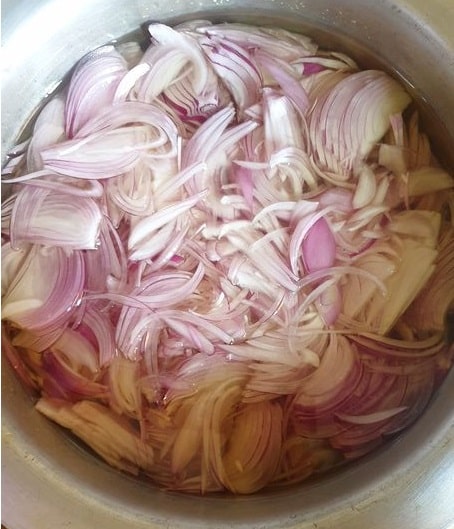
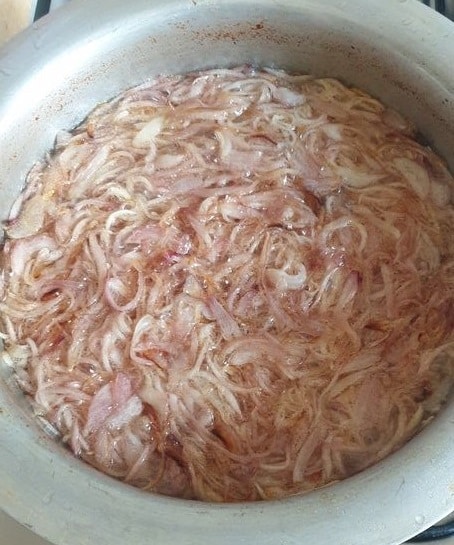
5 to 10 min mark – The oil will get hot and the onions will start releasing water of their own. (Stir from sides once in 5 mins)
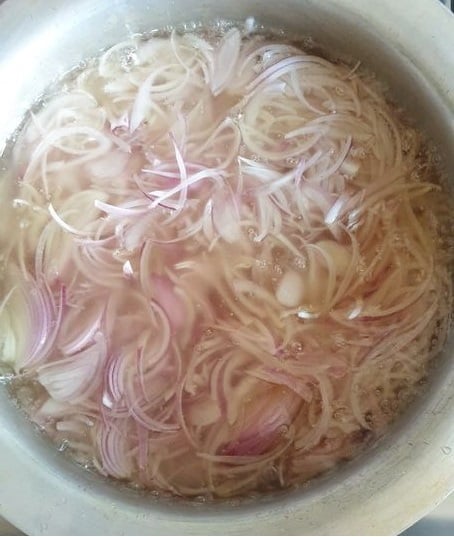
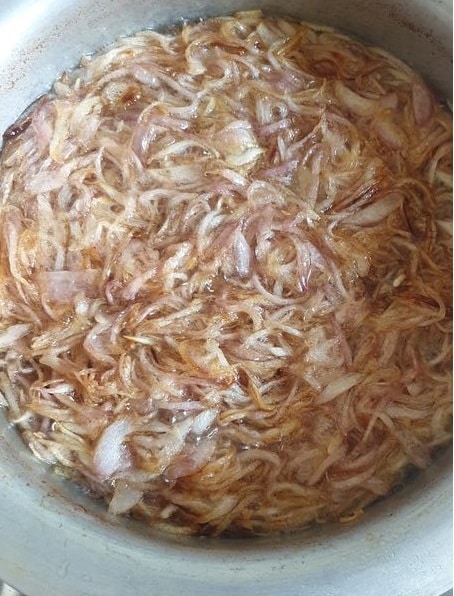
15 min mark– The onions will start to dehydrate at the water evaporates and will start to shrink in size. (Stir once or twice to check even browning)
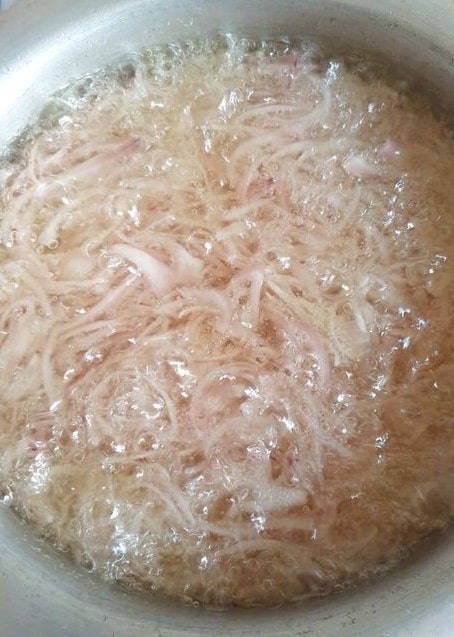
20 min mark – The onions will turn very light gold and have now officially started to crisp up. (stir once or twice and now stay close)
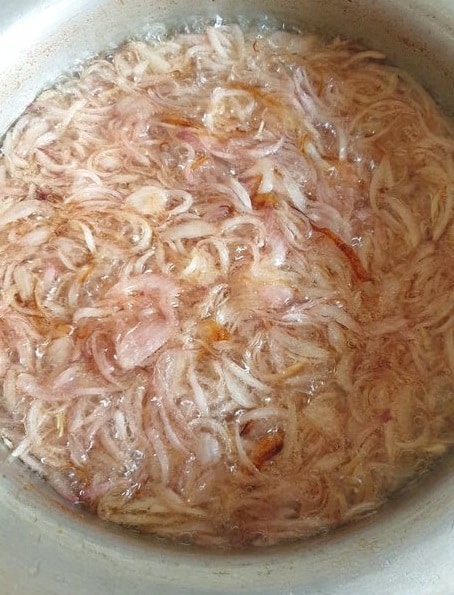
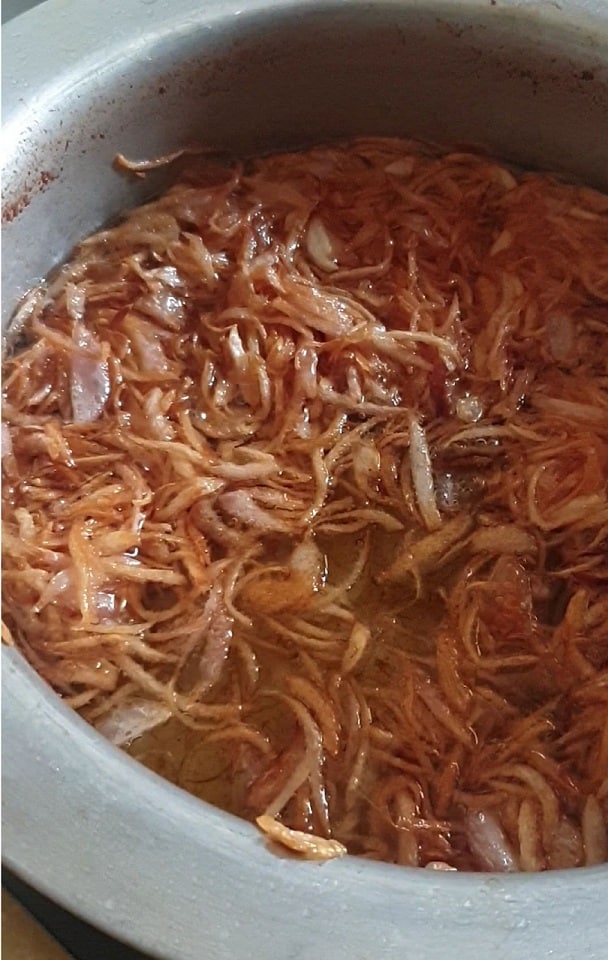
25 min mark – Onions have started to crisp up. Some thinner ones are golden already. Reduce the flame to medium and stir constantly. Start removing onions that have turned golden.
Between 25 to 30 min – This is a critical time. When you see your onions are just ABOUT to reach the perfect color, reduce the flame to low and start removing them with the skimmer. The oil is hot and the onions will turn a shade darker after getting removed as well. If you wait till you reach the right color and THEN start removing onions, the last batch you remove will be burnt.

5 mins mark at high flame 
10 mins mark at high flame 
15 mins mark at high flame 
20 mins mark at high flame 
25 mins mark at medium flame 
30 min at low flame
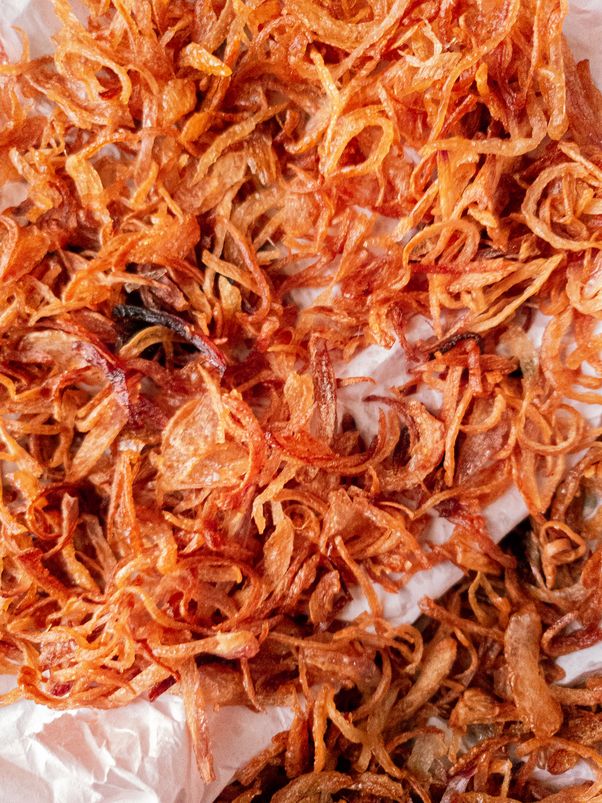
Letting the onions cool down.
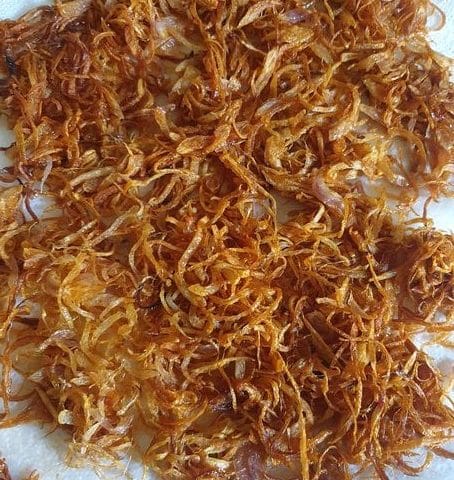
You should have a large tray or plate lined with paper towel ready on the side when you start frying the onions. Remove all your fried onions from the oil and place them directly on top of these paper towels. Make sure they are spread out evenly. Allow the onions to cool down. Its important for the onions to cool down in as much space as possible, in order to crisp up properly. You can press the onions together once they cool down, and you’ll hear a gentle crisp. Which will say, all of your effort, was well WORTH IT!
Serving Size
1 medium onion is equal to 1/2 cup of fried onions and 1/4 cup of crushed fried onions.
Storing the onions
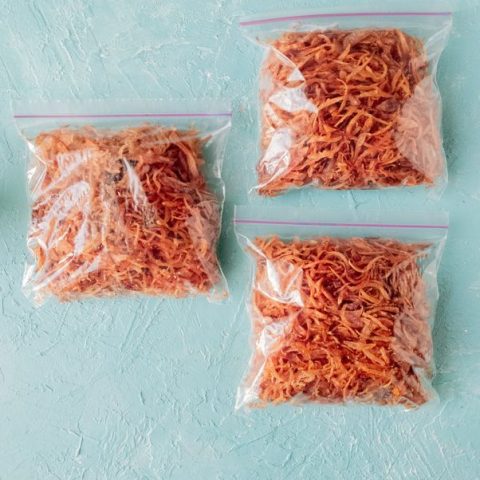
The best part about all of this hard work is that you can savor it! You can batch fry lots of onions in one go and freeze them! They are totally freeezer friendly and can last indefinitely! (I’ve always used them within 4 months, but I don’t see a reason why they won’t last longer than that) Once the onions cool down, bag them up in a ziplock bag and keep it in the freezer. If you want to use them in the coming days, they can even stay outside in a jar for a week.
What to do with the left over oil?
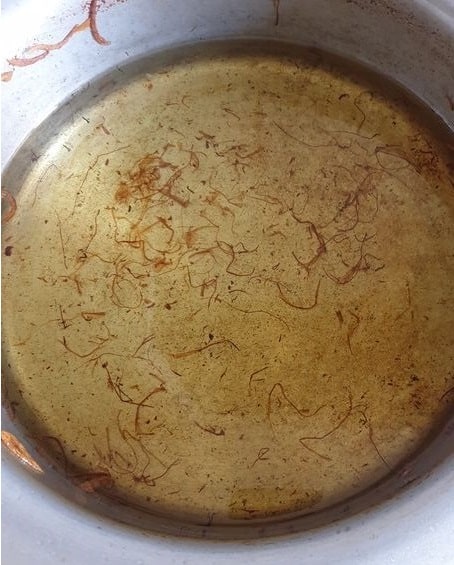
I usually fry my onions when I have a fresh bottle of cooking oil, and a big batch of onions, i.e. when I have freshly done my groceries. Let the remaining oil cool down and use a funnel to transfer it back to the bottle you had used it from. This oil has a nice sweet oniony flavor to it and can be used basically for everything savory. Of course not for sweets, and definitely not for more deep frying.
Bonus: If you are using pre-fried onions in your curry etc, you can make those with about 1 tbsp of oil, because all the oil that goes in a gravy is usually to fry the onions. And if that’s already done, you don’t need anymore!
How to fry onions
Ingredients
- 1 kg onions
- Oil for frying
Instructions
- Peel the onions and remove the root.
- Cut the onions from the center vertically, and slice the halves thinly in vertical cuts
- Add sliced onions in a wide pot and add oil till it comes at the level of the onions. Eye ball the quantity.
- Increase heat to high flame and fry the onions until golden brown.
- Keep stirring the onions every 5 mins to check its getting cooked evenly.
- Use a slotted stainless steel spoon to stir the onions.
- The onions will release water over time and then will start to fry.
- At about 20 min mark your onions will start to look very slightly brown. Reduce the flame to medium at this point and don’t leave the onions un-attended anymore.
- Stir constantly to make sure all the onions turn evenly golden.
- When the onions turn light gold, reduce the flame to low and start removing the onions from the oil slowly.
- Spread the onions on a tray covered with paper towel. And try not to crowd them.
- Allow the onions to cool down and you will have crispy golden onions.
- Use directly in recipes or make a pack in save it in the freezer.
NausheenZ says
Thanks for this lovely post with “asli”tips and tricks.I was thinking of the leftover oil which you thankfully mentioned in the end.The onion flavoured oil will be the best bet for biryani and qorma gravy and also for vegetarian curries!!
Wajiha says
omg vegetarian curries are best with left over onion oil! the aroma is real!
Charlène says
Is it possible to pressure can the fried onions?
Wajiha says
Hey Charlene, i dont think so love. ITll probably remove the crispiness
Salma says
Hey Wajiha,
I just stumbled upon this post, and honestly, was really impressed by all the details, the photographs, and all the hard work you put into this post- wow, girl!
Wajiha says
Hey Salma! thankyou so much for appreciatinng this! this post gave me so many tears quite literally! lol
Lindsay Johnson says
Just the detailed information I was looking for! Thank you…. just one question, if I freeze batches of the crispy onions will they be crisp upon defrosting?
Wajiha says
Hey Lindsay! You don’t need to defrost them. Just let them sit on the counter and thaw and use as is, once they come to room temperature on their own.
LT says
Hello! excited to try the recipe but like another person on here I’m confused by the instructions re the oil. You say to always add the onions to the oil after it’s started heating up, but then contradict it by saying to add the onions to the cold oil before it goes on the flame:
“While growing up I kept hearing this very popular TOTKA (aka tip) that adding onions in cold oil makes it crispier. This, of ALL THE hacks out there, is the only one that LEGIT works. All it does is absorb more oil. Always add onions to oil that has already started to heat up. Doesn’t need to be boiling hot, just warmed up. And keep frying your onions at high heat.
TIP: Add onions and oil together in a pot first and then putting them on a flame to fry for crispy onions”
Which way is better?
Wajiha says
hello Laura. Im sorry for the confusion.
Let me clarify. In South Asian cooking, onions are always added after the oil has been heated up to certainly well, just like you would do for frying french fries. So even luke warm oil would be in definition “colder” than conventional frying method. The popular South Asian hack I was talking about talked about adding onions and oil together in the pot and let them cook heat up together. This method, while effective makes onions absorb a considerable amount of oil. To reduce that, I suggested to add onions a little AFTER the oil has started to heat up, in which case, it is still only slightly warm. Your onions will still turn crispy and absorb less oil in the process. To simplify
1. Cold oil + Onions in pot together = Crispy onions which absorbed more oil.
2. Slightly warmed oil Then onions added in pot = Still Crispy onions which absorbed less oil.
Both methods will give you crispy onions nonetheless.
Sion says
Thank you Wajiha. I have been using Malaysian fried onions that are cooked in palm oil. The taste is great but the environmental damage that results from converting forest to palm oil production worries me. Our Pacific coconut oil is sustainable. So with your recipes I intend to create my own crispy fried onion. Kia kaha
Wajiha says
Hello Sion! I love it when someone takes an effort to think about the environment! Im glad you are doing something to make a difference! I wish i did more too! thankyou for inspiring me.
Amy says
Hi how did you cut your onions? I know you mentioned the food processor and mandoleine slicer or by hand but what method did you use here after cutting them in half?
Wajiha says
for this blogpost I used the mandoline. It definitely gives me more control over how even each slice of the onion is.
Meetoo says
I see a lot of praises to the instructions but not many, if at all comments from people who tried this.
On another site, it says to add the onions to hot oil. It even says so here too but then the instructions are contradictory where it says to add the oil and onions at the same time and “eye ball” them.
And the instructions are limited to a “flame” stove. Flame (natural gas) stoves are being phased out worldwide in favour of electric. So how about instructions for both?
Wajiha says
hello there, Thankyou for dropping by. I see there are several queries in your comment. let me list my responses to you.
1. I have a small instagram community of over 25k food lovers. 800+ of which have tried this method and has worked for them perfectly. The comments over here are from the people who got here from google, rest assured, there are many ppl who have infact, tried the method.
2. I actually don’t recommend hot oil at all. Please let me know where I might have said that, so that I can correct it.
3. The “eyeballing” you talking about are for quantity of the oil to onion ratio and not the temperature of the oil, so i think that is where the confusion is?
4. In countries, where electricity is scarce, flametops are still going strong. However, you do have a point. You can follow the exact same instructions for an electric stove too. Low flame = low heat, medium flame = medium heat, high flame = full heat. THe electric stove I’ve used has burn marks just like the ones in the oven. let me know if yours use a different system.
Hope this answers your questions. Happy cooking