
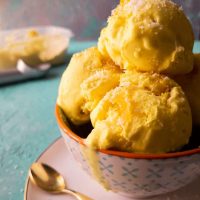
When I say dairy-free, I only mean dairy free. This isn’t “ice cream” in quotation marks like those nice creams were. This is the real deal. Tastes exactly like real ice cream should. Pineapple coconut Ice cream is the summer treat you didn’t know you needed! (Also thinking of calling this Pina Colada ice cream maybe? what do you think?)
I’ll be honest, I don’t make the fully indulgent kind of ice creams at home simply because I don’t think that is a good use of my time. The time, effort and cost of the products that go into making a normal standard ice cream at home makes no sense to me. I can get a store bought ice cream which tastes the same and costs the same easily.
Now dairy free or low-sugar ice creams are a whole other deal. These ice creams are definitely on the more expensive side plus there is no in between. Either it’s all out dairy-free, gluten-free and sugar free variety or none at all. Where do people like us go? Who are ok with using real cookie dough in a cookie dough ice cream but just want a non-dairy base? Like I want the best of both world you know? lol OK now I am rambling. Point is, I like this ice cream because the guilt factor is practically zero!
Also, you can use this recipe for practically any fruit you like!
I love how this Pina-Colada ice cream becomes a summer favorite in our house! My husband loves a well chilled dessert to beat the heat. I usually churn out icecream like my creamy chocolate Ice cream or make my rice kheer (rice pudding) on a nice summer evening.
Easy steps to make this Pineapple Coconut Ice cream
So every good home-made ice cream needs a 24 hour notice, and I’m telling you now, this is one treat you don’t wanna rush. This recipe has 2 components, A pineapple sauce and a Coconut cream. 1 day before you need the ice cream, you should
- Keep coconut cream in fridge overnight.
- Make pineapple sauce and keep in the fridge to chill.
Making your Pineapple sauce
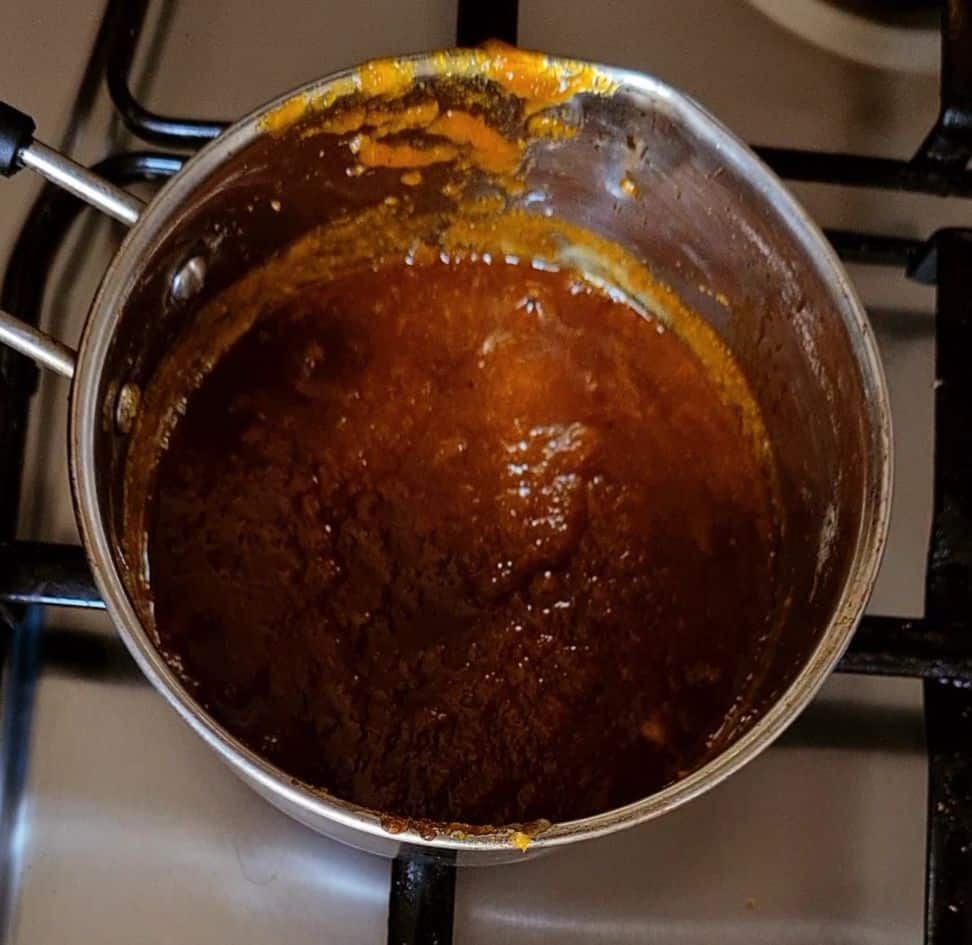
For this recipe, we are going to make our very own condensed milk substitute, which is this pineapple sauce. Puree your pineapples in a blender and add them in a saucepan, along with food color, sugar and a pinch of salt. I added brown sugar. But you can use any sugar you want.
Here are a couple of Sugar substitutes that you can use:
- Honey
- Maple syrup
- Coconut Sugar.
- Agave nectar
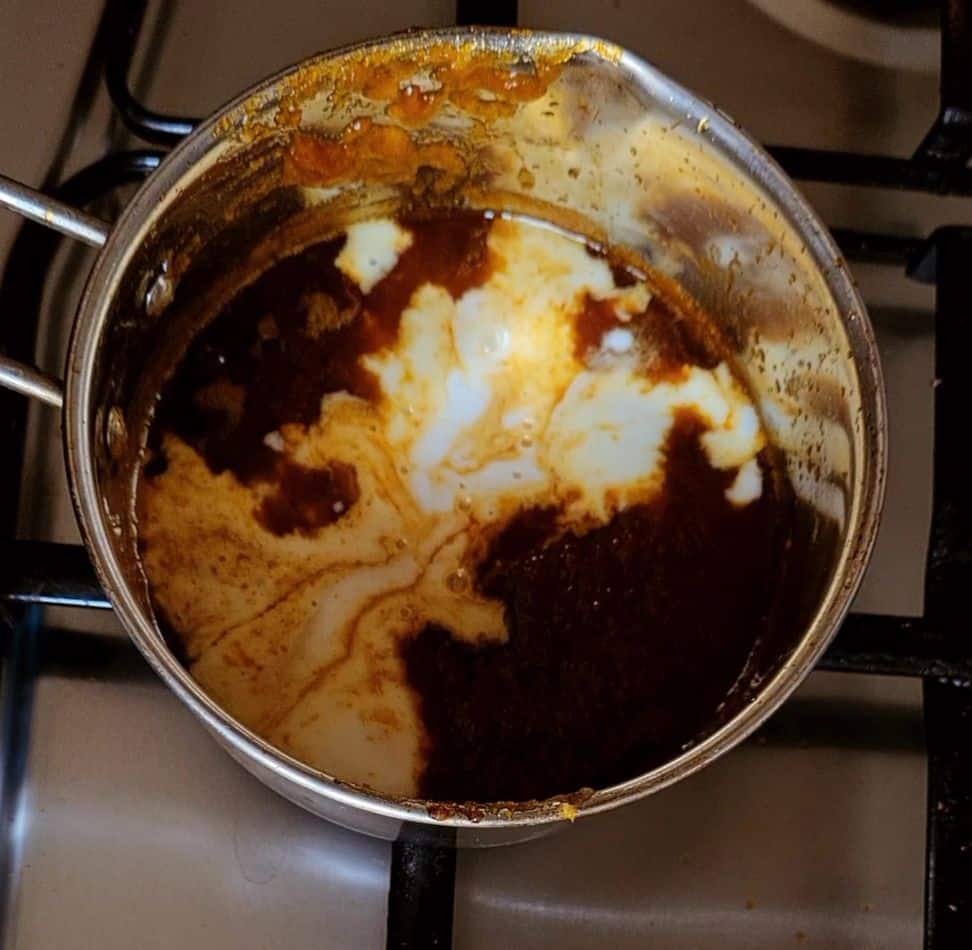
I used canned pineapples but you can use fresh pineapples as well. Cook the pineapple puree down for 5 mins at medium heat. Then add coconut milk and let it cook for another 20 mins at medium flame. Your mixture should reduce to about 2 cups.
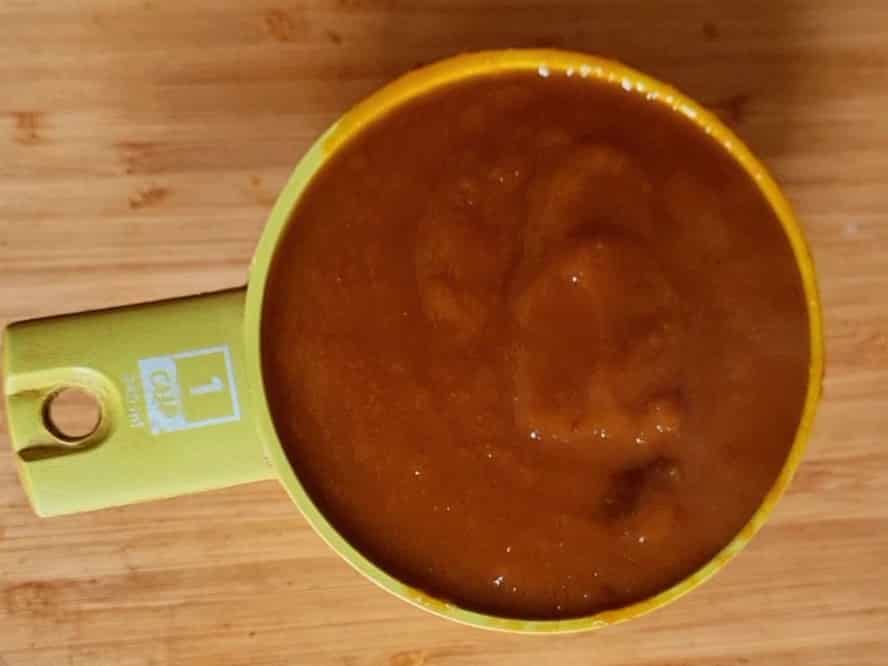
Use a strainer to remove the pineapple pulp from the thick pineapple sauce.
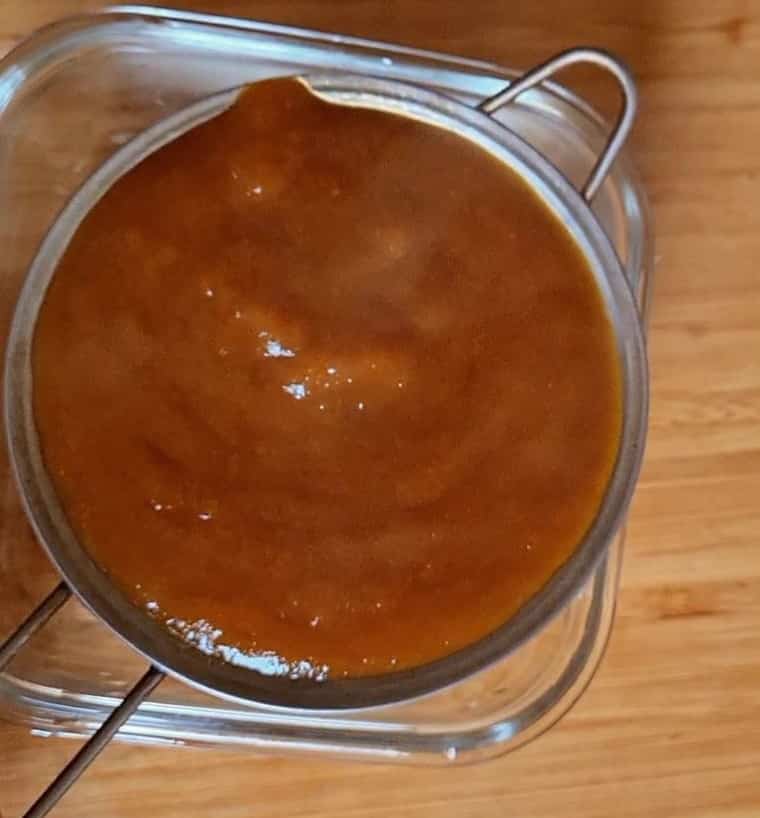
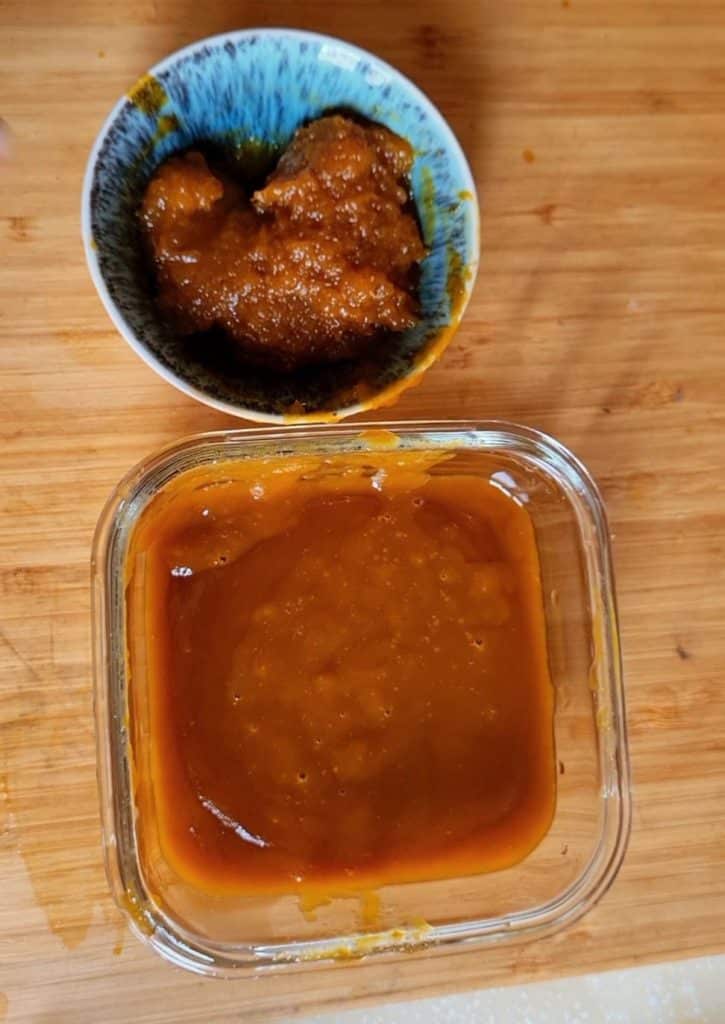
Now you can refrigerate both the sauce and the pulp to use later.
Whipping the Coconut cream
The second component of this recipe is whipped cream. This will add air and volume to your ice cream and give it the texture. To whip the coconut cream perfectly, you need to give it time to chill completely. Refrigerate your cream overnight. (can’t emphasise this enough)
I did a lot of research for which brand of coconut cream is the best for whipping and the internet gave me like 10 11 options. But here’s the thing. None of those options are available in my local grocery stores and well, they are definitely on the expensive side. So I just wanted to make this icecream with a standard of-the-rack coconut cream and see if it works. and guess what it does! So just grab any coconut cream you can get your hands on and we’ll make it work.
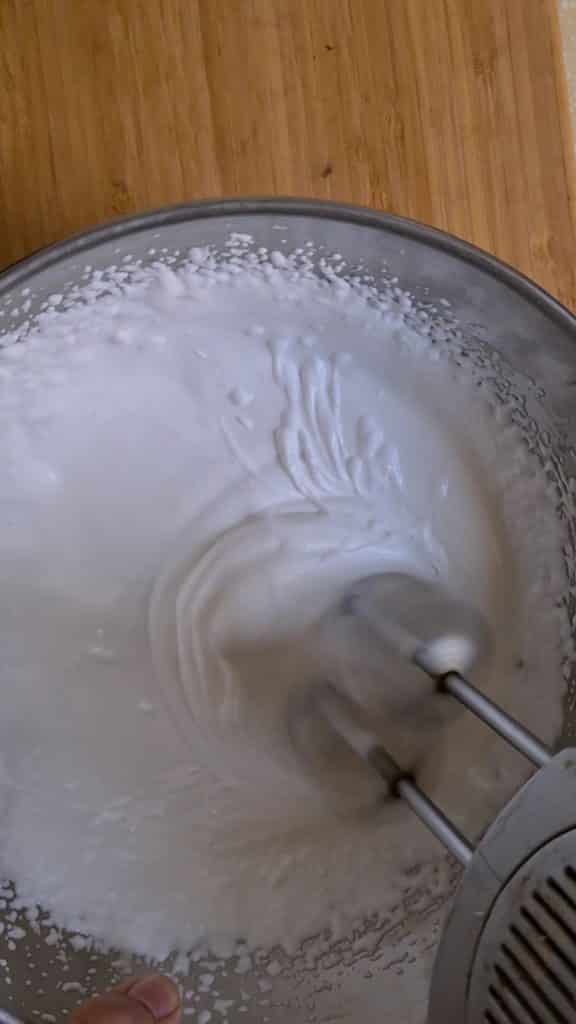
When you refrigerate your cream overnight, you will see that the liquid from the cream has separated from the thick cream. Your coconut cream can either be clumpy like feta cheese or smooth like yogurt, depending on the brand that you use. Both are workable! don’t worry.
Best tips to ensure the perfect whipped cream
- Make sure you’ve chilled your cream well in the fridge. Overnight is ideal.
- Keep the bowl and whisk attachment in the freezer for 15 mins in which you will whip your cream.
- If you live in a hot humid climate, use a larger bowl, fill it with ice and cold water. Place your bowl of whipping cream on this ice bath and then whip it up.
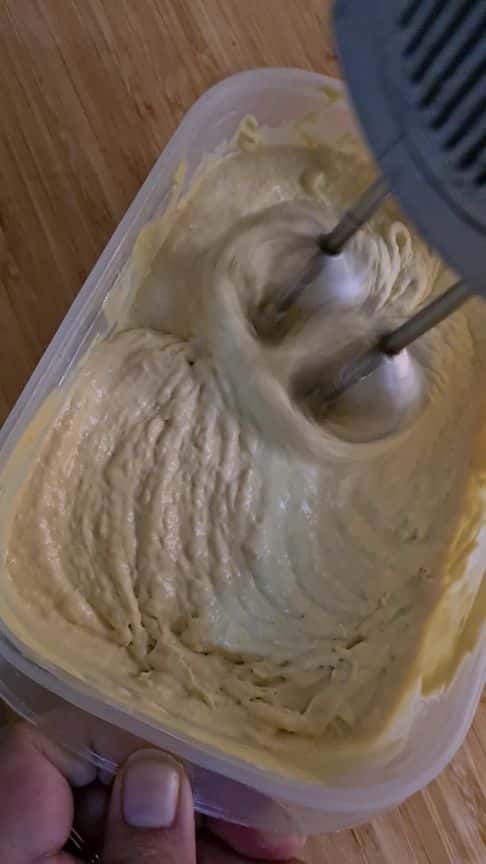
Remove the solid bits of cream or paste from the can carefully and place it in your cold bowl. And start whipping. If your cream is very granular and clumpy, add a little left over liquid to make your cream workable. Beat it for a good 5 min at high speed until it becomes light and fluffy. It doesn’t need to be very stiff.
Assembling the ice cream base
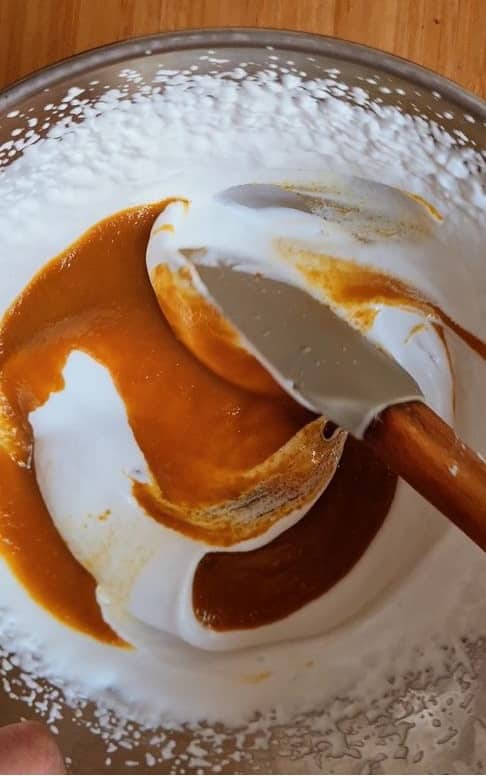
When your whipped cream is ready, add your pineapple sauce and pineapple essence into the whipping cream and beat for another 3 to 4 mins. Your ice cream base is ready. Transfer the base into the container you want to set your ice cream in. Make sure its big enough to allow some extra room for expansion.
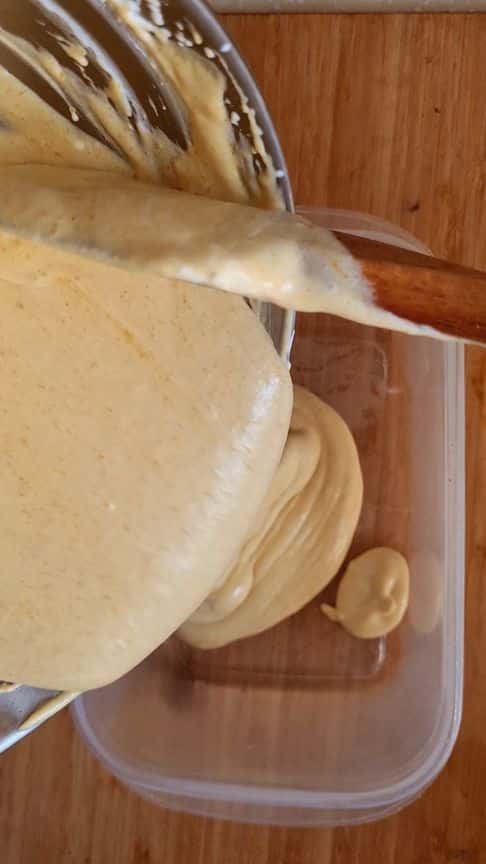
Put an airtight lid on your container and Freeze the ice cream in the freezer for about 3 hours. Take out the ice cream from the freezer. It will be set from the sides and still runny in the centre. Now we are going to whip it up once again. This step breaks the ice crystals and gives you a smooth ice cream eventually.
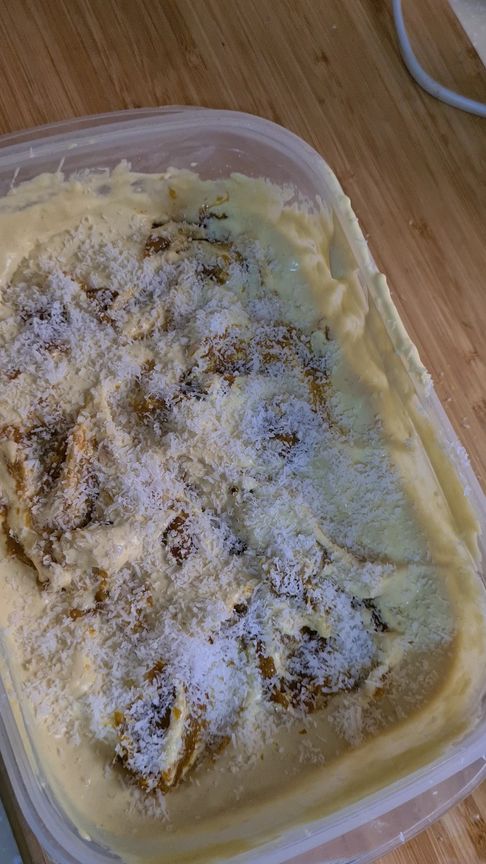
After you’ve whipped your ice cream, add in the pineapple pulp that we had saved. I also added coconut shavings which I really like!

Add a layer of cling film on top of your ice cream and THEN put the lid. We need to minimize air contact as much as we can.
Tips to prevent icecream from getting icy
- Always add a layer of cling wrap on top of your icecream, and then add the container lid.
- Always add pineapple essence or any essence that you are using when in the last step.
- Never add fresh fruits into the ice cream toppings. It will leach water and ruin your ice cream base. You can add fresh fruits to your ice cream while you are serving.
Serving the Ice cream
When you are ready to serve, take out the icecream and let it sit in the fridge for 10 mins before scooping it out! Top it off with some fresh pineapples to add an even more intense pineapple kick
How long can the ice cream stay in the freezer?
Homemade ice creams are best consumed as soon as possible, no matter what ice cream base recipe you use. This one is no different. 2 weeks is a good span of time to utilize it. You can also make shakes out of it.
More fruit / veggie desserts on the blog:
Gajar ka halwa (carrot pudding)
Apple/ Cinnamon latte
No-bake Blueberry Cheesecake
Date and Melon Shake
Dairy free no-churn Pineapple and Coconut icecream
Ingredients
- 2 cup coconut cream
- 2 cup coconut milk
- 2 cup chopped pineapples 200gm
- 2 tsp pineapple essence
- 2 pinch of salt
- Yellow food coloring optional
- 1 cup of coconut sugar or any that you prefer
- 4 tbsp of coconut shavings optional
Instructions
- Puree the pineapples in a food processor.
- Add the puree in a sauce pan, along with food color, sugar, and salt. Simmer the mix at medium flame for 3 to 4 mins.
- Add coconut milk to the sauce pan. And let it cook at medium flame for about 15 mins. Your mixture should reduce to a total of 2 cups.
- When your mix is ready, turn off the flame. Use a strainer to separate thick sauce from pulp. Cover both the liquid and the pulp with a cling wrap and keep in the refrigerator to chill overnight (12 to 24 hrs)
- Also keep a can of coconut cream in the fridge overnight as well. (12 to 24 hrs)
- Remove the cream can from the fridge. Remove the thick cream from the can carefully, trying to get as little liquid as possible. You will see watery liquid set at the bottom.
- With an electric beater, beat the coconut cream until light and fluffy.
- Fold in the pineapple sauce into the cream and beat for another 3 to 4 mins.
- Transfer the ice cream base into an airtight container, big enough to contain the ice cream and still have at least 1/4th free space to allow the icecream to expand.
- Keep the icecream into the freezer for 2 to 3 hours.
- Bring out the ice cream after 3 hours when half of the mix is solid and half is still liquid, and beat it with a blender to break all the ice crystals.
- Now add pineapple pulp all over ice cream and sprinkle coconut shavings.
- Cover and let it sit in the freezer for final hardening. Preferably overnight.
- Enjoy the next day.
Grammacay says
How do you make coconut shavings?
Wajiha says
Hey there you can use a cheese grater to do that or buy packets of cocounut shavings as is. They are usually available in the spice section in packets.
Anonymous says
Hi wajiha
I’m your big fan…if I would say you are my baking inspiration, it wont be wrong.
This recipe is a MUST in summer season, easy and yummy.
I made this on the weekend n planning to eat tiny bit everyday!!
Keep posting awesomely easy yummy recipes!!
Aisha Ahmed
Wajiha says
omg! my heart! im so glad you love this space so much! im sure you will do great on baking journey