
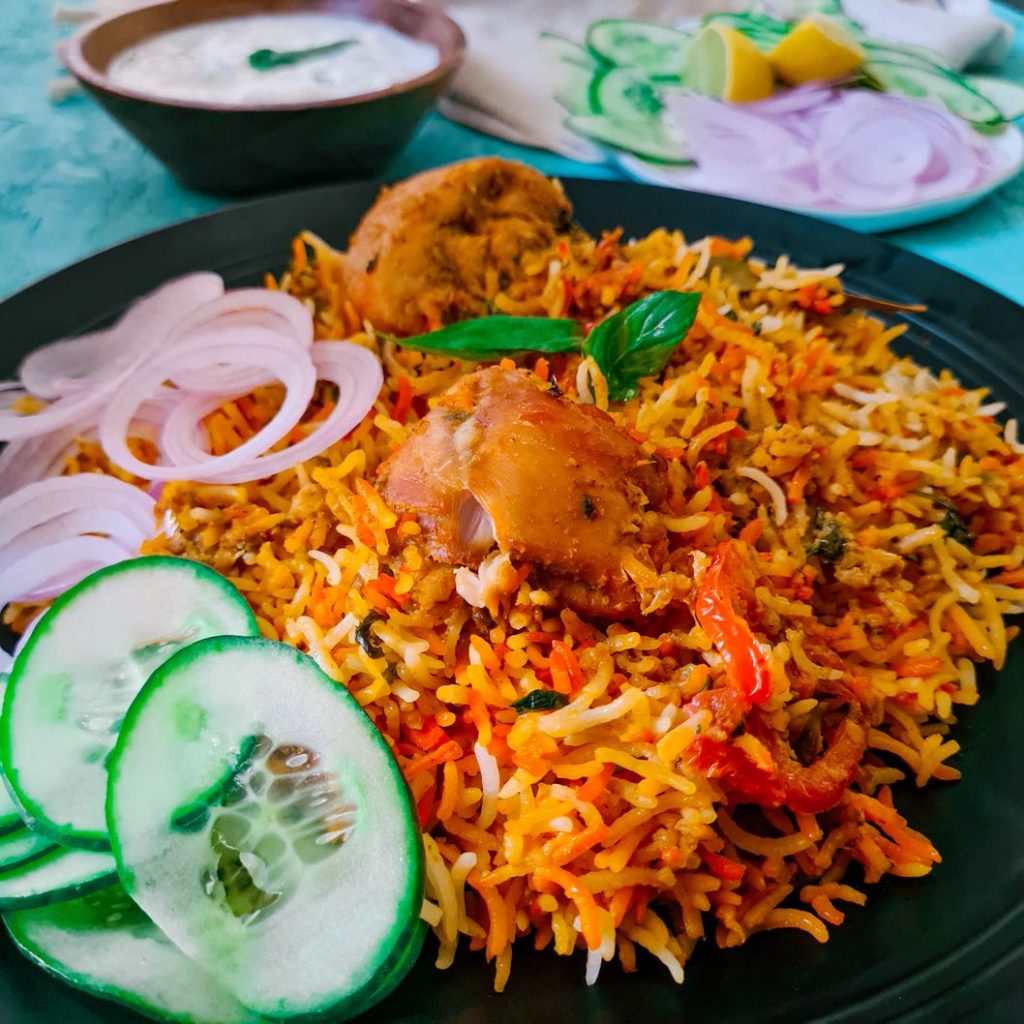
Dum style Spicy Chicken Biryani is probably one of the most popular recipes to come out of the Indian subcontinent. Known as a dish introduced by Mughals, this definitely IS a royal dish, that is made on occasions of happiness or sadness in brown households. The biryani today has definitely evolved, the most traditional style is of layers of rice, curry and garnish. Which is what this biryani is! It is also called dum style biryani.
I think I am probably the 1 millionth person posting about a basic biryani recipe I swear by. I don’t blame you if you are skeptical about it, especially if you’ve tried biryani recipes before that didn’t pan out. But I will tell you this, if there is one thing people of Karachi, Pakistan know how to do, its make a Delicious biryani! and rest assured, this is a Karachi classic biryani which will not disappoint.
A typical Dum biryani has these layers:
1. A curry with some sort of protein, known as korma. This one has a Chicken korma
2. A layer of parboiled rice
3. Garnish layers with at least 1 layer containing food color.
Here’s how to make a traditional Dum style Chicken Biryani
Preparing the Chicken Qorma
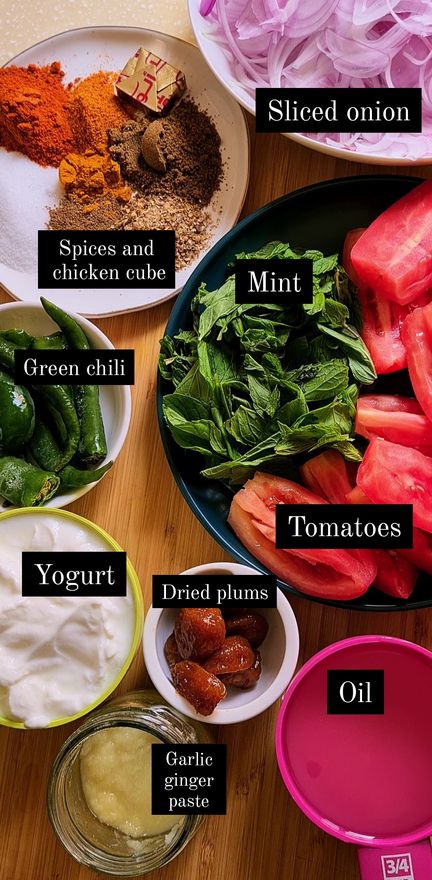
I know looking at an entire rainbow-sque ingredients can seem a little daunting for new cooks. But I promise you! I will walk you through the process, and its wayyyy easier than it looks. I’m using my own biryani spice mix for this recipe but incase you feel intimidated by it, you can use boxed spices as well. (all substitutions mentioned at the end)
Start by blending yogurt and green chilies together in a blender and setting it aside.
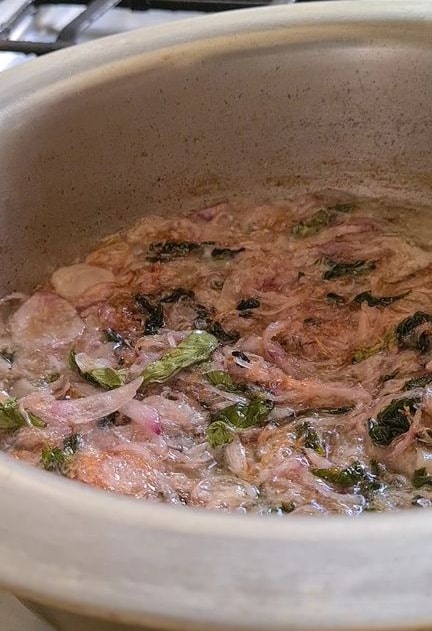

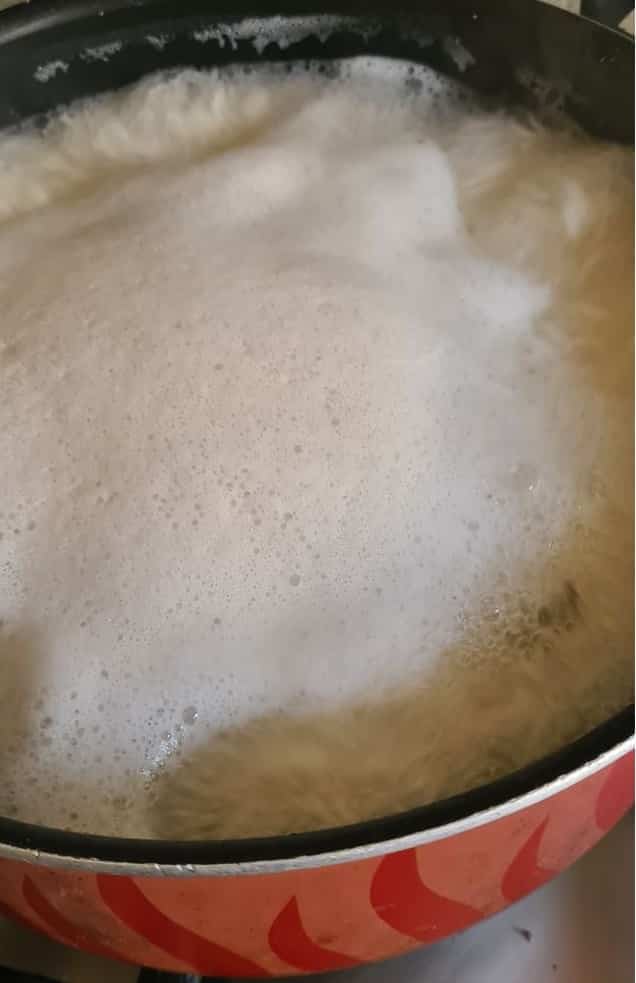
Then add oil, mint leaves and sliced onions in a pot and fry it at medium flame. Take your onions to that beautiful golden brown color and then remove about 1/2 cup of the onions to use later for garnish.
NOTE: You can use pre-fried onions as well, skip this step and directly add mint leave in oil to fry them. And continue recipe as is.
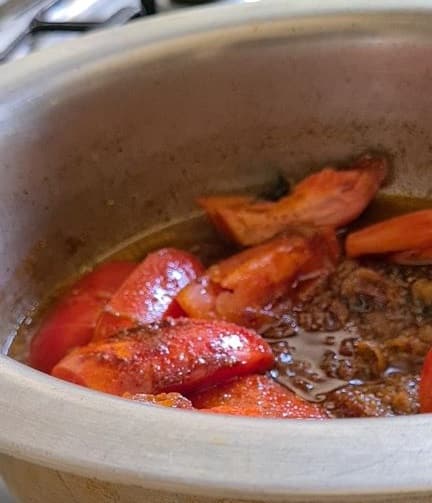
As soon as you take the small amount of the fried onions out, add 1/4th cup of water in the pot to stop the onions from frying any more. Then add your spices and tomatoes. Saute them a lil bit. Add more water and cover to let tomatoes soften up. It will take roughly about 5 mins
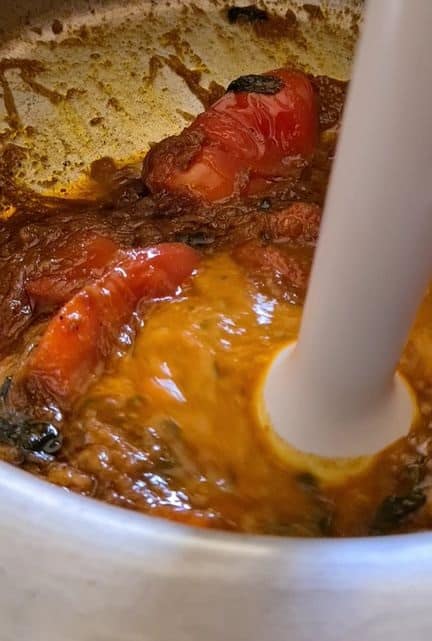
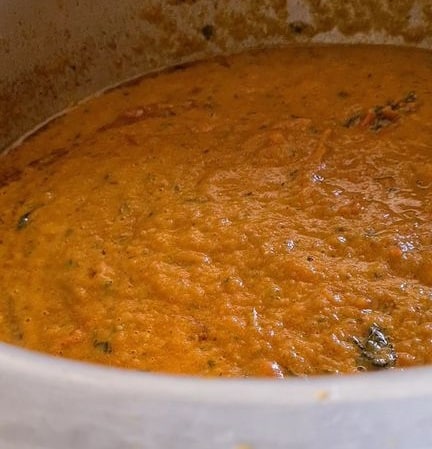
After your tomatoes have softened up, simply use a hand blender and blend your qorma base to get a smooth mix. This will give your qorma a smooth masala, plus blended masala becomes more in quantity too.
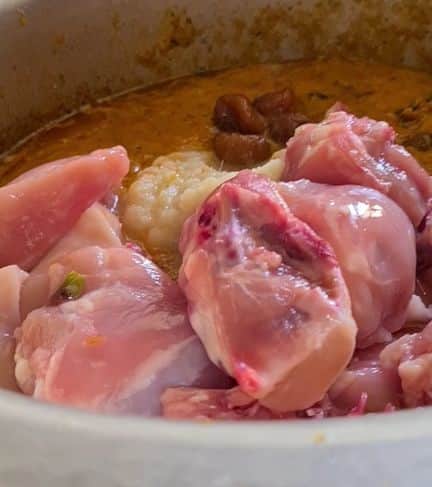

You can now add the remaining ingredients. This includes; chicken, dried plums aka aloo bukhara, chicken cube, garlic ginger paste and the yogurt and chili paste. Mix everything and that’s it! Cover your chicken korma and let it simmer for 15 to 20 mins at medium flame.
NOTE: Raw chicken should always be sauteed in oil first when adding to curries and gravies. Biryani is one of the few dishes where it is ok to add raw chicken to a masala base.
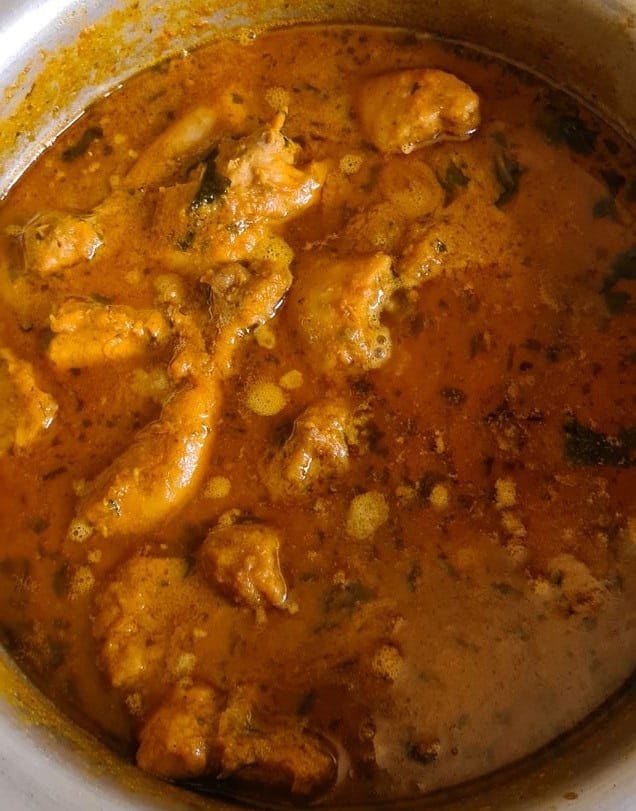
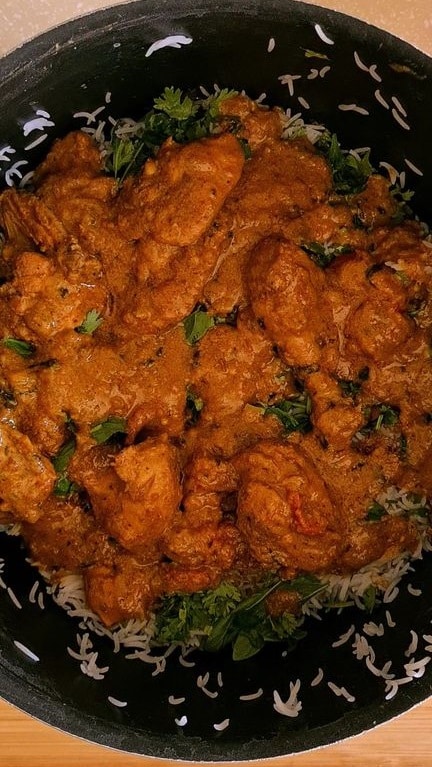
After 15 to 20 mins, your korma will look like this. Now we are going to add 2 ingredients that add the “biryani fragrance” to our biryani. Kewra water and a mace and nutmeg powder (jayfil javetri). You can also only add the kewra water incase you don’t have the latter.
TIP: You can also remove all the oil from your Chicken korma at this point if you want to.
Preparing the Rice
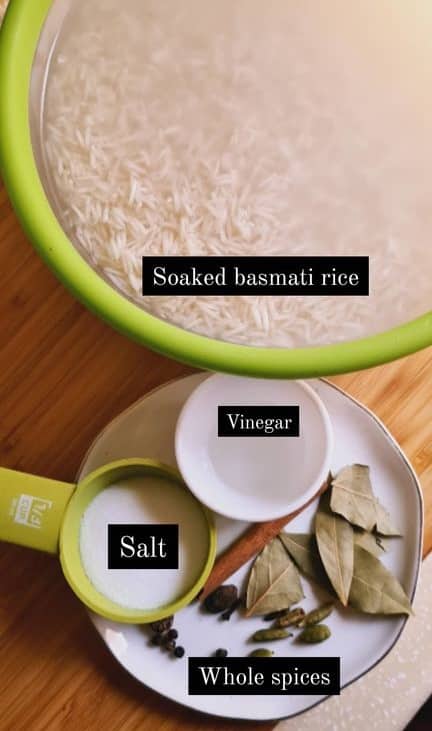
The rice in biryani with cooked chicken are always par-boiled, for a lack of better term. In reality the rice are boiled but they are boiled for a smaller amount of time and left a little harder than parboiled rice. I am using long grain basmati rice, which is the perfect choice for biryani. You wash it twice with water, drain it and then finally soak it for about 20 mins. It roughly takes about 2.5 to 3 litres of water to 3/4kg to 1kg rice.
Get the pot ready to boil water, along with all the ingredients shown in the picture, including whole spices, salt and vinegar.
NOTE: Always boil the water at high flame and let the water start bubbling before adding rice.
Add your pre-soaked rice into the bubbling hot water. It will take a couple of minutes for the water to start boiling again.
Start noting the time once your water starts boiling again. It roughly takes between 3 to 4 mins for the rice to be “parboiled”. Keep an eye on your rice and ideally, don’t multitask right now.
NOTE: You want your rice to be semi-cooked. Check a grain of rice. It must be able to break from the centre but not get mushed up when you press on it.
Strain your rice with a wide strainer and get ready to assemble your biryani.
Assembling the Biryani
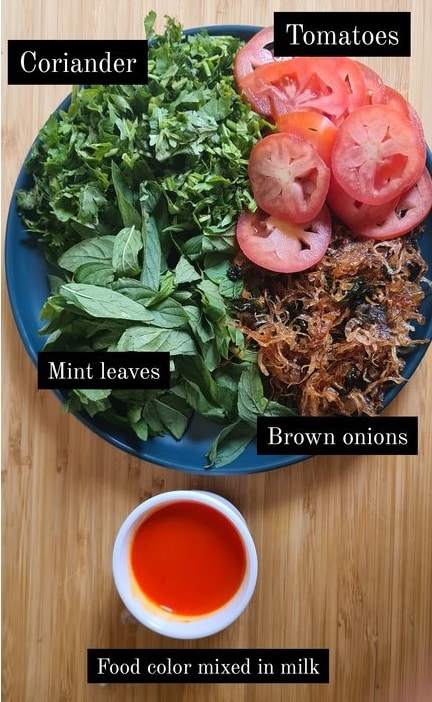
The ingredients for assembly as pretty straight forward. You can skip the tomatoes if you want to. There are no lemons in this biryani. For the amber color, I mix the color with milk for easy color distribution.
- Start layering but adding 1/3rd of the rice on the bottom. Doesn’t have to be accurate, just do it with approximation. Don’t worry if some of your rice have clumped together, that’s a good thing.
- Then use 1/3rd of all of your garnish and spread it over your rice (except the color)
- Now layer half of your chicken qorma evenly all over the rice.
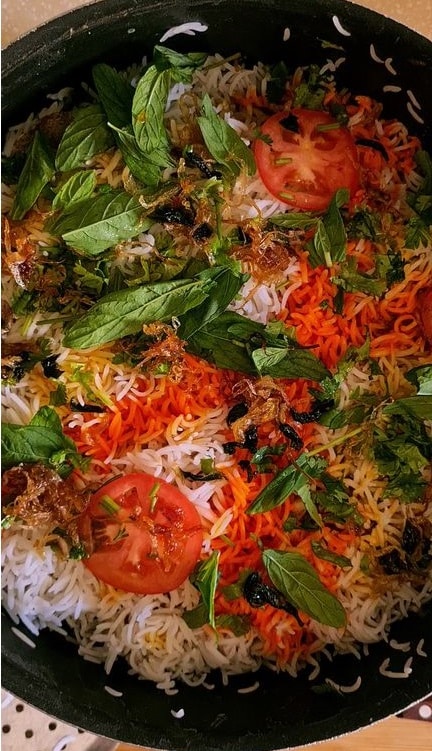
- Repeat till you get to the top. Add a layer of food color mixed with milk on the top in the form of a cross. And the usual garnishes.

Cover your pot with foil first to reinforce a proper seal, and then put your lid on. Put a simmer ring or a tava underneath your pot when you put it back on the flame. Turn on the flame at high for 5 mins and then at medium low for another 10 mins.
PRO TIP: Foil helps in sealing the pot properly to allow steam to be created inside the pot. You can also use a dutch oven instead or keep some weights on tops of your lid to make sure the seal is reinforced.
Remove the lid from the side slightly to check if there is steam in your pot. If you see steam, keep the lid back and turn off the flame. Let your biryani rest for 10 minutes and then open to serve.
Use a wide spatula or a flat slotted spoon or a plate to mix the biryani. Serve with raita and salad.
Subtitutes and Remixes
- Spices – You can skip the home spice mix and use boxed as well. For this recipe, I would recommend using half a packet of Shan Bombay biryani masala and half a packet of Shan Sindhi Biryani masala.
- Heat – This recipe is definitely spicy! Reduce the level of green chilies and red chili powder to reduce heat, but don’t skip either of them completely.
- Potatoes – For potato lovers, here’s what you need to do:
– Use 1 kg rice instead of 3/4th kg
– Increase salt and red chili powder, each both by 2 tsp each ) or to taste
– Add potatoes and chicken together while cooking.
– Increase 1 tomato and 1/4th cup yogurt in the Qorma - More quantity – It’s always good to know your rice to chicken ratio in case you want to double your quantities
For every 1 kg chicken, use 3/4 kg rice.
For every 1 kg chicken + potatoes, use 1 kg rice. - Garnish – You can skip the tomatoes and reduce the coriander and mint, according to your liking. But definitely include mint and fried onions in your garnish
Other Biryani Recipes for you:
Chicken Tikka Biryani
Quick Karhai Chicken Biryani
Pakistani Chicken Biryani
Ingredients
Chicken Qorma
- 1 kg chicken cut into smaller pieces.
- 1 tbsp garlic ginger paste
- 3 large tomatoes cut into 4 slices or 1 cup of canned tomatoes
- 7 to 8 green chilies
- 1 cup mint leaves
- 7 to 8 dried plums aloo bukhara (OR dried apricots)
- 4 medium onions sliced or 1 1/2 cup brown fried onions
- 1 chicken bouillon cube optional
- 1 tbsp salt
- 1 tsp red chili powder
- 1 tbsp kashmiri red chili powder
- 2 tsp cumin powder
- 1½ tsp coriander powder
- 1/2 tsp turmeric powder
- 1 tsp garam masala powder
- 2 tbsp kewra water
- 1 cup yogurt
- 3/4 cup oil
- 1/2 tsp mace and nutmeg powder optional (jayfil javetri)
- 1 cup water
For the Rice
- 3/4 kg long grain basmati rice soaked in water for 20 mins
- 3 to 4 bay leaves
- whole spices: 10 black peppercorns 5 cloves, 3 black cardamom, 5 green cardamom, 1 stick of cinnamon.
- 1 tbsp vinegar
- 3 tbsp salt
Garnish
- 1/4 cup milk mixed with orange food color.
- 1 tomato cut in slices
- 4 green chilies
- 3/4 cup coriander leaves chopped
- 3/4 cup mint leaves chopped
- 1/2 cup brown fried onions removed from qorma or 1/2 cup pre-made brown fried onions
- maze
- nutmeg
Instructions
Chicken Qorma
- Blend the green chilies with the yogurt to form a smooth paste and set aside.
- Add oil in a pot along with sliced onion and mint leaves. Fry them at medium flame till the onions turn golden brown. Reduce the flame to low and remove roughly about 1/2 cup of brown onions for garnish.
- Add 1/4th cup of water in the onions to stop frying. Add all the spices (except nutmeg and mace powder) and tomatoes. Saute for a minute and add 3/4th cup of water and cover the pot to allow the tomatoes soften up for 5 mins.
- Use a hand blender to blend the tomatoes and onions together.
- Now add the chicken, garlic ginger paste, dried plums, chicken cube and the yogurt chili mix. Mix everything well.
- Cover the pot and let the qorma simmer for 15 to 20 mins at medium to low flame.
- Remove the lid and check if the chicken is cooked. Turn off flame and add kewra water and mace nutmeg powder and simply mix.
- You can also remove extra oil at this point if your want
Rice
- In a large pot, boil water for the rice at high flame. Add all whole spices, vinegar, salt and bay leaves.
- Once the water starts bubbling, add in the pre-soaked basmati rice.
- Boil the rice for 5 mins and check a grain of rice. You should be able to break the grain of rice with fingers but the grain should still be hard and in-edible. That’s the perfect rice for Biryani layering.
- Strain the rice in a large strainer and set aside for layer.
Assembling
- Use a large pot for assembling the rice. Usually this is the pot used to boil the rice.
- Add 1/3 of the rice to layer the bottom of the pot.
- Garnish the rice with mint, chopped coriander, slices of tomatoes, 1 green chili. Sprinkle a little maze nutmeg powder.
- Add 1/2 of the chicken qorma on the rice spreading it out as evenly as possible.
- Add another 1/3 of the rice on top of qorma
- Repeat same garnish.
- Layer with the remaining chicken qorma
- Finish off with the remaining rice.
- Drizzle the rice with milk and color mix in the form of a cross.
- Garnish the top layer as well, this time including fried onions as well.
- Cover the pot with foil and then add the lid to make a strong seal.
- Place an insulator below the pot on the stove, like an old pan, a tawa or a a flat griddle pan.
- Turn on the flame at high for 5 to 6 mins, then reduce to medium low for another 10 mins.
- Remove the lid and open the foil slightly to check if you can see steam (be careful to not burn yourself. If you can see steam, that means your biryani is done. Cover the foil again and place the lid back on. Let the biryani rest for another 10 mins before serving.
- If you don’t see steam, increase the flame for 2 to 3 mins.
Serve with raita and salad.
Sasha says
Amazing biryani- the only recipe that could get me back to Friday biryani at my moms!
How many potatoes would you recommend adding?
Wajiha says
Hey Sasha! woohooo Hi5 to biryani love! AS many potatoes as you want my friend! haha I’d recommend adding 2 for thi recipe. Should give you about 8 pieces
Atiqa says
Such an easy recipe to follow. I did not have to adjust any spices and the biryani turned out great. Even my picky children loved it! Thank you for such great recipes.
Nishta says
It was my first time cooking a biryani and it turned out to be very very nice. Everyone was impressed with my first try.
Thank you for this wonderful yet easy recipe.
Wajiha says
Hey Nishta that iss sooo good to hear!!! im so glad it worked out for you!
Vajeeha says
Tried it one day before Ramadan started and my husband LOVVVVED it. He kept telling to write the recipe down, memorize it and do not change a thing about iy when u make it next time.
Jazak Allah for the recipe. it came out great masha Allah ????
Wajiha says
omg hey there name twin! hahaha you just made my day! may you have lots of blessings and love in your life
Vajeeha says
Ameen. Thank you!!! Yes we are Name Twin!!! And I usually spell it like Vajiha ????
Trying your Biryani again today for the 27th Roza Iftaar ????
Wajiha says
woohoo! i hope it went well!
Flavia says
How many ml is your one cup
Wajiha says
250 ml
Dia says
I really want to try this recipe but I don’t know how many cups of rice is 3/4 kg.
Wajiha says
Hi Dia, so 1 kg rice is roughly 5 and half cups. 3/4th kg rice should be 4 and half cups approximately 🙂
Rabia says
I have never tried such an easy, quick and rich tasted biryani. Seriously just mouth watering and everything was just perfect the taste, the gravy and such a balanced of spices. Overall, a musttt try recipe for your guests 10/10 ????
Wajiha says
Biryani is life! 🙂 its a fact! wooho1
Suman says
Tried it… loved it ????
Wajiha says
omg yay!!!
Anonymous says
Assalamoalaikum Yummiliciou biryani. Just want to ask can i skip kewra water?
Wajiha says
walaikum assalam! so the kewra water adds to that special Biryani aroma that we all smell as soon as you open a pot of a cooked biryani. But you can definitely skip it if you don’t have it at hand. Don’t substitute with anything else, simply skip the kewra water, the taste will not be altered at all 🙂
sunia says
Such an amazing and easy to follow recipe. Thank you for making biryani that much easier to make.
Wajiha says
Thanku Sunia! im so happy you liked it!
Yousra says
I tried this biryani today it turned out so yummy ..seems that i ll try more of ur recipes .. thanks ????
Wajiha says
Thankyou for trying Yusra!:) I can’t wait for you to try more!
Rida Diwan says
I made the biryani today and OMG its so so good! I tasted like bahir ki daigi biryani! Kickass! Thank you ???? i am going to check out alllll the recipes now at your blog
Wajiha says
omg Rida yay! i am soooooo happy to hear that!
Masoora says
Such a nice and easy recipe. My biryani turned out delicious.
Wajiha says
So happy to hear that Masoora!
Rubbia says
The perfect and easiest biryani recipe I ever found. Simply loved it.
I attempted biryani for the first time, and it was nothing but utter perfection.
Thanx wajiha ❤️
Wajiha says
whoa! i loveeee that this was your first biryani ever!!! woohoo!
Anonymous says
This was an amazing recipe! Each step was explained in detail and was so easy to prepare.
Wajiha says
I am glad all the steps helped you! my work is done! 🙂
Sidra Saboor says
Such an amazing and easy recipe to follow. The biryani turned out absolutely amazing ❤❤❤
Wajiha says
Wohoo! Always glad to hear good things about Biryani!
Nisha Fatmi says
This was such a great recipe! Maza aagaya
Wajiha says
wohooo! so glad!!